Body Care
Window Seal Repair and Replacement
Jun
Window seals are the quiet little heroes of the house. They do not get holiday cards, nobody names them in a renovation reveal, and yet they spend every day fighting drafts, moisture, noise, dust, bugs, and energy waste. When they fail, your home starts dropping hints: fog between glass panes, a cold breeze near the sash, water stains around trim, or a window that suddenly sounds like it is whispering, “I have given up.”
The good news is that window seal repair and replacement is not always as dramatic as replacing every window in the house. Sometimes the fix is a clean bead of exterior caulk. Sometimes it is new weatherstripping. Sometimes it is replacing the insulated glass unit, also called an IGU, while keeping the frame. And yes, sometimes the old window has reached retirement age and deserves a polite farewell.
This guide explains how to identify the problem, choose the right repair, avoid expensive mistakes, and know when it is time to call a professional. Think of it as couples therapy for your house and the outdoors.
What Is a Window Seal?
The phrase “window seal” can mean several different things, which is why homeowners sometimes get confusing advice. A contractor may be talking about the seal between two panes of insulated glass. A handyman may be talking about exterior caulk around the frame. A hardware store employee may be pointing you toward weatherstripping for a drafty sash.
1. The Insulated Glass Seal
Modern double-pane and triple-pane windows usually contain an insulated glass unit. The panes are separated by a spacer and sealed around the edges. Many units are filled with air or insulating gas, such as argon, to reduce heat transfer. When this edge seal fails, moisture can enter the space between panes. That is when you see fog, haze, droplets, or mineral deposits inside the glass where no towel can reach.
2. The Exterior Perimeter Seal
This is the caulk or sealant around the outside of the window frame where it meets siding, brick, stucco, or trim. It blocks water and air from sneaking into gaps. When exterior caulk cracks, shrinks, pulls away, or turns brittle, rain can get behind the trim and drafts can enter the wall cavity.
3. The Sash Seal or Weatherstripping
Weatherstripping sits around moving parts of the window. It helps the sash close tightly while still allowing the window to open. Over time, foam compresses, rubber becomes stiff, adhesive fails, and felt wears down. The result is a window that closes but does not really seal. It is the home-improvement version of a handshake with no grip.
Signs You Need Window Seal Repair or Replacement
Window seal problems are usually easy to spot once you know what to look for. The tricky part is matching the symptom to the correct repair.
Fog or Condensation Between Panes
If condensation is inside the room-facing glass surface, it may be a humidity issue. If moisture is trapped between panes, the insulated glass seal has likely failed. You cannot wipe it away, because it is inside the sealed unit. In this case, caulking around the frame will not fix the glass. The usual long-term solution is IGU replacement or sash replacement.
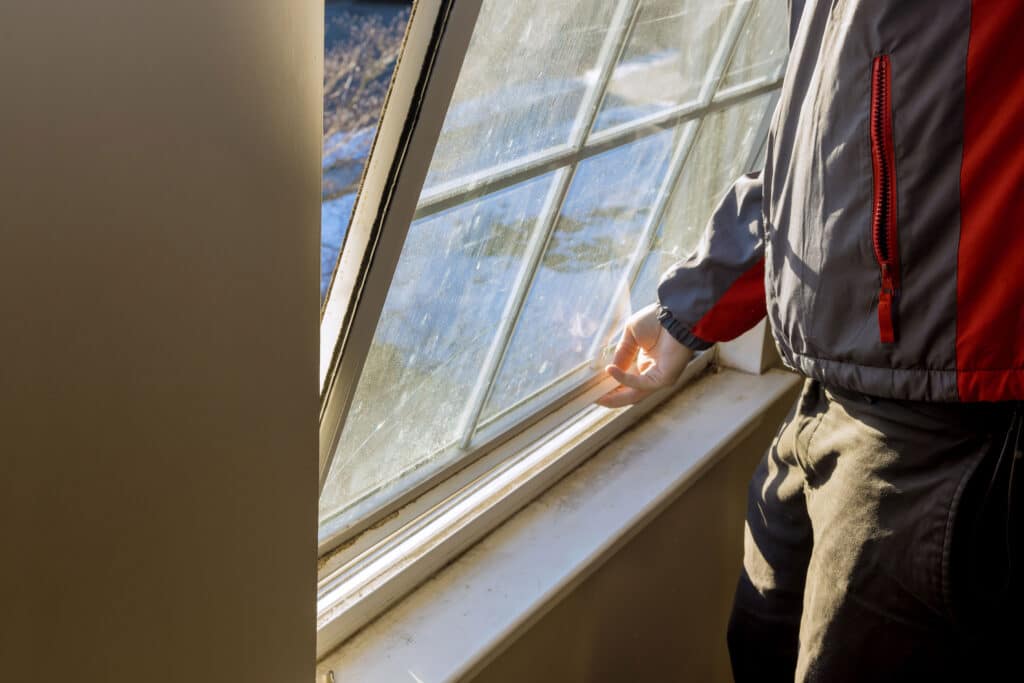
Drafts Around the Window
A draft may come from worn weatherstripping, poor installation, loose sashes, gaps around trim, or cracked caulk. A simple test is to move your hand slowly around the window on a windy day. You can also look for daylight around the frame. If the window rattles when touched, the seal is probably not doing its job.
Water Stains, Peeling Paint, or Soft Trim
Moisture around a window is not something to ignore. Peeling paint, swollen wood, dark staining, or soft trim can mean exterior sealant has failed or flashing was installed poorly. The repair may require more than caulk if water has already damaged the surrounding structure.
Higher Energy Bills
One drafty window will not single-handedly bankrupt you, but a house full of leaky windows can make heating and cooling systems work harder. Air sealing with caulk and weatherstripping is one of the simplest ways to improve comfort without launching a full renovation.
Common Causes of Window Seal Failure
Window seals fail for practical reasons, not because they are emotionally unavailable. The most common causes include age, sunlight, temperature swings, house movement, moisture exposure, poor installation, and low-quality materials.
Windows expand and contract as temperatures change. Exterior caulk must stretch with that movement. If the wrong sealant was used, or if the surface was dirty or wet during installation, the caulk may crack early. Weatherstripping fails because it is constantly compressed. IGU seals can fail as the edge materials age, especially in windows exposed to strong sun, extreme temperature shifts, or standing moisture.
Repair or Replace? How to Choose the Right Fix
The best solution depends on which seal failed. Replacing the entire window because of worn weatherstripping is like buying a new car because the floor mat curled. On the other hand, putting fresh caulk on a foggy double-pane window will not restore the failed glass seal.
Choose Caulk Repair When…
Use caulk when gaps exist between the window frame and surrounding trim, siding, or masonry. This repair is ideal for small cracks, minor air leaks, and exterior joints where old sealant has failed. Choose an exterior-grade window and door sealant designed for weather exposure. Silicone is flexible and water-resistant, while paintable acrylic latex or hybrid sealants are useful when appearance matters.
Choose Weatherstripping Replacement When…
Replace weatherstripping when drafts come from the moving sash, the window rattles, or the old strip is flattened, torn, loose, or missing. Adhesive-backed foam is easy to install but may not last as long as vinyl, rubber, silicone, or metal V-strip. The key is compression: the window should close snugly without becoming impossible to lock.
Choose IGU Replacement When…
If the glass is foggy between panes but the frame is solid, replacing the insulated glass unit is often the most sensible repair. A glass professional removes the failed unit and installs a new sealed unit into the existing sash or frame. This restores the clear view and improves insulating performance without replacing the whole window assembly.
Choose Full Window Replacement When…
Full replacement makes sense when the frame is rotten, warped, badly leaking, difficult to operate, structurally damaged, or far less efficient than modern options. It may also be the better choice if several seals have failed, the window is near the end of its service life, or replacement parts are unavailable.
How to Repair a Window Seal With Caulk
Caulking looks easy, and it isuntil it resembles toothpaste applied during an earthquake. The secret is preparation.
Step 1: Remove Old Caulk
Use a utility knife, scraper, or caulk removal tool to cut away cracked or loose caulk. Do not simply smear new caulk over old caulk. New sealant needs a clean surface to bond properly.
Step 2: Clean and Dry the Area
Wipe away dust, dirt, loose paint, and mildew. Let the surface dry completely. Caulking damp surfaces is a common reason repairs fail early.
Step 3: Choose the Right Sealant
For exterior windows, use a product labeled for windows, doors, siding, and outdoor exposure. For interior gaps, paintable acrylic latex caulk is often easier to work with. For high-movement joints or wet areas, a flexible silicone or advanced polymer sealant may perform better.
Step 4: Apply a Smooth Bead
Cut the tube tip at a 45-degree angle and start with a small opening. Hold the caulk gun at a steady angle and move slowly. The goal is a continuous bead that fills the joint, not a decorative mountain range.
Step 5: Tool the Bead
Smooth the caulk with a finishing tool or a gloved finger. This pushes sealant into the gap and creates a clean line. Remove painter’s tape before the caulk skins over.
How to Replace Window Weatherstripping
Weatherstripping is one of the most budget-friendly window seal repairs. It can reduce drafts, improve comfort, and help the sash close more quietly.
Step 1: Identify the Window Type
Double-hung, casement, sliding, awning, and tilt windows may use different seal shapes. Check the existing weatherstripping before buying a replacement. When possible, bring a small piece to the store for comparison.
Step 2: Remove the Old Strip
Peel away adhesive foam or carefully pull out old pile, vinyl, or rubber seals. Clean the channel or jamb so the new material sits flat.
Step 3: Measure Twice, Cut Once
Measure each side of the sash or jamb. Cut the new weatherstripping neatly. Gaps at the corners can defeat the purpose, so take your time.
Step 4: Install and Test
Press adhesive-backed strips firmly into place or secure nail-on types as directed. Open, close, and lock the window. If the sash binds, the material may be too thick or placed incorrectly.
What About Defogging Services?
Window defogging is a service that removes visible moisture from between panes. It may involve drilling small holes, cleaning the space, and adding vents or valves. It can make the glass look better, but it usually does not restore the original insulating gas or factory seal.
Defogging may be useful when appearance matters more than energy performance, or when a homeowner needs a temporary improvement before selling or remodeling. For a long-term fix, IGU replacement is usually the stronger option.
DIY vs. Professional Window Seal Repair
Many homeowners can handle interior caulking, exterior caulking on accessible windows, and basic weatherstripping. These projects require patience more than advanced skill. However, replacing insulated glass units, repairing water-damaged framing, and sealing upper-story windows are usually professional jobs.
Call a professional if the window is high off the ground, the glass is large or heavy, the frame is rotted, water is entering the wall, or you suspect flashing problems. Also check the manufacturer warranty before paying for repairs. Some window warranties cover seal failure for a specific period, especially on insulated glass.
Cost Factors to Consider
Window seal repair costs vary by repair type, window size, access, material, labor rates, and whether damage extends beyond the visible seal. A tube of quality caulk and a roll of weatherstripping can be inexpensive. Professional IGU replacement costs more, but it is often cheaper than replacing the full window. Full replacement is the most expensive option, especially for custom sizes, wood frames, specialty glass, or historic homes.
When comparing estimates, make sure every contractor is quoting the same scope. One bid may include only glass replacement, while another includes sash repair, exterior trim work, disposal, and repainting. The lowest number is not always the lowest final cost if it leaves half the problem behind.
Best Materials for Window Seal Repair
There is no single best material for every window. The right product depends on location, movement, exposure, and whether the joint needs to be painted.
Silicone Sealant
Silicone is flexible and highly water-resistant. It works well for exterior joints, but many pure silicones are not paintable. Use it where flexibility and moisture resistance are more important than paint finish.
Acrylic Latex Caulk
Acrylic latex is easy to apply, easy to clean, and usually paintable. It is a good choice for interior trim gaps and low-movement areas. For exterior use, choose a high-quality exterior-grade version.
Hybrid or Advanced Polymer Sealants
Hybrid sealants often combine flexibility, adhesion, durability, and paintability. They can be excellent for exterior window joints, especially where movement is expected.
Foam, Rubber, Vinyl, and V-Strip Weatherstripping
Foam is simple and affordable. Rubber and silicone seals tend to last longer. Vinyl is common and practical. Metal or plastic V-strip is useful for certain sash channels. The best choice is the one that fits tightly without blocking normal window operation.
Mistakes to Avoid
The first mistake is treating every window problem with caulk. Caulk seals gaps around frames; it does not repair failed insulated glass. The second mistake is sealing drainage paths. Many windows have weep holes designed to let water escape. Blocking them can trap water and create bigger problems.
Another mistake is using interior caulk outdoors. Sun, rain, and temperature swings will destroy the wrong product quickly. Also avoid applying sealant over dirt, dust, wet surfaces, or loose paint. Good sealant is not magic. It still prefers a clean workplace, just like the rest of us.
Maintenance Tips to Make Window Seals Last Longer
Inspect windows at least once a year, especially before winter or rainy season. Look for cracked caulk, missing weatherstripping, soft wood, peeling paint, and foggy glass. Keep tracks clean so water can drain correctly. Make sure sprinklers do not constantly spray windows. Control indoor humidity with ventilation, bath fans, kitchen exhaust fans, and dehumidifiers where needed.
Paint exposed wood trim before it deteriorates. Recaulk small cracks before they become wide gaps. Replace damaged weatherstripping before drafts become normal. The best window repair is often the small repair you do before the window starts behaving like a haunted house prop.
Field Experience: What Homeowners Learn After Fixing Window Seals
After dealing with window seal repair in real homes, one lesson becomes clear: the obvious problem is not always the actual problem. A homeowner may call about “bad glass” because one window is foggy, only to discover that three other windows are leaking air around the trim. Another may complain about drafts and assume the window must be replaced, when the real culprit is flattened weatherstripping that costs far less to fix. Diagnosis matters.
A useful habit is to inspect windows in different conditions. On a sunny afternoon, failed insulated glass may show haze, streaks, or a cloudy patch between panes. On a windy evening, air leaks become easier to feel. During rain, exterior seal failures may reveal themselves through damp trim or tiny water trails. Windows are like toddlers: they reveal different problems depending on the weather and how much attention they are getting.
One common experience is surprise at how much old caulk matters. A window can look acceptable from six feet away, but up close the sealant may be split, curled, or separated from the siding. Removing that old bead is not glamorous work. It takes longer than applying the new caulk. But the repair lasts much longer when the joint is cleaned properly. Homeowners who rush this step often end up doing the same job again, which is not a hobby anyone brags about at dinner.
Another practical lesson involves weatherstripping thickness. More is not always better. A thick foam strip may seem like a powerful draft blocker, but if it prevents the window from locking, it creates a new problem. The best seal allows firm contact while keeping the sash aligned and functional. After installation, always test the lock, check movement, and look for corners where air can still pass through.
For foggy double-pane windows, the experience is usually more humbling. Many people hope there is a spray, wipe, or secret trick that will clear moisture trapped between panes. Unfortunately, once the insulated glass seal fails, the moisture is inside the unit. Surface cleaning cannot reach it. Defogging can improve appearance in some cases, but homeowners who care about long-term energy performance usually get better results from replacing the IGU or sash.
The biggest takeaway is that window seal repair is not just about comfort. It protects the structure around the window. A small exterior gap can invite water into places where wood, drywall, and insulation quietly suffer. Repairing seals early helps prevent staining, rot, mold concerns, and expensive trim work. In other words, a ten-minute inspection can save a future weekend of regret.
Finally, do not underestimate the satisfaction of a properly sealed window. The room feels calmer. The draft disappears. The glass looks clearer. The heating or cooling system gets a break. And you get the deeply adult joy of saying, “I fixed the window seal,” which sounds boring until you realize boring home maintenance is often what keeps expensive disasters from knocking on the door.
Conclusion
Window seal repair and replacement begins with knowing which seal has failed. Fog between panes usually points to insulated glass seal failure. Drafts around a sash often mean worn weatherstripping. Cracked joints around the frame usually need proper caulking. Water stains may signal a deeper issue that deserves professional attention.
The smartest approach is simple: inspect carefully, match the repair to the problem, use the right material, and do not ignore early warning signs. A well-sealed window improves comfort, protects your home, reduces wasted energy, and keeps the outdoors where it belongsoutside, admiring your excellent maintenance habits from a respectful distance.
Note: This article provides general homeowner guidance. For major leaks, structural damage, upper-story work, historic windows, or warranty questions, consult a qualified window professional or the original manufacturer before starting repairs.
