Hair Care
Patio Table Makeover inspired by A Cutting Edge Stencil!
Jun
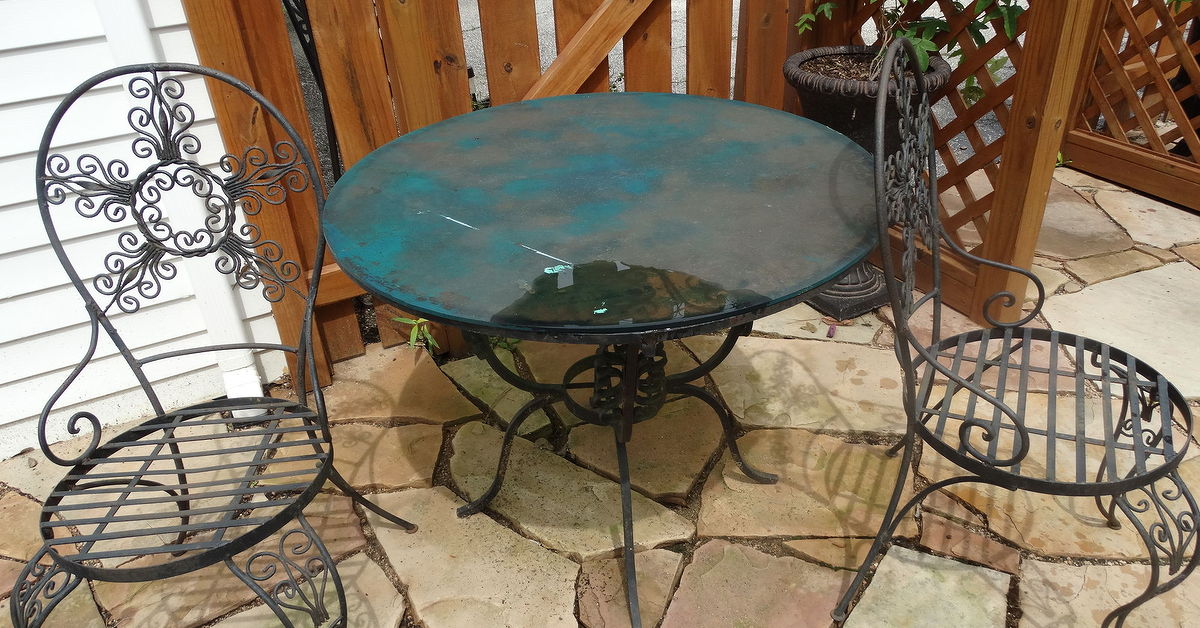
Some patio tables age gracefully. Others look like they survived three hurricanes, a glitter craft party, and a family barbecue where someone used them as a cutting board. If your outdoor table has reached the “please avert your eyes” stage, don’t haul it to the curb just yet. A patio table makeover inspired by a Cutting Edge Stencil can turn a scratched, faded, or boring tabletop into the star of your outdoor living space.
The beauty of a stenciled patio table is that it delivers the look of custom tile, designer inlay, or boutique patio furniture without the boutique price tag. Instead of buying a new table, you can refresh what you already own with paint, primer, a stencil, and a little patience. The result can be charming, colorful, durable, and completely personal. Best of all, nobody has to know the table used to look like it was emotionally exhausted.
This guide walks through the entire process: choosing the right table, selecting outdoor paint, prepping the surface, using a stencil without creating a blurry blob, sealing the finish, styling the table, and learning from real-life DIY mistakes. Whether your patio table is wood, metal, plastic, resin, or glass-topped with a paintable insert, this makeover idea can help you create a fresh focal point for coffee mornings, weekend dinners, and the occasional “I’m just sitting outside so I don’t have to fold laundry” moment.
Why a Stenciled Patio Table Makeover Works So Well
A patio table is usually one of the hardest-working pieces of outdoor furniture. It holds drinks, snacks, planters, laptops, sunscreen, board games, and mysterious sticky things no one in the household will admit to creating. Because the tabletop is so visible, even a small update can change the entire mood of the patio.
A stencil adds pattern without requiring advanced artistic skills. You do not need to freehand a mandala, draw perfect Moroccan tile shapes, or possess the steady hand of a surgeon. A good stencil gives you a repeatable design, while paint gives you the freedom to match your outdoor decor. Think navy and white for a coastal patio, terracotta and cream for a warm Mediterranean look, sage green and ivory for cottage-garden charm, or black and soft gray for a modern bistro feel.
Stenciling also works because it disguises minor surface flaws. A plain painted tabletop can highlight every dent and scratch, but a patterned design distracts the eye. It is the home-decor version of wearing a patterned shirt after eating pasta: stylish and strategically forgiving.
Choose the Right Patio Table for the Project
Before grabbing a paintbrush like a DIY superhero, inspect the table. A makeover can improve looks, but it cannot magically repair a table that wobbles like a newborn deer. Make sure the frame is sturdy, the legs are secure, and the tabletop is not deeply rotted, cracked, or structurally unsafe.
Best Table Materials for Stenciling
Wood is one of the easiest materials to paint and stencil because it can be sanded, primed, and sealed. Metal tables also work well, especially if rust is removed and the right primer or rust-resistant paint is used. Plastic and resin tables can be painted, but they require products designed to bond to slick surfaces. Glass is trickier; instead of painting the top surface where plates and cups will scrape it, consider painting the underside if the glass is clear, or stenciling a removable wood or metal insert.
If your table has slats, gaps, ridges, or heavy texture, choose a larger, simpler stencil pattern. Highly detailed designs look beautiful on smooth surfaces but can become fussy on uneven tabletops. If your table is round, a mandala stencil can look especially polished because it naturally emphasizes the shape. If your table is square or rectangular, tile-style stencils, geometric repeats, and border patterns are great options.
Plan the Look Before You Paint
The fastest way to regret a paint project is to decide the color palette while holding an open can of paint. Planning saves time, money, and dramatic sighing. Start by looking at the colors already on your patio: cushions, umbrellas, planters, siding, deck stain, rugs, and nearby flowers.
For a calm outdoor table makeover, choose a base color that blends with your patio furniture and a stencil color that adds soft contrast. For a bold look, use a dark base with a crisp light pattern. Navy with white, charcoal with cream, and forest green with pale gray all create strong contrast without feeling chaotic. If you want a sunny garden-party effect, try a warm white base with coral, mustard, or sky-blue stencil details.
Popular Stencil Styles for Patio Tables
A Moroccan tile stencil gives the illusion of patterned ceramic tile and works beautifully on square or rectangular tabletops. A mandala stencil creates a dramatic centerpiece, especially on a round patio table. Geometric stencils look clean and modern, while floral or vine patterns feel more romantic and garden-inspired. A Cutting Edge Stencil-inspired design often works best when the pattern is large enough to read from a distance but detailed enough to feel special up close.
One helpful trick is to print a photo of your table and sketch possible stencil placement on top. Centered designs feel formal and balanced. Offset patterns feel casual and artsy. Borders around the edge can frame the tabletop like a tray. Repeating tile patterns can make an old table look like a custom piece from a fancy outdoor catalogthe kind where people inexplicably serve lemonade in linen outfits.
Supplies You Will Need
A successful patio table makeover does not require a garage full of professional equipment. Most supplies are easy to find at hardware stores, paint stores, or craft retailers. The exact products depend on your table material, but the basic toolkit stays similar.
Basic Supply List
- Outdoor table in good structural condition
- Drop cloth or plastic sheeting
- Mild soap, water, sponge, and clean rags
- Sandpaper or sanding sponge
- Tack cloth or microfiber cloth
- Painter’s tape
- Exterior primer suited to your table material
- Exterior paint or spray paint
- Cutting Edge Stencil-inspired pattern or similar reusable stencil
- Dense foam roller, stencil brush, or foam pouncer
- Paper towels for off-loading excess paint
- Clear outdoor topcoat or spar urethane, if appropriate
- Protective gloves, eye protection, and a mask for sanding or spraying
The dense foam roller deserves a special mention. It helps apply thin, even layers through the stencil. A fluffy roller can hold too much paint, which may cause bleeding under the stencil edges. In stencil land, too much paint is the villain. It looks innocent in the tray, then sneaks under the pattern and turns crisp lines into sad clouds.
Step-by-Step Patio Table Makeover
Step 1: Clean the Table Thoroughly
Outdoor furniture collects pollen, dust, bird souvenirs, barbecue grease, and a surprising amount of mystery grime. Paint will not bond well to dirt, so start with a thorough cleaning. Use mild soap and water, scrub the tabletop and legs, rinse well, and let everything dry completely.
For metal tables, pay special attention to rust spots and peeling paint. For wood tables, check for rough patches, splinters, or old flaking finish. For plastic or resin, remove any waxy residue or oily film. A clean surface is not glamorous, but it is the difference between a makeover that lasts and one that peels faster than a sunburned tourist.
Step 2: Sand or Scuff the Surface
Sanding creates a slightly rough surface so primer and paint can grip. You do not always need to sand down to bare material. In many cases, a light scuff sanding is enough to dull a glossy finish. Use medium-grit sandpaper for rough areas and fine-grit sandpaper for smoothing.
After sanding, remove every bit of dust with a tack cloth or clean microfiber cloth. Dust left behind can create bumps in the finish. Those bumps will bother you every time you set down a coffee mug, and nobody needs that kind of emotional burden before caffeine.
Step 3: Prime for Better Adhesion
Primer helps create a sound base for paint, especially on bare wood, glossy surfaces, stained wood, or metal with exposed areas. Choose an exterior primer that matches the table material. Wood may need an exterior bonding primer. Metal may need a rust-inhibiting primer if rust was present. Plastic may require a specialty bonding product or a paint-and-primer formula made for plastic.
Apply primer in thin, even coats. Let it dry according to the product label. Do not rush this step. Primer is like the friend who helps everyone move but never gets thanked. It quietly does the hard work so the pretty paint can take all the compliments later.
Step 4: Paint the Base Color
Once the primer is dry, apply the base color. For brush-on exterior paint, use a high-quality brush for edges and a small foam roller for the tabletop. For spray paint, use light, overlapping passes and keep the can moving. Several thin coats are better than one heavy coat.
Let each coat dry before adding the next. The base coat should look smooth and fully covered before you stencil. If the old table color is still peeking through like it has unfinished business, add another thin coat.
Step 5: Position the Stencil
When the base color is fully dry, place the stencil on the tabletop. Measure to find the center if you want a symmetrical design. Use painter’s tape to hold the stencil in place. For large or detailed patterns, repositionable spray adhesive can help keep the stencil flat, but use it lightly and follow the label directions.
If you are using a repeating tile pattern, mark a starting point and work outward. Many stencil patterns include registration marks to help align repeats. Take your time here. A few extra minutes of measuring can prevent a design that slowly drifts sideways like it is trying to leave the patio.
Step 6: Off-Load the Paint
This is the secret to crisp stencil lines: load your roller or brush with paint, then remove most of it on a paper towel before touching the stencil. The tool should feel almost dry. It may seem wrong at first, as if you are wasting paint, but a dry roller gives cleaner edges and reduces bleeding.
Use light pressure and build color gradually. If you press too hard, paint can squeeze under the stencil. Stenciling is not a wrestling match. Treat it more like applying makeup to a very flat, very patient face.
Step 7: Lift and Repeat
After painting one section, carefully lift the stencil straight up. Do not drag it. Check the result before moving to the next area. If the lines look clean, continue. If there is slight bleeding, reduce the amount of paint and pressure. Wipe the underside of the stencil occasionally so dried paint does not transfer to the table.
For a large tabletop, work in sections. Let wet areas dry before placing the stencil over them again. If you accidentally smudge a spot, do not panic. Let it dry, touch up with the base color, and stencil again. DIY is not about never making mistakes. It is about learning to hide them with confidence and snacks.
Step 8: Add Details or Distressing
Once the stencil design is dry, decide whether the table needs extra character. You can lightly distress edges with fine sandpaper for a vintage look. You can add a thin painted border around the tabletop. You can use a small artist brush to touch up tiny gaps or sharpen a few details.
Do not overdo it. The stencil should remain the star. Too many extras can make the table look busy, like it got dressed in the dark during a craft-store sale.
Step 9: Seal the Table
Outdoor furniture faces sun, rain, humidity, temperature changes, spilled drinks, and the occasional aggressive nacho plate. A clear outdoor topcoat can help protect the painted design. For wood tables, an exterior spar urethane or outdoor-rated clear finish may be appropriate. For metal or plastic, use a clear coat compatible with the paint system you chose.
Always test the clear coat in a small hidden area first. Some topcoats can slightly change sheen or color, especially over white or light paint. Apply thin coats and let the finish cure fully before using the table. “Dry to the touch” does not always mean “ready for a family pizza night.” Give the finish time to harden.
Common Mistakes to Avoid
Using Too Much Paint on the Stencil
This is the most common stencil mistake. A wet roller creates fuzzy edges. Off-load paint first, then use light pressure. Build the color slowly. Your patience will be rewarded with crisp lines and fewer muttered words.
Skipping Prep Work
Skipping cleaning, sanding, or priming may save an hour at the beginning but can cost the whole project later. Paint needs a clean, dull, stable surface. If the table is dirty or glossy, the finish may chip or peel.
Painting in Bad Weather
Avoid painting in extreme heat, direct blazing sun, high humidity, strong wind, or right before rain. Wind blows dust into wet paint. Heat can make paint dry too quickly. Humidity can slow curing. Choose a mild, dry day and work in a shaded, well-ventilated area.
Using Indoor Products Outside
Indoor craft paint may look cute on day one and tragic by week three. Use exterior-rated paint and topcoat whenever the table will live outdoors. Patio furniture needs products designed for weather exposure.
Styling Your Newly Stenciled Patio Table
Once your patio table makeover is finished, style it so the pattern shines. Keep the centerpiece simple. A potted herb, a lantern, a bowl of citrus, or a small vase of flowers can add charm without hiding the design. If your stencil pattern is bold, choose solid-color placemats or neutral dishes. If your stencil is subtle, add patterned napkins or colorful glassware.
Think of the table as the anchor for the patio. Repeat one or two colors from the stencil in nearby pillows, planters, or outdoor rugs. This makes the makeover feel intentional instead of random. Even if the rest of the patio is still a work in progress, a coordinated table can make the whole area look more pulled together.
Budget-Friendly Ideas for a Bigger Patio Refresh
A stenciled table can inspire the rest of your outdoor space. You do not have to redo everything at once. Start with easy updates: clean the chairs, add fresh cushions, paint a few plant pots, hang string lights, or place a small outdoor rug under the table.
If the chair frames are faded, spray paint them in a coordinating color. If the cushions are tired but not ruined, add washable outdoor pillow covers. If the patio feels flat, use planters at different heights. A few simple changes can make the table feel like part of a complete outdoor room.
Care and Maintenance
To keep the table looking fresh, wipe spills quickly and clean the surface with mild soap and water. Avoid harsh scrubbers that can scratch the finish. Use coasters or placemats when possible, especially under hot dishes or rough-bottomed planters.
At the end of the season, inspect the tabletop. If the clear coat looks worn, lightly clean and recoat according to the product directions. Cover the table during harsh weather or store it in a protected area when possible. No outdoor finish lasts forever, but basic maintenance can help your stenciled patio table stay beautiful longer.
Real-Life Experience: What This Makeover Teaches You
A patio table makeover inspired by a Cutting Edge Stencil is not just a paint project. It is a small lesson in patience, planning, and accepting that perfection is overrated. The first thing you learn is that prep work matters more than excitement. Everyone wants to jump straight to the pretty stencil part. Nobody wakes up thrilled to scrub pollen off a table leg. But the cleaning and sanding stage sets the tone for the entire project. When the surface is smooth and properly primed, painting becomes easier, and the final design looks more professional.
The second lesson is that less paint is your best friend. Many beginners assume a thick coat will give better coverage. In stenciling, thick paint behaves like a toddler with a marker: it goes everywhere. A nearly dry roller gives the cleanest pattern. The first pass may look faint, but a second light pass creates depth without bleeding. Once you experience the difference, you will become the kind of person who says, “Off-load the roller,” at parties. People may not invite you back, but your stencil lines will be magnificent.
The third lesson is that small flaws disappear in the overall design. When your face is six inches from the tabletop, every tiny wobble looks enormous. Step back three feet, and suddenly the pattern looks charming. Step back ten feet, and it looks like you bought the table from a stylish boutique where everything smells faintly of eucalyptus. This is important because DIY projects can make people overly critical. Handmade character is not failure. It is proof that an actual human created something instead of ordering another beige object online at midnight.
You also learn that outdoor projects need more drying time than your enthusiasm wants to allow. Paint and topcoat may feel dry quickly, but curing takes longer. Using the table too soon can leave marks, dents, or cloudy spots. Give the finish time. Place the table somewhere safe, admire it from a respectful distance, and resist the urge to host taco night on it immediately.
Another experience-based tip is to practice on cardboard before touching the table. Tape the stencil down, test the roller, and try your chosen paint colors together. This quick sample can reveal whether the contrast is strong enough, whether the roller is too wet, or whether the pattern feels too busy. A ten-minute test can save an hour of touch-ups.
Finally, this makeover teaches you that old furniture often has more potential than we give it credit for. A scratched patio table may not need replacing. It may simply need a new surface, a lively pattern, and a second chance. Once the project is finished, the table becomes more than furniture. It becomes a conversation piece. Guests will ask where you bought it, and you get to smile casually and say, “Oh, I made it over.” Try not to say it too smugly. Or do. You earned it.
Conclusion
A patio table makeover inspired by a Cutting Edge Stencil is one of the most satisfying ways to refresh an outdoor space without buying all-new furniture. With thoughtful prep, exterior-rated products, careful stencil technique, and a protective finish, an ordinary table can become a custom-looking centerpiece. The project is affordable, creative, and beginner-friendly, but it still delivers a dramatic before-and-after moment.
Whether you choose a mandala, Moroccan tile, geometric repeat, or floral design, the goal is the same: give your patio personality. Outdoor spaces should feel inviting, comfortable, and a little bit fun. A stenciled table does exactly that. It says, “Come sit down, pour something cold, and enjoy the weather,” which is much nicer than what the old table was saying: “Please ignore my peeling paint.”
Note: This article is original, non-sponsored editorial content written for web publication and based on widely accepted DIY painting, stenciling, and outdoor furniture maintenance practices.
