Beauty Tools & Accessories
My DIY Recycled Secret Garden
Jun
Every great garden has a little mystery. Some have winding paths, some have roses climbing over a gate, and somelike minebegin with a slightly suspicious pile of “trash” that the rest of the household keeps threatening to throw away. Welcome to my DIY recycled secret garden: a hidden, cozy, wildly charming outdoor corner built from secondhand materials, repurposed containers, compost, native plants, and the stubborn belief that an old bucket can still have a glamorous second act.
A recycled garden is not just a budget-friendly landscaping trick. It is a creative way to reduce waste, build healthier soil, support pollinators, conserve water, and turn forgotten objects into personal design features. Old drawers become herb planters. Broken bricks become edging. A chipped teacup becomes a tiny succulent throne. A wooden pallet becomes a vertical garden that looks intentional enough to make guests say, “Wow,” instead of “Is that supposed to be leaning?”
The best part is that a secret garden does not need acres, a professional landscape designer, or a fairy-tale inheritance. A balcony, patio, side yard, fence corner, or narrow walkway can become a private green retreat. With smart planning and recycled materials, even a small space can feel layered, peaceful, and alive.
What Makes a Recycled Secret Garden Feel Magical?
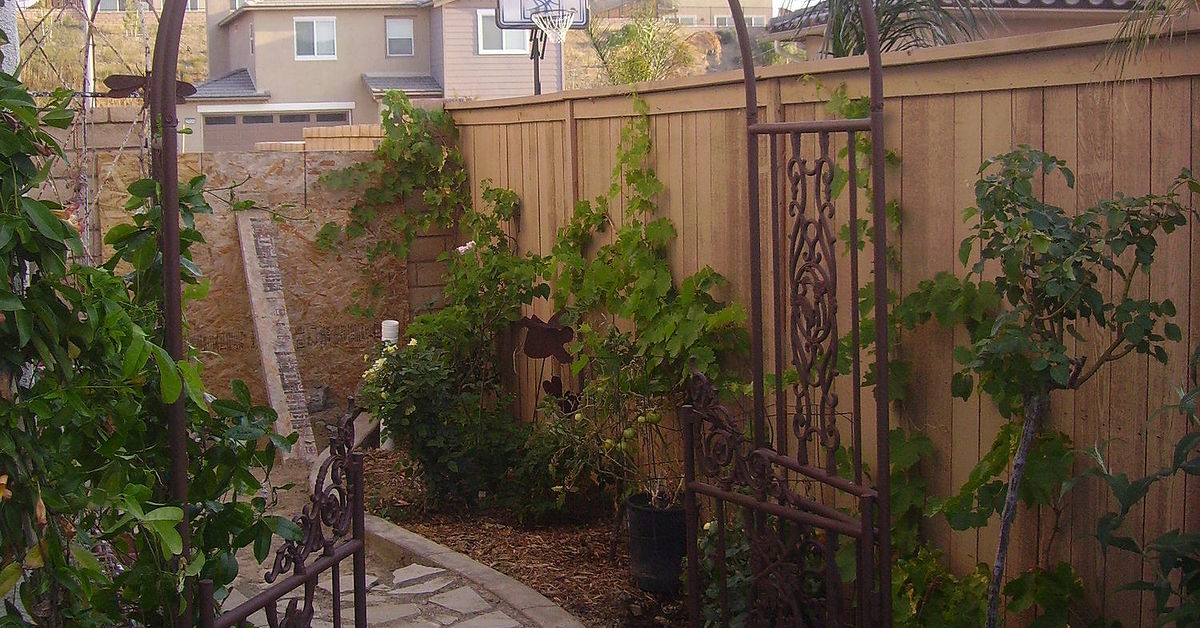
A secret garden is more than a place with plants. It is a mood. It feels tucked away, slightly unexpected, and deeply personal. The “secret” can come from a vine-covered entry, a curved path, tall planters, a screen made from salvaged wood, or a bench hidden behind herbs and flowers.
The recycled part adds character. New garden decor often looks polished, but reused materials tell stories. A weathered ladder holding flowerpots feels warmer than a store display. A rusty watering can planted with trailing flowers has the confidence of an old movie star. The goal is not perfection. The goal is charm with roots.
The Core Ingredients
A successful DIY recycled secret garden usually includes five elements: a defined entrance, layered plants, reused containers, healthy soil, and a small place to pause. That pause might be a bench, a chair, a stepping stone, or simply a spot where you stand with coffee and pretend you are inspecting the basil when you are actually avoiding emails.
Step 1: Choose the “Secret” Location
Start by looking for overlooked spaces. Side yards, back corners, fence lines, unused patios, and awkward strips beside garages are perfect candidates. These areas often have just enough privacy to feel special and just enough neglect to make improvement dramatic.
Before placing anything, observe the site for a few days. Notice how much sun it gets, where rainwater collects, where wind hits hardest, and which parts already feel naturally enclosed. Most vegetables and many flowering plants need strong sun, while ferns, hostas, mint, and some native woodland plants can handle partial shade. Matching plants to the location saves money, water, and future heartbreak.
Step 2: Build Boundaries with Reused Materials
Boundaries turn a random planting area into a destination. You can create them with old fence panels, lattice, salvaged doors, bamboo poles, branches, pallets, or even tall container plantings. A recycled screen does not need to block everything. In fact, partial views make the garden more inviting. A little mystery is better than building a backyard fortress.
Use broken bricks, stones, wine bottles, scrap wood, or leftover pavers to edge beds and paths. Keep safety in mind: avoid sharp metal edges, chemically treated wood in edible planting areas, and containers that previously held hazardous materials. For vegetables and herbs, choose food-safe containers whenever possible.
Easy Boundary Ideas
An old wooden ladder can become a plant shelf. A pallet can become a vertical herb wall. A salvaged window frame can hang on a fence as garden art. A row of mismatched pots can define a path. If the pieces do not match, repeat one detailsuch as plant color, pot height, or natural twineto make the design feel intentional.
Step 3: Turn Old Containers into Planters
Container gardening is the heart of a recycled secret garden because almost anything sturdy can hold a plant if it has drainage and safe material. Buckets, baskets, crates, drawers, colanders, coffee cans, old boots, and cracked ceramic bowls can become planters. The rule is simple: roots need air, water, and a way for extra moisture to escape.
Drill drainage holes in the bottom of solid containers. If you cannot drill, use the container as a decorative outer pot and place a draining nursery pot inside it. Avoid using straight garden soil in containers because it can become dense and poorly drained. A lightweight potting mix works better for most container plants.
Small containers dry out quickly, especially in sun and wind. Use them for herbs, succulents, annual flowers, or decorative accents. Larger containers are better for tomatoes, peppers, dwarf shrubs, and layered plantings. If a large planter is too deep, you can reduce soil volume with safe filler in the bottom, but always leave enough root space and never block drainage.
Step 4: Feed the Garden with Homemade Compost
A recycled garden should recycle nutrients too. Composting turns leaves, grass clippings, small plant trimmings, and many fruit and vegetable scraps into a soil amendment that improves structure and adds organic matter. Think of compost as the garden’s slow-cooked dinner. It is not glamorous, but everybody behaves better after receiving it.
A good compost pile needs a balance of “browns” and “greens.” Browns include dry leaves, shredded cardboard, straw, and small twigs. Greens include vegetable scraps, coffee grounds, fresh grass clippings, and plant trimmings. Keep the pile moist like a wrung-out sponge and turn it occasionally to add oxygen.
Skip meat, dairy, greasy foods, pet waste, diseased plants, and weeds loaded with seeds. These can attract pests, smell unpleasant, or spread problems. Finished compost should look dark, crumbly, and earthy. Add it to garden beds, mix it into potting blends in moderation, or use it as a top dressing around established plants.
Step 5: Use Mulch Like a Garden Superpower
Mulch may not sound exciting, but it is one of the most useful tools in a low-cost sustainable garden. Leaves, straw, pine needles, wood chips, and shredded bark can help conserve moisture, protect soil from erosion, reduce weeds, and slowly add organic matter as they break down.
In flower beds, a layer of organic mulch makes the garden look finished while reducing watering needs. Around woody plants, keep mulch a few inches away from stems and trunks so moisture does not sit against the bark. In vegetable beds, dry leaves or straw can keep soil cooler and cleaner. Mulch is basically the garden’s blanket, but please do not tuck it tightly around plant necks.
Step 6: Plant for Pollinators and Wildlife
A secret garden feels more alive when butterflies, bees, hummingbirds, and songbirds visit. To support them, plant a variety of flowers that bloom from early spring through fall. Choose different shapes, colors, heights, and bloom times so pollinators can find food across the season.
Native plants are especially valuable because they are adapted to local climate, soil, and wildlife. A strong wildlife garden can include native perennials, shrubs, grasses, herbs, and flowering vegetables allowed to bolt. Milkweed, coneflower, bee balm, goldenrod, asters, penstemon, and native grasses are examples that work in many regions, though the best choices depend on where you live.
Plant in clumps rather than scattering single plants everywhere. Pollinators find grouped flowers more easily, and the garden looks fuller. Add a shallow water source with stones for insect landing pads, and include shelter such as shrubs, grasses, or brush piles. Your garden will quickly become a tiny neighborhood café for creatures with wings.
Step 7: Add a Recycled Pathway
A path instantly makes a garden feel intentional. It also keeps shoes out of muddy beds and prevents visitors from stepping on your newly planted thyme, which apparently looks like “just a little green carpet” to certain people.
Use reclaimed bricks, broken concrete, wood rounds, gravel, stepping stones, or flat rocks. A curved path creates a stronger secret-garden feeling than a straight one because it hides the destination. Even in a small yard, a gentle bend can make the space feel larger.
Lay cardboard or newspaper beneath gravel or mulch paths to suppress weeds naturally. Overlap the edges so weeds do not sneak through like tiny botanical criminals. Top with wood chips, bark, pea gravel, or salvaged pavers.
Step 8: Make Vertical Space Work Hard
Small secret gardens need vertical drama. Trellises, hanging containers, wall planters, and climbing plants help create height without stealing floor space. Recycled materials are perfect here. Old bed frames, branches, metal grids, pallet boards, and ladders can all support vines or trailing plants.
Grow climbing beans, peas, cucumbers, clematis, honeysuckle, native vines, or flowering annuals depending on your climate and sunlight. In shady areas, use shelves or hanging baskets with ferns, begonias, or shade-tolerant herbs. Vertical layers make the garden feel lush and enclosed, even when the footprint is tiny.
Step 9: Create a Cozy Sitting Spot
Every secret garden needs a place to sit, even if it is only one chair. Refinish an old bench, rescue a stool, use a tree stump, or build a simple seat from reclaimed wood. Add cushions made from outdoor fabric, or bring cushions outside only when needed.
Place the seat where you can see your favorite view: a container full of herbs, a birdbath, a flowering vine, or the dramatic corner where the marigolds are clearly trying to take over. A garden is not only for growing plants. It is also for noticing things slowly.
Step 10: Add Personality with Recycled Details
The difference between a recycled garden and a pile of objects is editing. Choose pieces that serve a purpose or create delight. A chipped bowl can hold water for birds. A cracked mirror can reflect light in a dark corner if placed safely. Old spoons can become plant labels. Tin cans can become lanterns. A vintage chair with the seat removed can hold a flowerpot like it was born for the job.
Use repetition to avoid visual chaos. Repeat one color, one material, or one shape. For example, paint mismatched containers in similar soft tones, use natural rope on several pieces, or group metal objects together. The garden can be quirky without looking like a yard sale had a nervous breakdown.
Smart Plant Choices for a Recycled Secret Garden
For Sunny Spots
Try lavender, rosemary, thyme, oregano, basil, marigolds, zinnias, coneflowers, black-eyed Susans, tomatoes, peppers, and compact beans. Many herbs are excellent for containers, smell wonderful, and attract pollinators when allowed to flower.
For Partial Shade
Consider parsley, mint in a container, chives, lettuce, violas, ferns, coral bells, woodland phlox, and shade-tolerant native plants suited to your region. Mint deserves its own container because it spreads with the confidence of a tiny green empire.
For Wildlife Value
Choose native flowers, grasses, shrubs, and host plants for butterflies. Add seed-producing plants for birds and avoid invasive species that can escape the garden and crowd out local ecosystems. A beautiful garden should not become the villain in a nature documentary.
Water-Wise Tips for a Low-Maintenance Garden
Recycled gardens can also conserve water. Group plants with similar moisture needs together. Put thirsty plants near the hose or rain barrel and drought-tolerant plants farther away. Water deeply and less often rather than sprinkling lightly every day, except for small containers that may need frequent attention in hot weather.
Use mulch, compost, and larger containers to help soil hold moisture. If possible, collect rainwater in a safe barrel system allowed by your local rules. Self-watering planters, even homemade versions, can help container plants survive hot days. Always check soil before watering; the top may look dry while moisture remains below.
Common Mistakes to Avoid
The first mistake is using containers without drainage. Plants do not enjoy sitting in swamp soup. The second is choosing unsafe materials for edible crops. Avoid containers that held chemicals, paint, fuel, or unknown industrial products. The third is overcrowding. A lush garden is wonderful, but plants still need airflow to reduce disease problems.
Another mistake is buying too much too fast. The charm of a DIY recycled secret garden comes from gradual discovery. Build the bones first: path, containers, soil, and main plants. Then add details over time. A garden made slowly often feels more personal than one assembled in a weekend shopping sprint.
My DIY Recycled Secret Garden Experience
My own recycled secret garden began with an ugly corner that had no personality except “forgotten storage zone.” There was a leaning fence, a patch of tired soil, two cracked pots, and a plastic bucket that had seen things. I did not have a grand plan at first. I had a broom, a pair of gloves, and the dangerous optimism of someone who has watched too many garden makeover videos.
The first improvement was clearing the space. I removed dead leaves, sorted usable materials, and discovered that the corner was larger than it looked. Then I made a simple path using old bricks and flat stones. None of them matched, but once they were set into mulch, they looked charming instead of random. This was the first lesson: recycled materials often look better when grouped with confidence.
Next came the containers. I drilled holes in a few buckets, lined an old wooden crate, and turned a chipped ceramic bowl into a succulent planter. I used lightweight potting mix for the containers and added compost to the garden bed. The difference was immediate. Plants that had looked dramatic and offended in poor soil suddenly perked up like they had received encouraging news.
I planted herbs near the entrance because brushing past thyme and basil makes the garden smell like dinner has potential. I placed taller flowers toward the back and trailing plants along container edges. A small trellis made from branches gave climbing beans a place to grow. It was not perfectly straight, but neither am I after carrying bags of mulch, so I decided we matched.
The biggest surprise was how quickly wildlife found the space. Bees arrived first, then butterflies, then birds that treated the mulch like a breakfast buffet. I added a shallow dish of water with stones in it, and suddenly the garden felt like a tiny resort. No reservations, no dress code, wings preferred.
Not everything worked. One metal container became too hot in full sun, so I moved it to partial shade. A small pot dried out constantly, so I replanted it with a tougher herb. I put mint in the ground once, learned my lesson, and now treat mint like a charming guest who must stay in its own room. These little failures improved the garden because each one taught me how the space actually behaved.
The emotional reward was bigger than expected. A recycled secret garden changes how you see ordinary objects. A broken chair is no longer trash; it is a planter stand. Fallen branches become trellis material. Leaves become mulch. Vegetable scraps become compost. The garden trains your imagination to ask, “What else could this become?” That question is addictive in the best way.
My favorite moment came a few months in, when the plants had filled out and the path looked settled. The garden no longer seemed like a project. It felt like a place. I sat there with coffee, surrounded by herbs, flowers, bees, and objects that had been given another chance. It was small, imperfect, and completely mine. That is the real magic of a DIY recycled secret garden: it does not just reuse materials. It reuses possibility.
Conclusion: Build the Garden, Keep the Secret
A DIY recycled secret garden is proof that beauty does not have to arrive shrink-wrapped from a store. With compost, mulch, native plants, safe reused containers, and a little creative courage, you can transform an overlooked corner into a private retreat that supports pollinators, reduces waste, and makes everyday life feel softer around the edges.
Start small. Choose one corner, one path, one reused planter, or one pollinator-friendly flower. Let the garden grow in layers. Let it look a little wild. Let it surprise you. The best secret gardens are not perfect displays; they are living stories. And sometimes, the first chapter begins with an old bucket that nobody believed in.
