
Skincare
How to Take Better Photos With Your iPhone
Aug
Your iPhone can capture a child’s split-second grin, the glow of a city after rain, or a plate of pancakes before the syrup begins its inevitable journey toward the tablecloth. The camera is capable. The real question is whether the photographer is giving it a fighting chance.
Taking better iPhone photos is not mainly about buying the newest model, downloading 14 editing apps, or attaching enough accessories to make your phone resemble a small satellite. It is about understanding light, focus, exposure, composition, timing, and the camera tools already sitting in your pocket.
This guide explains how to take better photos with your iPhone using practical techniques that work for portraits, travel pictures, food photography, landscapes, pets, nighttime scenes, and everyday moments. Most improvements require only a few secondsand possibly wiping a mysterious fingerprint off the lens.
Start With a Clean iPhone Camera Lens
Before changing a single camera setting, clean the lenses. Your iPhone spends its day touching fingers, pockets, tables, purses, and surfaces best left unnamed. A thin layer of oil can soften details, reduce contrast, and create glowing streaks around lights.
Use a clean microfiber cloth and gently wipe each rear lens. Avoid rough paper products, dirty shirt sleeves, or household cleaners. Check the lens again whenever a photo looks unusually hazy, especially at night.
This ten-second habit can improve image clarity more than an aggressive sharpening filter ever will.
Configure the Best iPhone Camera Settings
The default Camera app is designed to produce good results automatically, but a few settings can make it easier to compose consistently and capture the quality you need.
Turn On the Grid and Level
Open Settings > Camera and enable Grid and Level. The grid divides the frame into thirds, making it easier to position subjects and straighten horizons. The level helps with overhead photos and prevents oceans from appearing to drain toward one side of the planet.
The grid is a guide, not a law. Centered compositions can be powerful when symmetry is important, but the rule of thirds is an excellent starting point for more balanced images.
Preserve Your Preferred Settings
Under Settings > Camera > Preserve Settings, you can tell the Camera app to remember options such as the last camera mode, exposure adjustment, Night mode, Live Photo, or Photographic Style. The available choices vary by iPhone model and iOS version.
This is useful when you regularly shoot in a particular mode and do not want the camera resetting itself every time you reopen the app.
Choose the Right Resolution and Format
Supported iPhones can capture high-resolution images, including 24-megapixel or 48-megapixel photos. Higher resolution provides more detail for cropping and large prints, but it also creates larger files and may require more light to deliver its best results.
For family pictures, social media, and everyday photography, the standard format is usually sufficient. Use maximum resolution for landscapes, architecture, product photography, or scenes containing fine details you may want to crop later.
Apple ProRAW, available on supported Pro models, retains more image information for advanced editing. It is valuable when you plan to recover highlights, adjust color extensively, or create a carefully finished photograph. It is unnecessary for every coffee cup, parking receipt, and photo of where you left the car.
Make Light Your First Priority
Good light can make an older iPhone look impressive. Bad light can make the latest model look as though it has been documenting evidence in a basement.
Use Soft Natural Light
For portraits and food photography, place the subject near a window where indirect daylight enters from the side. Side lighting creates shape and texture, while soft shadows make faces and objects look more three-dimensional.
Cloudy days are also excellent for portraits because clouds act like a giant diffuser. When shooting outdoors in strong sunlight, move into open shade beside a building or beneath a covered area. Avoid positioning a person under a small tree where broken patches of sun create bright spots across the face.
Shoot During Golden Hour
The hour after sunrise and the period before sunset often provide warmer colors, softer contrast, and longer shadows. This light is particularly flattering for portraits, city scenes, beaches, and landscapes.
Do not assume sunset photography means aiming directly at the sun. Turn around and observe what the warm light is doing behind you. Buildings, faces, trees, and clouds may look better than the sunset itself.
Protect Bright Highlights
An underexposed shadow can often be brightened during editing. A completely white, overexposed sky may contain little detail to recover. When photographing a bright scene, reduce the exposure slightly to preserve clouds, signs, windows, or reflective surfaces.
Control Focus and Exposure Manually
The iPhone usually focuses and meters light automatically, but it cannot read your mind. If a person is standing near a bright window, the camera might expose the window correctly while leaving the face too dark.
Tap the most important subject on the screen. A yellow focus box and sun icon will appear. Drag the sun upward to brighten the image or downward to darken it. Small adjustments are usually better than dramatic ones.
For a scene that will not change much, press and hold the desired area until AE/AF Lock appears. This locks automatic exposure and focus, allowing you to recompose without the camera suddenly changing its decision.
For example, when photographing a person against a colorful wall, lock focus on the person’s eye, adjust the brightness, and then move the person away from the center of the frame. The subject remains sharp while the composition becomes more interesting.
Choose the Best iPhone Lens for the Scene
Many iPhones offer multiple rear-camera perspectives, commonly represented by buttons such as 0.5x, 1x, 2x, 3x, or 5x. The exact options depend on the model.
Use the 1x Camera for Reliable Quality
The main 1x camera generally offers the strongest all-around performance, especially in dim light. Use it for everyday scenes, indoor pictures, moving subjects, and situations where image quality matters more than dramatic perspective.
Use the Ultra-Wide Lens Deliberately
The 0.5x ultra-wide camera is useful for architecture, interiors, landscapes, large groups, and exaggerated foregrounds. However, objects near the edges may appear stretched.
For a creative landscape, place a rock, flower, or pathway close to the lens and allow the background to recede into the distance. For a group portrait, keep faces away from the extreme edges unless everyone has agreed that unusually wide foreheads are part of the artistic vision.
Use Telephoto Perspectives for Portraits
A longer perspective can create more natural facial proportions and simplify the background. When available, try a native 2x or telephoto option, step back, and keep the camera near the subject’s eye level.
Avoid Excessive Digital Zoom
Arbitrary pinch-to-zoom settings may enlarge the image digitally rather than use a dedicated optical perspective. This can reduce detail and exaggerate noise. Select one of the labeled lens buttons whenever possible, move closer safely, or crop modestly during editing.
Improve Your iPhone Photo Composition
Camera quality affects technical detail, but composition determines whether anyone cares enough to keep looking.
Simplify the Background
Before pressing the shutter, inspect the entire frame. Watch for trash cans, bright signs, random elbows, tree branches appearing to grow from heads, and other distractions.
Move a few feet left or right, lower the camera, or ask the subject to step forward. A small change in position can turn a chaotic snapshot into a clean photograph.
Use Leading Lines
Roads, fences, railings, shadows, shorelines, and building edges can guide the viewer’s eye toward the subject. Look for lines that begin near a corner of the frame and travel inward.
Add Foreground Depth
Landscapes often feel flat when they contain only a distant view. Include something close to the cameraa flower, doorway, table edge, branch, or textured wallto create layers and a stronger sense of depth.
Use Negative Space
Not every part of the frame needs to be occupied. Empty sky, a plain wall, calm water, or shadow can make a small subject feel more significant. Negative space is especially effective for minimalist photos and images that may later need room for text.
Change Your Height
Most phone photos are taken from adult eye level because that is where adults tend to store their eyes. Kneel for pets and children. Raise the phone above a table for food. Shoot through a doorway or from behind an object. A fresh angle can make a familiar subject feel new.
Use the Right Camera Mode
Portrait Mode
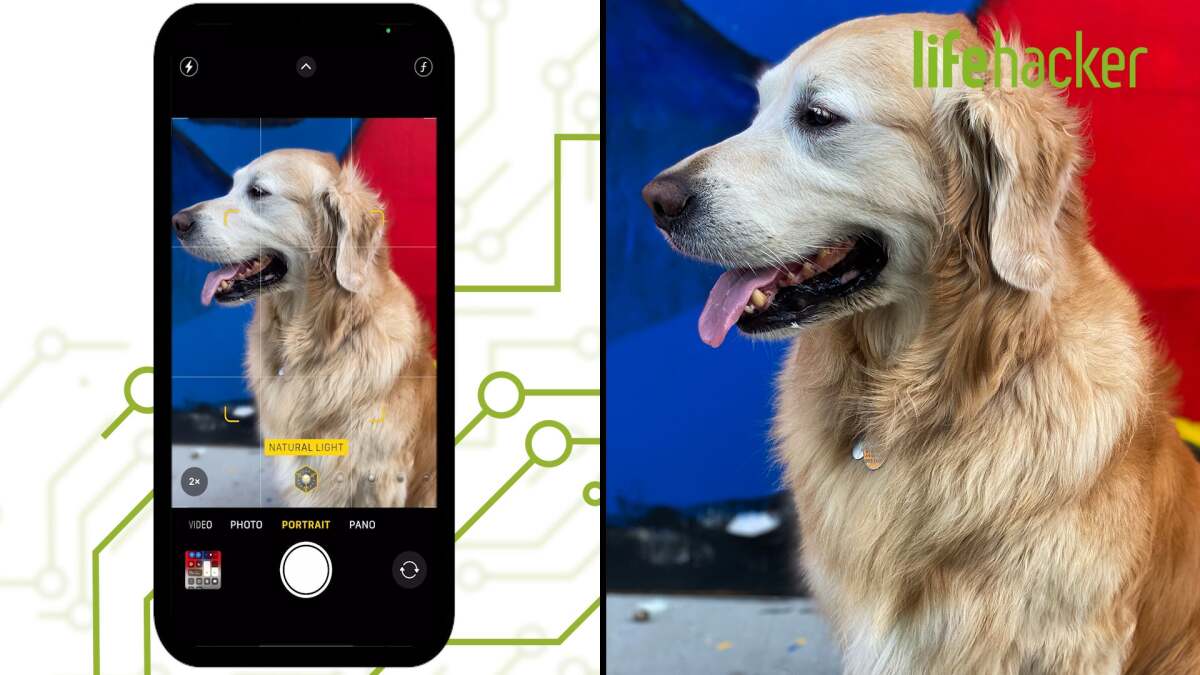
Portrait mode simulates shallow depth of field by separating the subject from the background. It works best when the subject has clear edges and there is some physical distance between the subject and the background.
For better portraits, avoid placing someone directly against a wall. Move the subject several feet forward, choose soft light, focus on the nearest eye, and inspect hair and glasses for unnatural blur. On supported photos, you can adjust the depth effect after capture.
Night Mode
Night mode activates automatically on supported iPhones in low light. It captures information over a longer period, so stability matters. Hold the phone with both hands, brace your elbows against your body, or place the device on a solid surface.
Once you press the shutter, remain still until the exposure finishes. A small tripod and timer can produce even better detail in cityscapes, illuminated buildings, and night skies.
Macro Mode
Supported models can focus extremely close using the ultra-wide camera. Macro photography works well for flowers, insects, jewelry, food textures, and tiny product details.
Use plenty of light and keep the primary point of focus near the center, where close-up sharpness is often strongest. Move the phone slowly rather than repeatedly tapping the screen while your subject wonders why a giant rectangle is approaching.
Live Photos
Live Photos capture moments immediately before and after the shutter press. You can choose a better key frame when someone blinks or apply effects such as Loop, Bounce, or Long Exposure.
The Long Exposure effect can smooth moving water, blur traffic, or create light trails. Stabilize the phone and photograph a scene containing both stationary and moving elements for the clearest result.
Burst Mode
Burst mode is ideal for sports, pets, children, jumping portraits, and other unpredictable action. Depending on your settings, you can drag the shutter control or use the volume-up button for a burst, then select the sharpest frame afterward.
Keep the iPhone Steady
Motion blur becomes more likely indoors and at night because the camera needs more time to collect light. Hold the iPhone with both hands, keep your elbows close to your body, and press the shutter gently.
You can also use a volume button as the shutter, connect compatible earbuds or remote controls, use an Apple Watch camera remote, or activate the three- or ten-second timer. A timer is particularly useful when the phone is resting on a tripod, railing, table, or stack of suspiciously arranged books.
Take Better Portraits, Food Photos, and Travel Pictures
Portrait Photography
Ask the subject to turn slightly rather than facing the camera squarely. Look for soft side light, keep the nearest eye sharp, and give the person something natural to do with their hands.
Take several frames while talking to the subject. Expressions between poses often look more authentic than the official “I am now being photographed” face.
Food Photography
Move the plate near a window and turn off overhead lights that create mixed colors. Use a three-quarter angle for foods with height, such as burgers or cakes, and an overhead angle for flat arrangements such as pizza, salads, or decorated tables.
Remove unnecessary objects, wipe the edge of the plate, and make sure the main ingredient is visible. The camera cannot rescue a composition in which the parsley garnish has somehow become the leading character.
Travel Photography
Capture establishing shots, medium views, and close details. A complete travel story might include a wide photograph of a market, a vendor arranging fruit, and a close-up of handwritten prices.
Photograph transitions as well as landmarks: train platforms, hotel windows, street signs, meals, weather, and people interacting with the environment. These ordinary details frequently become more meaningful than the twentieth identical picture of a famous building.
Edit iPhone Photos Without Overdoing It
A strong edit improves what was already present. It should not make viewers wonder whether the sky was imported from another galaxy.
Begin by straightening the horizon and cropping distractions. Adjust exposure only if the entire image is too bright or dark. Reduce highlights to recover bright areas, lift shadows carefully, and use contrast to add depth.
Brilliance can improve midtone detail, while warmth can correct an image that feels too blue or orange. Add saturation conservatively, especially in portraits. Excessive saturation can turn natural skin into something usually found in the produce aisle.
Use sharpening and definition lightly. These controls can enhance texture, but they cannot restore detail that was never captured. Too much sharpening creates crunchy edges, visible noise, and an artificial appearance.
Compare the edited version with the original before saving. If every adjustment slider has been pushed far from the center, consider taking a short walk and returning with calmer thumbs.
Create a Repeatable iPhone Photography Workflow
When a scene matters, do not take one photo and immediately walk away. Capture a safe version first, then experiment. Try horizontal and vertical framing, move closer, simplify the background, change the exposure, and test another lens.
Review images later on a larger screen when possible. Select the strongest frame based on expression, focus, light, and compositionnot merely the first image in the sequence.
Delete obvious duplicates, but avoid making every decision while standing at the location. A photograph that seems strange in the moment may become the most interesting image after careful cropping or a black-and-white edit.
Practical Experience: Lessons From an iPhone Photo Challenge
One of the most useful ways to improve is to spend an hour photographing ordinary surroundings without relying on new gear. A neighborhood, park, kitchen, office, or local café provides enough material. The goal is not to collect hundreds of random images. It is to practice making deliberate decisions before every shutter press.
Begin with a familiar object, such as a coffee cup near a window. The first photograph will probably be acceptable and completely forgettable. Next, turn off the overhead light, move the cup closer to the window, and rotate it until side light reveals the texture. Remove napkins, charging cables, and any mysterious crumbs from the background. Tap the cup to focus, reduce exposure slightly, and take another frame. The difference demonstrates an important lesson: improving the scene is often more effective than editing the photograph.
Then go outside and photograph one subject from five positions. A bicycle, tree, storefront, or parked car will work. Take one picture at eye level, one from a low angle, one using the ultra-wide lens, one through a foreground object, and one focused on a close detail. This exercise quickly exposes how often people photograph from the first place they happen to stand. Usually, the most interesting frame appears only after moving.
Next, practice exposure control with a person or object near a bright window. Let the camera choose the exposure and take the first picture. Then tap the subject and raise the exposure until it becomes visible. Finally, lower the exposure enough to protect the window highlights while keeping the subject recognizable. Comparing these versions makes exposure compensation feel less like a technical setting and more like a storytelling decision. A brighter frame may feel cheerful and open; a darker one may feel dramatic or mysterious.
For action practice, photograph a pet, cyclist, moving vehicle, or someone walking across the frame. Use Burst mode and track the subject instead of waiting for it to arrive at the perfect spot. Review the sequence and notice how body position, background separation, and facial expression change from one fraction of a second to the next. Timing is not luck when you create enough opportunities for the right moment to occur.
Finish the challenge during evening light. Photograph the same scene before sunset, during blue hour, and after nearby lights turn on. Stabilize the phone for Night mode and compare handheld results with a frame taken from a solid surface using the timer. The steadier image will usually contain cleaner details, smoother shadows, and sharper light sources.
The most important experience from this exercise is realizing that better iPhone photography comes from attention, not speed. Cleaning the lens, observing the light, choosing a viewpoint, checking the background, setting focus, and adjusting exposure require only a few extra seconds. Those seconds separate a casual record of an event from a photograph that communicates atmosphere, character, or emotion.
Conclusion
Learning how to take better photos with your iPhone begins with simple habits: clean the lens, find attractive light, tap to focus, control exposure, choose the right camera, stabilize the phone, and compose with intention. Features such as Portrait mode, Night mode, Macro mode, Burst, Live Photos, high-resolution capture, and ProRAW can expand your options, but they work best when supported by strong photographic fundamentals.
The next time a scene catches your attention, pause before pressing the shutter. Check the background. Move your feet. Try a lower angle. Darken the exposure slightly. Then take more than one version. Your iPhone already knows how to process an image; your job is to decide what the image should say.
SEO Metadata
Note: Camera features, available lenses, resolution options, and menu names may vary by iPhone model and iOS version.

