
Skincare
DIY Sunburst Mirror From Thrifted Silverware
Jul
A sunburst mirror has a magical way of making a room look brighter, bolder, and slightly more expensive than your actual decorating budget. The problem? Many store-bought sunburst mirrors come with price tags that behave like they were personally trained by luxury handbag brands. Fortunately, there is a wonderfully weird, wallet-friendly alternative: making a DIY sunburst mirror from thrifted silverware.
Yes, we are talking about forks, spoons, and knivesthe same humble heroes usually assigned to mashed potatoes and weeknight pasta. With a little cleaning, arranging, gluing, and patience, mismatched flatware can become sculptural wall decor with serious vintage charm. This project is ideal for anyone who loves upcycled home decor, thrift store crafts, farmhouse accents, eclectic interiors, or the satisfying thrill of telling guests, “Thanks, I made that out of old spoons.”
The beauty of this project is that perfection is not required. In fact, mismatched silverware often makes the finished mirror more interesting. A spoon with floral engraving, a fork with a dramatic handle, and a butter knife that looks like it once attended a fancy dinner party can all work together to create a layered, radiant design. Think of it as a tiny orchestra of utensils, except nobody has to wash dishes afterward.
Why Make a Sunburst Mirror From Thrifted Silverware?
A thrifted silverware mirror checks several design boxes at once. It is budget-friendly, sustainable, customizable, and surprisingly elegant. Sunburst mirrors have been popular for decades because their radiating shape adds movement to a wall. They look especially good above a console table, in a dining room, over a mantel, in a hallway, or anywhere that needs a decorative focal point.
Using old silverware gives the mirror a more personal, collected feel than a mass-produced piece. The different patterns, finishes, and shapes create texture. Silverplate brings a vintage glow. Stainless steel adds a cleaner modern look. Tarnished pieces can create moody antique character, while spray-painted pieces can lean glam, boho, coastal, or modern depending on the color.
This project is also a clever way to rescue incomplete flatware sets. Thrift stores, estate sales, flea markets, and yard sales often have bins of lonely forks and spoons waiting for a second act. Maybe they lost their matching set. Maybe someone’s junk drawer staged a rebellion. Either way, they are perfect candidates for a DIY silverware wall mirror.
Materials You Will Need
You can adjust the size and style of this project based on what you find, but the basic supply list is simple.
- Round mirror, usually 6 to 12 inches for beginners
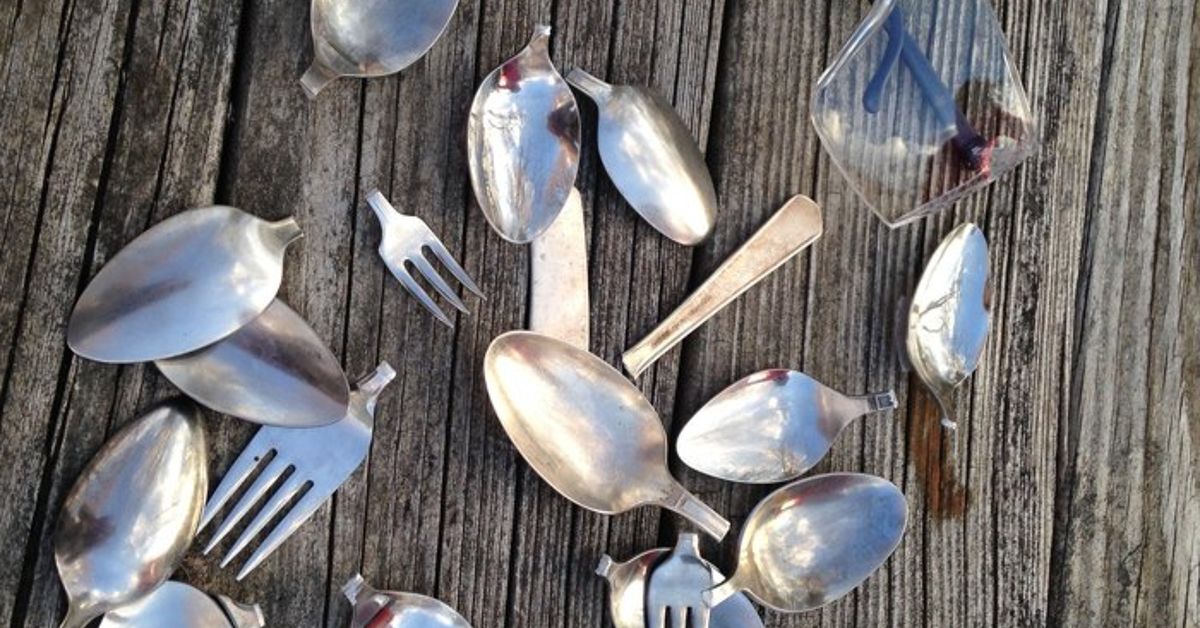
- Thrifted silverware: spoons, forks, butter knives, or a mix
- Round backing, such as wood, sturdy cardboard, MDF, or a charger plate
- Strong adhesive suitable for metal and backing material
- Hot glue for temporary positioning, if needed
- Painter’s tape
- Pencil or marker
- Ruler or measuring tape
- Sandpaper or sanding block
- Cleaning cloths
- Mild dish soap
- Baking soda paste or silver polish, optional
- Spray paint, optional
- Picture hanger, D-rings, or heavy-duty hanging hardware
- Safety glasses and gloves
Choosing the Right Silverware
The best silverware for this project depends on the final look you want. For a refined vintage mirror, choose pieces with decorative handles and similar lengths. For a playful eclectic mirror, mix ornate spoons, plain forks, and smooth butter knives. For a bold starburst effect, use longer utensils on the outer layer and shorter pieces closer to the mirror.
How Many Pieces Do You Need?
For a small mirror, plan on 24 to 40 pieces of flatware. For a larger statement mirror, you may need 50 to 80 pieces. The number depends on the width of each handle, how tightly you space the pieces, and whether you create one layer or multiple rows.
A good beginner formula is simple: start with 12 spoons, 12 forks, and 12 knives. Lay them around your mirror before gluing anything. If the design looks sparse, add more. If it looks crowded, remove a few pieces. Dry-fitting is your best friend here. Glue is less forgiving than a toddler with a permanent marker.
Should You Use Real Silver, Silverplate, or Stainless Steel?
Any of these can work, but avoid using valuable heirloom silver unless you are absolutely sure you want to turn it into wall art. Many thrifted pieces are silverplate or stainless steel, which are great for crafting. Silverplate often has beautiful detailing and a soft patina, while stainless steel is durable and easier to clean.
If you find pieces that are heavily rusted, bent beyond repair, or sharp at the edges, skip them. A little tarnish is charming. A fork that looks like it fought a lawn mower is less charming.
How to Clean Thrifted Silverware Before Crafting
Before you build your DIY sunburst mirror, wash every piece thoroughly. Thrifted silverware can carry dust, sticker residue, old polish, and mystery grime. Fill a sink or basin with warm water and mild dish soap, then scrub each piece with a soft sponge. Rinse and dry immediately to prevent water spots.
For dull or lightly tarnished pieces, use a soft cloth and a gentle silver polish. For heavily tarnished silverplate, a baking soda paste can help brighten the surface. Mix baking soda with a little water until it forms a paste, rub gently with a soft cloth, rinse well, and dry completely. Avoid abrasive pads because they can scratch decorative finishes.
You do not have to make every piece look brand new. Some patina gives the mirror personality. The goal is clean and dry, not necessarily shiny enough to signal aircraft.
Design Planning: The Secret to a Balanced Sunburst
The easiest way to make this mirror look intentional is to plan the pattern before touching the glue. Place your round backing on a flat table. Set the mirror in the center, then arrange the silverware around it like rays of the sun.
Popular Silverware Layout Ideas
For a classic sunburst, alternate forks, spoons, and knives in a repeating pattern. For example: spoon, fork, knife, spoon, fork, knife. This creates rhythm and keeps the design balanced.
For a dramatic starburst, place longer knives at equal intervals and fill the spaces between them with spoons and forks. The knives create strong lines, while the rounded spoons soften the look.
For a floral effect, place spoon bowls facing outward around the mirror. The shape can resemble petals. This style looks especially pretty when painted gold, champagne, white, or matte black.
For a layered vintage look, create two circles of silverware. Put longer pieces on the back layer and shorter decorative handles on the front layer. This adds depth and makes the finished piece feel more expensive.
Step-by-Step: How to Make a DIY Sunburst Mirror From Thrifted Silverware
Step 1: Prepare the Backing
Choose a backing that is strong enough to hold the weight of the silverware and mirror. A thin wood round or MDF circle is the most reliable choice. Sturdy cardboard can work for a small lightweight mirror, but wood is better if your flatware is heavy.
Sand the surface lightly so the adhesive can grip. Wipe away dust with a dry cloth. If you are using a charger plate, roughen the back slightly where the utensils will attach.
Step 2: Mark the Center
Place your round mirror in the center of the backing and trace around it lightly with a pencil. This circle tells you where the mirror will sit later and helps you keep the silverware handles hidden beneath the mirror edge.
You can also draw guide lines like a clock: 12, 3, 6, and 9. These marks help you space the first pieces evenly. Once those are placed, fill in the gaps.
Step 3: Arrange the Silverware
Lay your silverware around the traced circle with the handles pointing inward and the decorative ends pointing outward. Adjust the spacing until the pattern feels balanced. Stand back and look at it from several angles. Take a photo with your phone so you can remember the layout.
This photo is more useful than you think. Once you start gluing, everything suddenly looks like a tiny metal traffic jam. A reference photo keeps the project from becoming utensil confetti.
Step 4: Glue the First Layer
Apply strong adhesive to the handle area that will touch the backing. Press each piece firmly into place. Use painter’s tape to hold pieces steady while the adhesive cures. Work opposite sides as you go: top, bottom, left, right, then fill between. This helps maintain symmetry.
Hot glue can be useful for temporary tacking, but it is not always reliable as the only adhesive for metal, especially if the finished mirror will hang vertically. A stronger construction or craft adhesive designed for metal, glass, and wood is a safer choice.
Step 5: Add a Second Layer, Optional
If you want a fuller design, add a second row of silverware between the first layer. You can angle the pieces slightly or use shorter utensils. This creates a denser, more luxurious sunburst. Let the first layer set before adding the next so the pieces do not slide around.
Step 6: Paint or Leave Natural
You can leave the silverware as is for a collected vintage look, or spray paint the entire sunburst frame for a unified finish. Gold is classic and glamorous. Matte black looks modern and dramatic. White feels fresh and coastal. Antique bronze adds warmth.
If painting, cover the mirror area with painter’s tape and paper, or paint the silverware frame before attaching the mirror. Spray in thin coats in a well-ventilated area. Let each coat dry according to the paint label. Rushing spray paint is how you get drips, fingerprints, and regret.
Step 7: Attach the Mirror
Once the silverware is secure and any paint is fully dry, apply adhesive to the back of the mirror or the center of the backing. Press the mirror into place over the utensil handles. Weigh it down gently with a book wrapped in a towel, making sure the weight is centered and not pressing unevenly on the glass.
Allow the adhesive to cure fully. This may take several hours or longer depending on the product. Do not hang the mirror until everything is completely bonded.
Step 8: Add Hanging Hardware
Attach hanging hardware to the back of the base, not to the silverware. D-rings, a sawtooth hanger, or a heavy-duty picture hanger can work depending on the finished weight. If the mirror is heavy, use hardware rated above the actual weight of the piece.
When hanging on drywall, use an appropriate wall anchor or install into a stud. Mirrors are not the place for wishful thinking. Gravity has never once said, “You know what, I’ll let this slide.”
Best Places to Display a Silverware Sunburst Mirror
A silverware sunburst mirror naturally belongs in a dining room, breakfast nook, or kitchen because the material connects to food and gathering. It can also look fantastic in an entryway, where it gives guests something interesting to notice as soon as they walk in.
Try hanging it above a narrow console table with a small lamp and a bowl for keys. In a dining room, place it above a buffet or bar cart. In a farmhouse-style kitchen, hang it near open shelving or a plate wall. In a modern home, paint it matte black and let the shape become the star.
Style Variations to Try
Glam Gold Silverware Mirror
Spray paint the finished frame metallic gold or champagne. This turns mismatched thrift store utensils into something that looks boutique. Pair it with white walls, velvet accents, or marble surfaces for a polished look.
Farmhouse Vintage Mirror
Leave the silverware natural and slightly tarnished. Use a distressed wood backing and choose pieces with ornate handles. This version looks warm, nostalgic, and perfectly at home with antique plates, linen curtains, and rustic furniture.
Modern Black Sunburst Mirror
Paint the entire silverware frame matte black. The utensil shapes become graphic and sculptural rather than obviously kitchen-related. This is a great option for minimalist, industrial, or contemporary spaces.
Whimsical Kitchen Wall Mirror
Use spoon bowls, fork tines, and knife blades all facing outward in an intentionally playful pattern. Add a small round mirror in the center and hang it near a coffee station or breakfast corner. It is quirky without being chaotic.
Common Mistakes to Avoid
The biggest mistake is using weak glue. Silverware has weight, and smooth metal can be tricky to bond. Clean and roughen the contact surfaces before gluing, and choose an adhesive suited for the materials.
Another mistake is skipping the dry layout. Without a test arrangement, the final pattern can end up uneven. Always arrange first, photograph the design, and then glue.
A third mistake is hanging the mirror before the adhesive cures. Even if it feels secure after an hour, give it the full curing time recommended by the adhesive label. Nobody wants to hear a crash from the hallway followed by the sad sound of 37 spoons hitting the floor.
Finally, do not underestimate the weight. Thrifted flatware can be surprisingly heavy, especially if you use many pieces or a wood backing. Use proper hanging hardware and wall anchors.
Budget Breakdown
This project can be very affordable, especially if you already have some supplies. Thrifted silverware often costs far less than new craft materials. A small round mirror can usually be found at a craft store, dollar store, or secondhand shop. A wood round, charger plate, or scrap backing may already be hiding in your garage.
A realistic budget for a small DIY sunburst mirror is around $10 to $25. A larger version may cost $30 to $50 depending on the mirror size, adhesive, paint, and amount of flatware. Compared with many decorative wall mirrors, that is still a thrifty win.
Extra Experience: What It Is Really Like to Make a DIY Sunburst Mirror From Thrifted Silverware
The first thing you learn while making a DIY sunburst mirror from thrifted silverware is that thrift store utensil bins are more exciting than they look. At first, it seems like you are just digging through random forks. Then you start noticing details: a floral handle here, a scalloped spoon there, a butter knife with an unexpectedly elegant shape. Suddenly, you are not shoppingyou are curating. Very fancy. Very archaeological. Indiana Jones, but with salad forks.
In my experience, the best results come from buying more silverware than you think you need. Not every piece will make the final cut. Some handles are too short, some are too thick, and some look great alone but strange in the pattern. Having extras gives you freedom to experiment. It also reduces the emotional drama of realizing your perfect layout is missing exactly one spoon.
Cleaning takes longer than expected, but it is worth doing carefully. A quick wash removes grime, but polishing brings out the character of each piece. Some silverware looks better with a little tarnish left in the grooves because it highlights the pattern. If you polish everything to the same shine, you may lose some depth. The trick is to clean for hygiene and adhesion while preserving enough age to keep the mirror interesting.
The dry-fit stage is where the project really becomes fun. I like to arrange the longest pieces first at the four main compass points: top, bottom, left, and right. Then I add pieces halfway between those points, like filling in a clock. This keeps the design balanced. After that, I fill the remaining gaps with smaller spoons and forks. Alternating shapes helps the eye move around the circle instead of getting stuck in one heavy area.
One practical lesson: do not start gluing when you are tired. This is not a “just one more step before bed” project. Once adhesive is involved, you need patience and a steady hand. If a fork slides out of place and you correct it with gluey fingers, congratulations, you have now joined the ancient order of people who accidentally glued themselves to home decor.
Another useful tip is to elevate the mirror slightly while working. Place the backing on a lazy Susan, cake stand, or upside-down bowl so you can rotate it easily. This helps you check the spacing without constantly walking around the table. Also, keep a damp cloth nearby for glue smudges, but be careful not to wipe uncured adhesive across visible metal.
If you plan to spray paint the finished frame, test the color on one spare utensil first. Metallic paints can look very different on shiny metal than they do on a plastic cap. Gold can read warm and antique, or it can suddenly become “trophy from a bowling league.” Testing saves heartbreak.
The finished piece has a handmade charm that store-bought mirrors often lack. It is not perfectly symmetrical in a machine-made way, but that is part of the appeal. The small variations catch the light beautifully. Guests usually notice it immediately, and the moment you say it is made from thrifted silverware, they lean closer. That is the joy of upcycled decor: it gives a room a story, not just an accessory.
Most importantly, this project reminds you that creativity does not require expensive materials. Sometimes it only requires a round mirror, a handful of abandoned spoons, and the willingness to look slightly ridiculous at the thrift store while comparing fork handles like they are rare diamonds.
Conclusion
A DIY sunburst mirror from thrifted silverware is the perfect mix of budget decorating, creative reuse, and statement-making style. It turns forgotten flatware into wall art with personality, texture, and shine. Whether you leave the silverware naturally vintage, paint it glamorous gold, or go bold with matte black, the finished mirror can brighten a room and start conversations.
The key to success is simple: choose interesting pieces, clean them well, plan your layout, use strong adhesive, and hang the finished mirror safely. With a little patience, your thrifted forks and spoons can go from junk drawer extras to radiant home decor. Not bad for utensils that probably thought their career peaked at soup.
Note: This article is written in original, publish-ready HTML body format and is based on practical DIY, upcycling, mirror-hanging, adhesive, silverware-cleaning, and home decor guidance synthesized from reputable U.S. craft, home improvement, cleaning, and decorating resources.

