
Makeup
10 Genius Things People Do With Their Old Keys
Jul
Somewhere in your home, probably inside a drawer that opens only after a brief wrestling match, there may be a collection of mystery keys. One belonged to an old apartment. Another may have opened a padlock that disappeared during the previous presidential administration. The rest appear to belong to secret passages, pirate chests, or absolutely nothing.
Before tossing them, consider this: old keys are compact, durable, easy to paint, and already equipped with a convenient hole. That makes them unusually cooperative materials for crafts, home décor, practical tools, and sentimental keepsakes. With a little imagination, you can repurpose old keys instead of allowing them to spend another decade rattling around beside dead batteries and dried-up pens.
These ten old key crafts range from five-minute projects to ambitious weekend creations. Some preserve memories, some solve household problems, and at least one gives you permission to make a wind chime that sounds like a tiny locksmith convention.
Before You Repurpose Old Keys
First, confirm that every key is truly retired. Test it on current doors, cabinets, padlocks, storage units, mailboxes, and vehicles. Ask other household members before permanently altering anything. A key becomes dramatically less charming when someone announces that it opened the only locked copy of the family safe.
Remove address labels, unit numbers, phone numbers, and other identifying tags. Do not display an active house key or post a clear photograph of its cut pattern online. Electronic car keys, chipped keys, and remote fobs should usually be handled through an appropriate electronics or automotive recycling program rather than placed in a craft box.
Clean ordinary metal keys with warm water, dish soap, and a small brush. Dry them thoroughly. Light oxidation can often be reduced with fine steel wool or fine-grit sandpaper, but an attractive vintage patina may be worth preserving. Wear gloves and eye protection when drilling, grinding, cutting, or bending metal, and follow the manufacturer’s directions for paints, sealers, and adhesives.
1. Create a Memory-Filled Key Shadowbox
A key from a first apartment, childhood home, college dorm, family business, or long-ago road trip may no longer open a lock, but it can still unlock a surprisingly strong memory. A shadowbox turns that small object into meaningful wall art.
How to Make It Personal
Place the key over a street map, photograph, handwritten address, lease fragment, postcard, or copy of the original floor plan. Secure it with a discreet hook, wire loop, pin, or removable adhesive dot. Add a small caption with the address and years associated with the location.
For a wedding or anniversary gift, frame keys from the couple’s first shared home with a line such as “Where our story found a door.” For a family display, arrange several keys chronologically. The finished piece costs little, takes up almost no space, and carries more personality than another generic sign ordering everyone to “live, laugh, love.”
2. Build a Tinkling Old-Key Wind Chime
Keys naturally make different tones when they strike one another, especially when you combine several sizes, weights, and metals. Hung from driftwood, an embroidery hoop, a metal ring, or the frame of an old lampshade, they become a rustic wind chime or indoor mobile.
Assembly Tips
Tie each key to strong cord, fishing line, lightweight chain, ribbon, or thin wire. Vary the hanging lengths so the keys can move freely and make occasional contact. Add washers, beads, shells, bottle caps, or small bells for more visual texture.
Test the sound before hanging the chime permanently. A gentle clink near a porch is delightful; twenty heavy keys directly outside a bedroom window during a thunderstorm may inspire less poetic feelings. For indoor use, suspend the keys where they will catch light rather than wind, creating a quiet decorative mobile.
3. Turn Old Keys Into One-of-a-Kind Jewelry
Skeleton keys and small vintage keys already look like pendants, so jewelry is one of the easiest ways to reuse them. Slide a cleaned key onto a chain or cord, and the basic necklace is finished. From there, you can make it as simple or elaborate as you like.
Ways to Customize Key Jewelry
Add beads, charms, tassels, ribbon, leather cord, gears, lockets, or pieces of broken costume jewelry. A metal-stamping kit can add a short word, date, or initials to a flat key. Paint can create a bright modern finish, while a clear protective coating can preserve an aged surface.
Small keys also work as bracelet charms, earrings, zipper pulls, purse decorations, and keychain ornaments. Check for sharp edges before making wearable pieces, and avoid placing an unknown or corroded metal object directly against sensitive skin for long periods. A decorative bail or wrapped-wire connection can keep the key secure and make the finished piece look more polished.
4. Make Vintage Refrigerator Magnets
Old-key magnets are quick, inexpensive, and useful. They also turn the refrigerator into something slightly more interesting than a gallery of takeout menus and overdue appointment cards.
A Simple Five-Minute Method
Choose flat keys and strong craft magnets. Clean both surfaces, lightly roughen glossy areas if recommended by the adhesive manufacturer, and use an adhesive designed to bond metal. Let the glue cure completely before testing the magnet vertically.
Decorate the front with buttons, small cabochons, miniature photos, painted patterns, resin accents, or alphabet beads. A coordinated group can hold recipes, shopping lists, children’s artwork, or labeled notes on a magnetic command board. Use magnets strong enough for the weight of the key, especially with thick antique keys.
5. Upgrade Plain Drawer Pulls and Cabinet Knobs
An ornate old key can transform ordinary furniture hardware into a custom detail. This works particularly well on jewelry boxes, apothecary-style cabinets, entryway tables, and dressers with a vintage or industrial look.
Decorative Accent or Functional Handle?
For a decorative accent, attach a key across the face of an existing knob using a strong two-part epoxy rated for metal and the knob’s material. Support the key while the adhesive cures so gravity does not slowly turn your masterpiece into a small metallic landslide.
For a functional pull, choose a sturdy key and mount it mechanically rather than relying only on glue. Depending on the design, this may involve carefully drilling mounting holes or securing the key over metal spacers with screws. Make sure there are no sharp teeth where fingers will grip. If the key is rare, fragile, or historically interesting, display it instead of drilling it.
6. Craft Ornaments, Gift Tags, and Party Markers
Because keys already have holes, they are practically begging to be tied to something festive. With paint and ribbon, they can become Christmas ornaments, wedding favors, place cards, gift toppers, or wineglass markers.
Ideas for Every Season
Paint several keys white, silver, or pale blue and arrange them into a snowflake. Use red ribbon and greenery for a traditional holiday ornament. For Halloween, coat keys in matte black paint and attach tiny paper bat wings. For Valentine’s Day, combine a key with a heart-shaped tag reading “You hold the key.” Yes, it is gloriously corny. That is part of its power.
At a dinner party, paint small keys in different colors and tie one loosely around each glass stem. Guests can identify their drinks without disposable plastic markers. For gift wrapping, attach a decorative key to ribbon and write a name or brief message on a cardstock tag.
7. Use Old Keys as Hidden Curtain Weights
Light curtains can flutter, twist, or refuse to hang neatly, particularly near open windows and on covered porches. Old keys provide a compact source of weight that can be concealed inside the bottom hem.
How to Add the Weight Safely
Place one key near each lower corner or distribute several evenly across the hem. Sew each key into a small fabric pocket so it cannot slide, bunch, or work its way through the material. Rounded, smooth keys are best; sand or wrap sharp teeth before inserting them.
This technique can also help stabilize tablecloth corners, lightweight fabric banners, photography backdrops, and certain costume hems. Do not add excessive weight to delicate fabric, and remove metal pieces before machine washing if rust, noise, or damage could be a concern.
8. Convert a Key Into a Handy Mini Tool
A retired key can become a surprisingly useful addition to a toolbox or craft drawer. Its narrow shape reaches places that wider tools cannot, and the hole makes it easy to hang or tether.
Practical Uses Around the House
Tie a sturdy string through the head of a heavier key to create an improvised plumb bob for checking a vertical line while arranging frames or marking a wall. Let the key hang freely until it stops moving, then use the string as your reference.
A flat key can also help crease paper, press clay details, open taped packages, clean narrow non-electrical grooves, or spread small amounts of filler in craft projects. Experienced DIYers sometimes grind old keys into miniature scrapers, but that requires proper eye protection, secure clamping, safe grinding technique, and careful smoothing of every edge. Never use a modified key as a substitute for an insulated electrical tool or a tool designed for heavy force.
9. Make a Wall-Mounted Hook Rack
There is pleasing irony in using old keys to hold current keys. A row of repurposed keys mounted on a wooden board can become an entryway rack for lightweight items such as jewelry, lanyards, dog leashes, reusable bags, andnaturallykeys that still remember their jobs.
Creating Strong Key Hooks
Choose long, sturdy keys. The end of each key must project or bend upward enough to hold an item. Because many keys are brittle or difficult to bend cleanly, decorative keys may be mounted over conventional hooks instead. This preserves the appearance while allowing the actual hardware to carry the load.
Arrange the keys on reclaimed wood, a painted board, or the inside of an empty picture frame. Pre-drill appropriate holes and use secure fasteners. Add labels such as “Home,” “Car,” “Pets,” or “Mystery Key Department.” Keep the rack for light objects unless the mounting hardware and wall anchors are rated for heavier loads.
10. Add Old Keys to Garden and Concrete Art
Keys can become part of outdoor art, stepping-stone designs, garden markers, mosaics, and decorative concrete edging. Their recognizable shapes add an unexpected industrial detail among stone, wood, and plants.
Outdoor Project Ideas
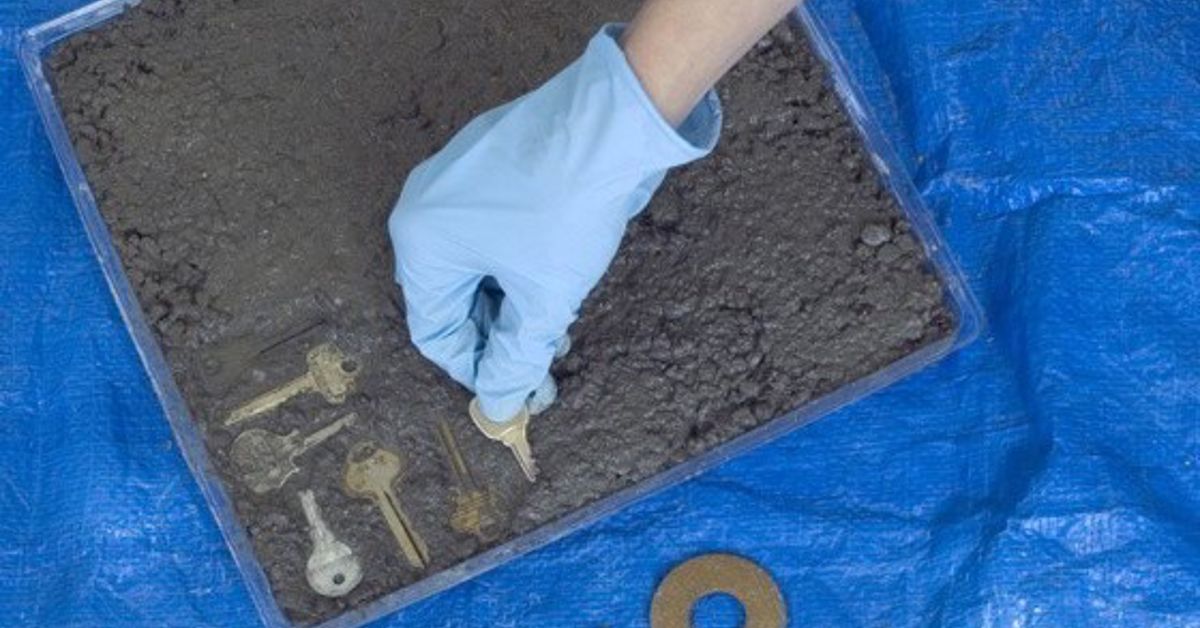
Press clean keys into the surface of a wet concrete stepping stone, keeping sharp edges below or level with the finished surface. Arrange them as a flower, sunburst, tree, compass, or abstract pattern. Keys can also be attached to a garden sculpture, birdhouse, fence panel, or weathered wooden sign.
For plant markers, tie a key to a labeled metal or wooden tag rather than trying to write directly on a small key. Outdoor pieces should be sealed when appropriate, and rusty objects should not be placed where bare feet, pets, or children may encounter rough edges. Remember that some metals and finishes weather unpredictably, which can be either charming or annoying depending on how emotionally invested you are in perfect patio décor.
What If the Keys Are Not Suitable for Crafts?
Not every key deserves a dramatic second career. Bent, heavily corroded, oily, jagged, or unidentifiable industrial keys may be better candidates for metal recycling. Many ordinary keys are made from brass, steel, aluminum, nickel-plated alloys, or combinations of metals. A magnet can help distinguish ferrous metal from many nonferrous varieties, but local facilities have their own sorting and acceptance rules.
Do not automatically place loose keys in a curbside recycling bin. Small metal objects can fall through sorting equipment or may not be accepted by the local program. Contact a scrap-metal recycler, municipal waste service, locksmith, or community recycling event first. Because scrap is commonly valued by weight, saving a larger batch of small metal items may be more practical than making a special trip with three keys and a hopeful expression.
Real-World Experience: What Happens When You Finally Use That Jar of Keys
Old-key projects often begin with confidence and a jar dumped across the kitchen table. Five minutes later, everyone is trying to remember whether the small silver key opened a suitcase, a filing cabinet, or a lock that is still performing an important duty somewhere. The first useful lesson is therefore organizational: sort before crafting.
Create three groups. The first contains confirmed active keys. Label these immediately and return them to secure storage. The second contains sentimental keys connected to recognizable homes, vehicles, workplaces, or family stories. These are best reserved for frames, ornaments, and keepsakes. The third group contains keys that nobody can identify after a reasonable investigation. Those become the main craft supply.
People also discover that old keys vary much more than expected. Some accept paint beautifully after cleaning and light sanding. Others have slick plated finishes that cause paint to peel unless an appropriate primer is used. Flat modern keys work well for magnets and collages, while ornate skeleton keys usually make better necklaces and display pieces. Thick keys may look impressive but can be too heavy for lightweight ornaments.
The easiest successful project is usually a pendant or gift decoration. Threading ribbon through an existing hole requires no specialized tools, and the result looks intentional almost immediately. Magnets are nearly as simple, although patience matters. Testing a magnet before the adhesive has fully cured is a classic mistake. The key slides, the magnet sticks to the refrigerator, and the glue forms an abstract sculpture on the floor.
Wind chimes require more experimentation. Keys that look completely different may produce almost identical sounds, while two plain keys can create a surprisingly pleasant note. Spacing is important. When keys hang too close together, the chime becomes a frantic metallic rattle. When they hang too far apart, it becomes silent garden décor with unrealized musical ambitions. Temporary knots allow the lengths to be adjusted before everything is permanently secured.
Sentimental projects tend to be the most satisfying. A plain key from a first home may appear unimpressive until it is placed over a map and labeled with a date. Suddenly, it stops being clutter and becomes a family artifact. That transformation is the real appeal of creative reuse: the material does not need to be valuable when the story is.
There is also a practical limit. Trying to turn every key into a masterpiece can create a new category of clutter. Choose the best shapes, preserve the most meaningful examples, and recycle the rest responsibly. A finished shadowbox is décor. Forty-seven unfinished key pendants in a plastic tub are simply a sequel to the original drawer problem.
The most successful approach is to begin with one small project, use supplies already available, and let the keys guide the design. Their scratches, stamps, shapes, and patinas provide character that new craft materials often try very hard to imitate. Old keys have already lived one useful life. Giving a few of them another is clever, affordable, and far more entertaining than putting them back in the drawer.

