
Body Care
Kitchen Before and After!
Aug
A successful kitchen makeover is not simply a contest to see how rmations solve everyday frustrations: crowded counters, mysterious dark corners, cabinet doors that attack one another, and a refrigerator positioned approximately three zip codes from the sink.
A truly impressive kitchen before and after combines beauty with better movement, smarter storage, safer cooking, efficient appliances, and materials that can survive spilled coffee, tomato sauce, and enthusiastic pancake experiments. Here is how to turn a tired kitchen into a hardworking, welcoming space without letting the renovation consume your savings, sanity, or entire garage.
Start With the “Before,” Not the Dream Backsplash
Before collecting paint swatches or falling emotionally attached to a waterfall countertop, study how the existing kitchen performs. A dated color palette may be unattractive, but poor function is the problem that will continue bothering you long after the new-cabinet smell disappears.
Document the Daily Frustrations
Spend several ordinary days observing the room. Notice where grocery bags land, where people collide, which drawers refuse to open when the dishwasher is down, and where small appliances permanently occupy valuable counter space. Take photographs from every doorway, record measurements, and make a list of problems rather than products.
Common “before” problems include insufficient task lighting, narrow walkways, poorly placed appliances, wasted corner cabinets, limited landing space beside the range, inadequate ventilation, and storage that requires minor gymnastics. These observations become the practical foundation of the new design.
Separate Cosmetic Problems From Structural Problems
Cosmetic issues include worn cabinet finishes, dated hardware, old light fixtures, tired flooring, and an uninspiring backsplash. Structural or functional issues include damaged plumbing, unsafe wiring, moisture, weak ventilation, an inefficient layout, and walls that restrict circulation.
This distinction matters because cosmetic updates can often be completed gradually. Structural work usually requires permits, skilled trades, and coordinated scheduling. Painting cabinets before discovering that the electrical system needs major work is the renovation equivalent of frosting a cake before baking it.
Plan the Kitchen After Around Real Life
Traditional kitchen planning often considers the relationship among the sink, refrigerator, and cooking surface. That basic idea remains useful, but modern kitchens may have multiple cooks, an island, a coffee station, a pantry zone, or children raiding the refrigerator every eleven minutes. Instead of forcing every room into one textbook triangle, organize the kitchen into logical work zones.
Create Clear Work Zones
A preparation zone should include counter space, knives, cutting boards, mixing bowls, and access to a sink. The cooking zone needs heat-resistant landing space, cookware, utensils, oils, and ventilation. A cleanup zone should keep the sink, dishwasher, trash, recycling, and dish storage close together.
When these areas overlap intelligently, cooking feels smooth. When they are scattered randomly, making dinner starts to resemble a low-budget obstacle course. Walk through several imaginary tasks on the proposed floor plan before approving it: unloading groceries, brewing coffee, preparing vegetables, serving dinner, and emptying the dishwasher.
Protect the Walkways
An island can add preparation space, seating, and storage, but only when the surrounding clearances are comfortable. An oversized island squeezed into a small room creates impressive photographs and terrible traffic. Make sure appliance doors can open without trapping the cook, and avoid placing stools where seated guests block a major route.
Choose Appliances Before Finalizing Cabinets
Select appliance sizes early, even when delivery will happen months later. Refrigerators, wall ovens, ranges, dishwashers, and ventilation equipment have specific clearance, electrical, plumbing, and airflow requirements. A counter-depth refrigerator may create a cleaner visual line, while a standard-depth model may provide more capacity. Neither is automatically better; the correct choice depends on the household.
Planning guidance synthesized from NKBA, Consumer Reports, Architectural Digest, Houzz, and This Old House.
A Practical Kitchen Before-and-After Example
Before: Dark, Crowded, and Confused
Imagine a 1980s kitchen with brown cabinets, beige laminate counters, one ceiling fixture, a bulky peninsula, and a range with weak recirculating ventilation. The refrigerator door blocks the main entrance when opened. The pantry consists of three deep shelves where canned beans disappear until the next presidential administration.
The room is not necessarily small, but it feels cramped because the peninsula interrupts movement, upper cabinets create a heavy visual wall, and countertop clutter consumes the available preparation area.
After: Brighter and More Efficient
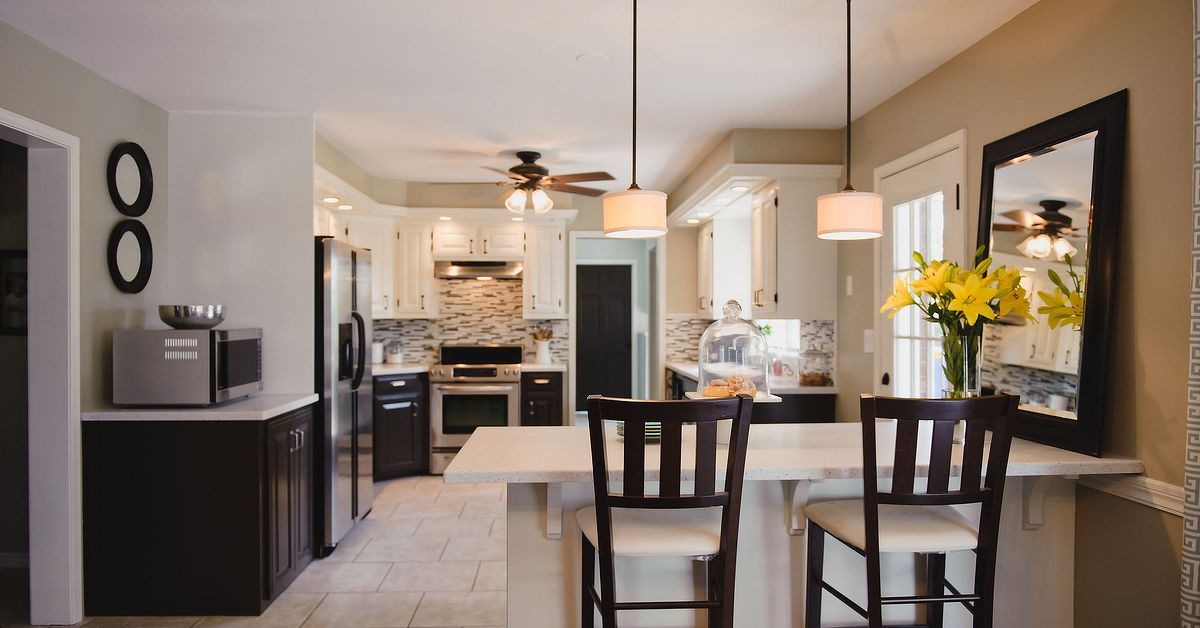
The remodeled kitchen keeps plumbing near its original location to control costs. The peninsula is removed and replaced with a narrower island positioned to preserve circulation. The range moves to an exterior wall, allowing a properly planned hood to vent outdoors. Deep drawers replace several lower cabinets, while a tall pantry uses pullout shelves to make stored food visible.
Warm wood base cabinets are balanced with light upper cabinets, giving the room contrast without making it feel chopped into pieces. Durable quartz counters provide an easy-care work surface. A simple tile backsplash adds texture, and layered lighting eliminates shadows. The result appears larger even though the room’s exterior footprint has not changed.
This is the secret behind many dramatic kitchen before-and-after projects: fewer obstacles, better proportions, clearer sightlines, and storage designed around actual belongings.
Before-and-after strategies informed by This Old House, Better Homes & Gardens, and Houzz renovation examples.
Cabinets: Replace, Reface, Repaint, or Repair?
Cabinetry is usually one of the largest expenses in a kitchen remodel, so existing boxes deserve an honest inspection. Solid, properly installed cabinets with a useful layout may be excellent candidates for painting, refinishing, or refacing. Damaged boxes, weak particleboard, severe water exposure, or an inefficient configuration may justify replacement.
Use Drawers Where They Improve Access
Deep drawers make cookware, dishes, and pantry items easier to see than traditional lower cabinets with fixed shelves. Pullout trays can improve existing cabinets without requiring full replacement. Wide handles, well-lit interiors, and frequently used items stored between knee and shoulder height can also make the kitchen more comfortable for users of different ages and abilities.
Do Not Sacrifice Every Upper Cabinet for Open Shelves
Open shelving can make a kitchen feel lighter and provide easy access to attractive everyday dishes. It also displays every mismatched mug, dusty serving bowl, and emergency cereal box. Use it selectively. A combination of closed storage and a few open shelves usually delivers more flexibility than declaring war on cabinet doors.
Countertops, Backsplashes, and Floors
Choose Materials for the Way You Cook
Quartz is popular because it offers consistent patterns and relatively simple maintenance. Granite provides natural variation and excellent durability when properly maintained. Butcher block brings warmth but requires protection from standing water and careless knife work. Marble develops a lived-in patina and can stain or etch, which delights some homeowners and causes others to monitor lemons like security guards.
Request samples and examine them in the actual kitchen during morning, afternoon, and evening light. A finish that looks calm in a showroom may appear surprisingly busy beside the chosen flooring and cabinet color.
Let the Backsplash Support the Room
A backsplash protects the wall and can provide pattern, color, or texture. If the countertop has dramatic veining, a quieter backsplash often creates balance. If the cabinets and counters are restrained, tile can become the visual focal point. Extending the backsplash to the upper cabinets, hood, or ceiling can make the design feel more intentional.
Prioritize Durable Flooring
Kitchen flooring must tolerate spills, dropped utensils, chair movement, and frequent cleaning. Porcelain tile, luxury vinyl, engineered wood, and properly finished hardwood can all work, depending on the home and climate. Consider comfort, slip resistance, maintenance, transitions to adjacent rooms, and whether the floor can be repaired if one area is damaged.
Lighting: The Upgrade That Changes Everything
A single decorative fixture cannot perform every kitchen lighting job, no matter how photogenic it is. Effective kitchens use layers.
- Ambient lighting provides general illumination throughout the room.
- Task lighting brightens counters, the sink, the range, and food-preparation areas.
- Accent lighting adds depth inside glass cabinets, above shelves, or along architectural details.
- Decorative lighting gives pendants and chandeliers permission to be charming.
Under-cabinet lights are particularly valuable because ceiling fixtures can leave countertops in shadow. Use dimmers where appropriate, coordinate color temperature, and plan switches before walls are closed. Lighting should make chopping an onion safer while allowing dinner guests to feel as though they are in a pleasant home rather than an airport security checkpoint.
Lighting recommendations supported by NKBA and Better Homes & Gardens planning guidance.
Ventilation, Safety, and Efficiency
Give Cooking Fumes Somewhere to Go
A range hood should be selected for the cooking equipment, room, duct route, and local requirements. Whenever practical, venting outdoors removes smoke, moisture, grease, odors, and combustion byproducts more effectively than simply recirculating filtered air. Consider airflow as well as noise; a powerful hood nobody uses because it sounds like a helicopter is not especially helpful.
Include Electrical and Fire Safety in the Design
Kitchen wiring, outlets, circuits, appliance connections, and ground-fault protection should follow current local code. Licensed professionals should handle work beyond a homeowner’s ability. Do not cover smoke alarms with paint, and position alarms according to manufacturer instructions and fire-safety guidance so normal cooking does not produce constant nuisance alerts.
Compare Appliance Performance, Not Just Appearance
Energy-efficient refrigerators, dishwashers, and electric cooking products can reduce operating costs over time. ENERGY STAR reports that certified electric cooking products are more efficient on average than standard models, while certified refrigerators also outperform federal minimum-efficiency models. Induction cooking offers fast response and avoids combustion inside the kitchen, although cookware compatibility and electrical capacity must be considered.
For faucets, compare flow rate, spray performance, reach, handle clearance, and ease of cleaning. Federal standards limit kitchen faucet flow, and lower-flow options may provide additional savings when they still meet the household’s needs.
Efficiency and safety guidance synthesized from ENERGY STAR, EPA, NFPA, CPSC, and Consumer Reports.
Three Kitchen Makeover Paths for Different Budgets
Budget Refresh
Keep the layout, cabinets, plumbing, and major appliances. Paint sound cabinet boxes, replace hardware, update lighting, add a new faucet, install a backsplash, repair damaged surfaces, and improve organization. This approach creates a visible difference with minimal demolition.
Midrange Remodel
Maintain the room’s footprint but replace selected cabinets, counters, flooring, lighting, and appliances. Add drawer storage, improve ventilation, and make small layout adjustments. This level often delivers the best balance between transformation and cost control.
Major Renovation
Change walls, windows, doors, utilities, or the kitchen’s location. A major renovation may solve serious layout problems and create a more connected living space, but it requires a detailed design, professional coordination, permits, contingency funds, and patience.
Whatever the scope, reserve money for surprises. Hidden water damage, outdated wiring, uneven floors, and delayed materials have a special talent for appearing after demolition begins. A contingency of roughly 15% to 20% can prevent an unexpected repair from destroying the rest of the plan.
Budget guidance based on Consumer Reports, Architectural Digest, This Old House, and NAR remodeling research.
Kitchen Remodel Mistakes That Weaken the “After”
Designing for photographs instead of habits: A beautiful room still fails when there is nowhere to place groceries or hide the toaster.
Changing the plan after construction begins: Late decisions create extra labor, delays, and expensive replacement orders.
Ignoring ventilation: A stylish range deserves a hood and duct plan developed before cabinetry is ordered.
Choosing every finish separately: Cabinets, counters, floors, paint, metals, and lighting must be reviewed together.
Underestimating storage: Inventory cookware, food, appliances, cleaning supplies, recycling, and serving pieces before designing cabinet interiors.
Following too many trends: Use fashionable colors and details where they can be changed. Keep expensive permanent elements reasonably adaptable.
Doing risky work without expertise: Cosmetic DIY can save money. Improvised electrical, plumbing, gas, structural, or ventilation work can create danger and expensive repairs.
The 500-Word Reality Check: Experience Behind the Before and After
The First Lesson: Empty the Kitchen Before Designing It
One of the most useful experiences in kitchen remodeling is surprisingly unglamorous: removing everything from the cabinets. Most people underestimate how much they own because their belongings have spent years hiding behind doors. Once every stockpot, lunch container, baking tray, blender attachment, and suspicious lid is visible, storage planning becomes much more accurate.
In one typical makeover, the homeowners believed they needed more cabinets. After sorting duplicates and relocating rarely used serving pieces, they discovered that the real problem was not capacity. It was accessibility. Deep shelves allowed items to disappear behind one another. Replacing several lower shelves with drawers and pullouts created more usable storage without adding a single square foot.
The Second Lesson: Mock Up the Island
Another valuable technique is creating a full-size island outline with painter’s tape or cardboard boxes. Drawings can make a large island look reasonable, especially on a generous computer screen. A physical mock-up reveals whether it blocks the dishwasher, crowds the refrigerator, or forces everyone to shuffle sideways.
In one project, the proposed island was reduced by eight inches after the mock-up. That small change improved circulation dramatically and still preserved seating and storage. Nobody has ever complained that the island became easier to walk around.
The Third Lesson: Test Finishes in Real Light
Cabinet colors and countertop samples change throughout the day. A gray paint can become blue in northern light, green beside warm flooring, or flat beneath cool LEDs. Samples should remain in the room for several days and be viewed next to every major finish.
A homeowner once rejected a creamy cabinet color in the showroom because it looked slightly yellow. In the actual kitchen, it balanced the cool daylight and coordinated beautifully with the oak floor. The bright white alternative looked harsh. The room made the decision more accurately than the showroom did.
The Fourth Lesson: Plan Temporary Living
Renovation experience also teaches respect for the temporary kitchen. Set up a microwave, coffee maker, small refrigerator, water source, trash can, and basic dishwashing station away from construction dust. Prepare frozen meals in advance, budget for takeout, and store daily essentials separately from packed kitchen boxes.
Without this preparation, a six-week remodel can feel like six months of eating crackers over the laundry sink. A workable temporary setup reduces stress and helps homeowners avoid pressuring contractors into rushing critical work.
Final Takeaway
The most satisfying kitchen before and after is not necessarily the one with the highest price tag. It is the room where drawers open freely, lighting reaches every work surface, cooking odors leave the house, and the family naturally gathers. Preserve what works, correct what does not, and spend money where it improves daily life. Beautiful finishes complete the transformation, but thoughtful planning is what makes the “after” continue working long after the reveal photographs are taken.

