
Body Care
How to Make Self-Watering Planters From Soda Bottles
Aug
There is a special kind of disappointment that comes from buying a beautiful basil plant, promising to take excellent care of it, and discovering a week later that it has transformed into a crunchy botanical memorial. Fortunately, keeping small plants watered does not require an expensive irrigation systemor a neighbor willing to babysit your parsley.
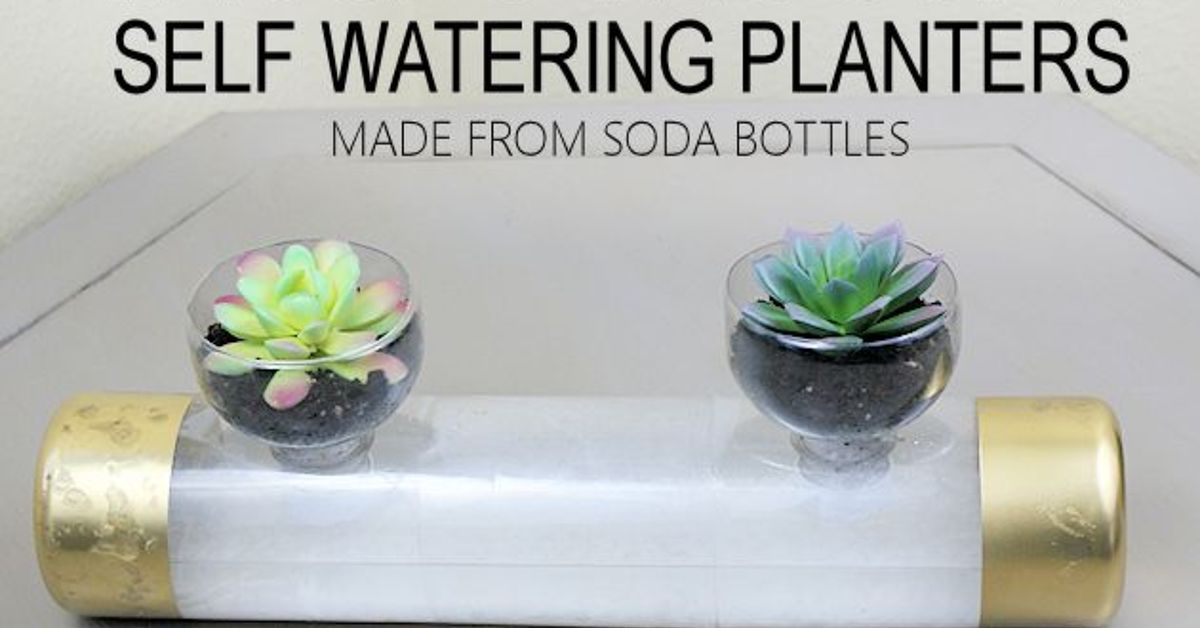
A simple self-watering planter made from a soda bottle can create a small reservoir that supplies moisture to potting mix gradually. The basic idea is wonderfully low-tech: cut a plastic bottle into two sections, turn the upper section upside down, add a wick, fill it with potting mix, and place it above a reservoir of water. The wick draws moisture upward as the growing medium dries.
The project costs almost nothing, takes roughly 15 to 30 minutes, and gives an empty plastic bottle another useful job before it enters the recycling stream. It is especially convenient for herbs, lettuce, seedlings, flowers, and other compact plants.
More importantly, a properly constructed bottle planter solves one of the biggest headaches of container gardening: small containers can dry out surprisingly quickly. Here’s how to build one that works instead of becoming an attractive bottle full of swamp water.
How Does a Soda Bottle Self-Watering Planter Work?
Most homemade self-watering planters use a principle called capillary action or wicking. Instead of pouring water onto the surface of the potting mix every day, you store water underneath the planting area.
A piece of absorbent cord extends from the potting mix into the water reservoir. Water moves through the wick and into the growing medium. As the potting mix loses moisture through plant uptake and evaporation, more water can travel upward.
The goal is not to keep the roots permanently underwater. Roots need oxygen as well as moisture. A good design therefore separates the majority of the root zone from the water reservoir while allowing the wick to provide a controlled moisture connection.
Why Self-Watering Containers Can Be Useful
Container plants have relatively little growing medium compared with plants in the ground, so their moisture supply can disappear quickly during warm, sunny, or windy weather. A reservoir provides a buffer between waterings.
A bottle planter can offer several advantages:
- Reduces how frequently you need to water small plants.
- Provides moisture more consistently than occasional heavy watering.
- Helps reduce severe drying between waterings.
- Makes a useful seed-starting or educational gardening project.
- Works well in apartments, windowsills, balconies, and small patios.
- Repurposes a common household plastic bottle.
- Makes the reservoir level easy to inspect.
It is not completely automatic, of course. The reservoir eventually runs dry. Consider it self-watering, not supernatural.
What You’ll Need
You can build the simplest version with materials you probably already have.
- One clean 1-liter or 2-liter plastic soda bottle
- Scissors, utility knife, or craft knife
- A nail, drill, awl, or other tool for making a hole
- About 8 to 12 inches of nylon or polyester cord
- Quality container potting mix
- Water
- Seeds or a small transplant
- Marker
Optional supplies include decorative tape, paint suitable for plastic, a piece of fabric to cover the reservoir, plant labels, and fine mulch for the top of the planter.
Choose the Right Bottle
A 2-liter soda bottle is usually the easiest size for beginners. It provides enough depth for many herbs, flowers, leafy greens, and young vegetable plants while still fitting comfortably on a windowsill or table.
Use bottles that originally held beverages or other food products, and wash them thoroughly before planting. Avoid repurposing containers that previously held chemicals, pesticides, automotive fluids, cleaners, or other potentially hazardous materials.
Rinse away sugary soda residue especially well. You are trying to grow basil, not establish an all-inclusive resort for ants.
How to Make a Self-Watering Planter From a Soda Bottle
Step 1: Clean the Bottle
Remove the label if desired and wash the inside of the soda bottle with warm water and dish soap. Rinse thoroughly until no soap or soda residue remains.
Allow the bottle to dry enough that you can handle it safely.
Step 2: Mark Your Cutting Line
Measure approximately halfway down the bottle and draw a horizontal line around it with a marker.
You do not need laboratory precision. The bottom section simply needs to be deep enough to hold a useful amount of water while the upper section provides adequate room for potting mix.
For a standard 2-liter bottle, cutting slightly above the midpoint often creates a generously sized reservoir.
Step 3: Cut the Bottle in Half
Carefully puncture the bottle along your line using a sharp tool, then finish the cut with sturdy scissors.
Plastic edges can be surprisingly sharp. Trim rough areas and consider covering the exposed rim with tape, especially if children will help maintain the planter.
You should now have:
- A bottle bottom that will become the water reservoir.
- A bottle top that will become the planting chamber.
Step 4: Make a Hole in the Bottle Cap
Keep the cap on the bottle and create a hole through its center. The opening should be large enough for the wick to pass through while remaining reasonably snug.
If drilling the cap, secure it first so it cannot spin.
An alternative is to remove the cap completely and place a thicker bundle of wick through the bottle neck. However, keeping the cap generally helps hold the planting medium in position.
Step 5: Install the Wick
Thread your cord through the hole in the cap.
Leave several inches extending below the cap so that the wick reaches well into the reservoir. Inside the planting chamber, leave enough cord to extend upward into the potting mix.
Nylon or polyester cord is particularly useful because synthetic fibers resist decomposition. Cotton can wick effectively but may deteriorate with prolonged moisture.
Before assembly, soak the wick thoroughly with water. Starting with a wet wick helps establish the moisture connection immediately.
Step 6: Invert the Top of the Bottle
Turn the upper half upside down and place it inside the lower bottle section.
The neck should point downward into the reservoir while the wider cut opening faces upward.
Check that the wick reaches close to the reservoir’s bottom. The bottle neck itself does not need to remain submerged deeply; it is the wick that should maintain contact with the water.
Step 7: Prepare the Potting Mix
Use a lightweight commercial potting mix formulated for containers rather than ordinary garden soil.
Good container media commonly include ingredients such as peat moss or coconut coir combined with perlite, vermiculite, composted bark, or similar materials. These ingredients create a useful balance between moisture retention and root aeration.
Garden soil tends to become dense inside small containers. Dense, saturated soil reduces the oxygen available to roots and can create perfect conditions for root problems.
Moisten the potting mix before filling the bottle. It should feel evenly damp but not resemble chocolate pudding.
Step 8: Arrange the Wick in the Soil
Do not leave the entire upper portion of the wick sitting in one tiny spot near the cap. Spread it upward or curve it through the lower portion of the growing medium so moisture reaches a broader area.
Add a little potting mix, position the wick, and continue filling.
Leave approximately 1 inch of space below the cut rim. This makes planting and occasional top-watering less messy.
Step 9: Plant Your Seeds or Seedling
Plant seeds according to their recommended depth or transplant a young plant into the center of the container.
Small plants are preferable because soda bottles provide limited root volume. Gently firm the growing mix around a transplant without compressing it excessively.
Water the soil lightly from above immediately after planting. This settles the potting mix and helps ensure that the entire wick is surrounded by moist material.
Step 10: Fill the Reservoir
Lift the planting chamber and add water to the bottom section.
Do not fill the reservoir so high that the bottle neck and growing medium remain continuously submerged. Leave an air gap between the reservoir water and most of the planting chamber.
Reassemble the planter and confirm that the wick sits in the water.
Congratulations. Your former soda bottle has received a career change.
Best Plants for Soda Bottle Self-Watering Planters
The best candidates are compact plants that appreciate relatively consistent moisture.
Herbs
Try:
- Basil
- Parsley
- Cilantro
- Chives
- Mint
Basil and parsley are particularly good candidates because they dislike becoming severely dry. Mint also enjoys reliable moisture, although its enthusiasm for growing can eventually exceed the dimensions of a soda bottle.
Leafy Greens
Small self-watering planters are excellent for:
- Leaf lettuce
- Baby spinach
- Arugula
- Asian greens
Choose loose-leaf or baby varieties rather than expecting a 2-liter bottle to support a grocery-store-sized cabbage.
Flowers
Compact annual flowers and moisture-loving ornamental plants can also work. Plant choice should match the amount of sunlight available at your intended location.
Seedlings
One of the smartest uses for bottle planters is starting seedlings. The reservoir reduces the risk that a small volume of potting mix will dry out while seeds are germinating or young seedlings are establishing roots.
Plants That May Not Like This Setup
A self-watering reservoir is not universally beneficial.
Plants adapted to dry conditions often prefer their potting medium to dry substantially between waterings. Succulents, cacti, and certain Mediterranean herbs can perform poorly when continuously supplied with moisture.
Rosemary, for example, generally prefers a well-aerated medium and should not remain constantly wet. If you experiment with drought-tolerant species, use a very free-draining potting mix and a smaller wick.
How Often Should You Refill the Reservoir?
There is no universal schedule.
Refill frequency depends on:
- Plant size
- Bottle size
- Temperature
- Humidity
- Sun exposure
- Wind
- Potting mix
- Growth rate
A young indoor herb might use its reservoir slowly, while a leafy plant outside during hot summer weather may empty it rapidly.
Look at the water level rather than following an arbitrary calendar. One advantage of a transparent bottle is that checking the reservoir takes approximately two seconds and requires no gardening degree.
Common Problems and How to Fix Them
The Soil Stays Too Wet
If the potting mix remains soggy, the wick may be too thick, the growing medium may retain excessive water, or part of the planting chamber may be sitting directly in the reservoir.
Try replacing the wick with a thinner cord, lowering the reservoir level, or adding more aeration material such as perlite to the potting mix.
The Soil Isn’t Getting Wet Enough
First make sure the wick actually reaches the water.
Next, check whether the wick was thoroughly saturated before installation. A dry or poorly positioned wick may struggle to transfer moisture into dry potting mix.
You can also water the planter from above once to re-establish continuous moisture between the wick and growing medium.
Green Algae Appears in the Reservoir
Clear bottles allow light to reach the water, which can encourage algae.
Wrap the reservoir with decorative paper, fabric, opaque tape, or another removable light-blocking material. Keeping direct sunlight away from the stored water also helps.
Make the covering removable so you can still inspect and clean the reservoir.
The Plant Has Yellow Leaves
Yellow foliage can have several causes, but overly wet roots are one possibility.
Check the potting mix before assuming the plant needs even more water. Wilting can occur from both dry conditions and excessive moisture, so adding water every time a plant looks unhappy can make the problem worse.
The Bottle Keeps Falling Over
Plastic soda bottles are light, particularly when the reservoir becomes empty.
Place the planter inside a heavier decorative container, use a stable tray, or choose compact plants that will not become top-heavy. Outdoor bottle planters should be protected from strong wind.
How to Improve Your DIY Self-Watering Bottle Planter
Block Light From the Roots
Roots normally grow underground, not inside transparent apartments. Covering the planting chamber helps limit light exposure and can reduce algae development around moist surfaces.
Add a Water-Level Window
If you decorate or cover the reservoir, leave a narrow vertical strip uncovered. This creates a simple water-level gauge.
Fancy commercial planter companies may call this a viewing window. You can call it the part you forgot to tape.
Add a Small Top Mulch Layer
A thin layer of appropriate mulch can reduce evaporation from exposed potting mix. Avoid burying small plant stems under a thick layer.
Make Several Planters
One bottle planter is useful. A row of five or six can create a remarkably productive herb or salad garden on a sunny balcony.
Use labels so you do not spend three weeks wondering whether the tiny seedlings are cilantro or an unexpectedly well-cared-for weed.
Can You Use Fertilizer in a Self-Watering Soda Bottle?
Yes, but use fertilizer conservatively.
Container plants have access to only a small volume of potting medium, and soluble nutrients can accumulate if fertilizer is applied too aggressively. Follow the instructions for the fertilizer and plant you are growing rather than automatically using the strongest possible mixture.
A potting mix containing controlled-release fertilizer may provide adequate nutrition during the early growing period. For longer-term growing, a diluted liquid fertilizer can be used when appropriate.
Occasionally watering thoroughly from the top and allowing appropriate drainage can also help prevent excessive salt accumulation, depending on how your planter is constructed.
Is Reusing a Soda Bottle Good for the Environment?
Reusing one bottle will not personally solve the world’s plastic-waste problem, but extending the useful life of an item before disposal is a sensible form of waste reduction.
The larger environmental lesson is even more valuable: many everyday household objects can sometimes be reused before new products are purchased.
When your bottle planter eventually becomes damaged or unusable, clean it and determine whether your local recycling program accepts that type of plastic. Recycling requirements vary among communities.
Safety Tips for This DIY Gardening Project
A few precautions make the project safer and more successful:
- Use only clean bottles that contained food or beverages.
- Never garden in containers that previously held toxic chemicals.
- Wear appropriate hand protection when cutting rigid plastic.
- Cut away from your hands and body.
- Adults should handle cutting and drilling for children’s projects.
- Trim or cover sharp plastic edges.
- Keep standing reservoir water inaccessible to pets and small children.
- Wash edible herbs and vegetables before eating them.
Why This Simple Design Works So Well
The beauty of the DIY soda bottle self-watering planter is that it does not attempt to eliminate natural plant behavior. Instead, it makes water available in a way that roots can access gradually while maintaining an aerated growing medium above the reservoir.
It also addresses a genuine weakness of small container gardens. The less potting mix a container holds, the less water it can store. A bottle reservoir effectively gives the system a second moisture supply without requiring you to saturate the root zone repeatedly.
For beginners, the transparent design has another advantage: you can actually see what is happening. You can watch the reservoir level fall, inspect the wick, observe root development, and modify the design if the potting mix becomes either too wet or too dry.
Practical Experience: What You’ll Learn From Using Bottle Planters
One of the first things people notice after using a homemade self-watering bottle planter is that the project is much less about building the bottle and much more about finding the right moisture balance. Cutting and assembling the planter takes minutes. Fine-tuning it teaches you how plants actually use water.
During the first few days, checking the soil is worthwhile. A common beginner mistake is assuming that a bigger wick must be better. It isn’t necessarily. A thick, highly absorbent wick combined with moisture-retentive potting mix can move more water than a small plant needs. The soil stays dark and wet, and the gardener proudly concludes that the irrigation system is working magnificentlyright up until the plant begins complaining about soggy roots.
A thinner wick often produces better results. With basil, lettuce, parsley, and similar plants, you generally want the growing medium evenly moist rather than permanently saturated.
Another practical discovery is how dramatically location changes water consumption. Put the same two bottle planters in different places and they can behave like completely different systems. A planter beside a bright but protected window may keep water for many days. Move its sibling onto a hot balcony with several hours of direct sunlight and a summer breeze, and the reservoir can drop noticeably faster.
That makes the transparent bottle surprisingly educational. Instead of wondering where all the water went, you can watch the plant use it.
The reservoir also exposes another misconception about self-watering systems: they are not an excuse to stop inspecting plants. They simply reduce the repetitive watering job. You still need to watch for pests, nutrient problems, algae, crowding, and changes in growth.
Algae is probably the most predictable cosmetic issue. Leave clear reservoir water in strong light and sooner or later you may discover that your minimalist DIY planter has developed its own green interior decorating department. Covering the lower bottle with an opaque sleeve usually makes maintenance easier.
Root growth can be interesting too. Vigorous herbs may eventually send roots toward the bottle neck or even into the reservoir. That is a sign that the plant is beginning to outgrow its tiny home. Rather than treating the bottle as a permanent container, think of it as an excellent starter planter for seedlings, herbs, and short-season greens. Mature tomatoes, peppers, cucumbers, and similarly large crops belong in substantially bigger containers.
Perhaps the most useful lesson is that this project makes watering habits visible. With a conventional flowerpot, a beginner may water because it is Monday, because the leaves look sad, or because watering feels productive. With a reservoir, moisture becomes measurable. You can see how quickly water disappears and learn to respond to the plant and environment rather than to a rigid schedule.
The design is also easy to modify. If the soil is too wet, reduce the wick size. If it is too dry, increase wick contact with the potting mix. If algae develops, block the light. If the bottle tips, place it inside a heavier outer pot. Each adjustment teaches something useful about container gardening.
And that may be the best reason to make one. A soda bottle planter is not merely an inexpensive flowerpot. It is a miniature experiment in roots, water, evaporation, growing media, and plant behaviorall constructed from something that might otherwise have been thrown away.
Conclusion
Learning how to make self-watering planters from soda bottles is an easy way to combine container gardening, recycling, and practical plant care in one afternoon project. A clean plastic bottle, a simple wick, lightweight potting mix, and a small reservoir can provide herbs, greens, flowers, and seedlings with a more consistent moisture supply.
The most important rule is balance. A self-watering planter should make moisture available without turning the root zone into a permanent swimming pool. Use an aerated container mix, keep most roots above the reservoir, experiment with wick size, and select plants suited to consistent moisture.
Once the first planter works, making more becomes suspiciously addictive. Yesterday’s collection of empty soda bottles can quickly become tomorrow’s windowsill basil farmand that’s considerably more satisfying than watching another forgotten herb turn into potpourri.

