
Skincare
How to Make Adorable DIY Wine Glass Snow Globes
Jul
There is something wonderfully mischievous about turning an ordinary wine glass upside down and discovering that it suddenly looks like a miniature winter wonderland. Add a tiny tree, a cheerful snowman, a dusting of faux snow, and a glowing tea light on top, and you have a holiday decoration that looks far more expensive than it actually is.
DIY wine glass snow globes are waterless, customizable, and surprisingly beginner-friendly. Unlike traditional liquid-filled snow globes, they do not require glycerin, waterproof seals, or the emotional strength needed to clean glittery water from the kitchen floor. The inverted glass acts as a clear dome, while its foot becomes a convenient platform for a candle or additional decoration.
These homemade snow globes work beautifully as Christmas centerpieces, mantel decorations, hostess gifts, wedding favors, or additions to a holiday village. Better yet, most of the supplies can be found at craft stores, discount stores, thrift shops, or in the mysterious drawer where ribbon goes to reproduce. Similar waterless snow-globe crafts commonly use miniature figurines, faux snow, sturdy bases, and repurposed containers to create compact seasonal scenes.
What Is a Wine Glass Snow Globe?
A wine glass snow globe is a decorative winter scene enclosed beneath an upside-down wine glass. Miniature trees, animals, houses, presents, or holiday characters are attached to a circular base. The rim of the glass is then glued to that base, trapping loose artificial snow and the miniature display beneath the bowl.
When the finished decoration is turned upright, the wine glass stem rises above the globe and the flat foot becomes a small pedestal. Many crafters place an LED tea light on the foot, transforming the project into a glowing snow globe candle holder.
This design is especially convenient because it is a waterless snow globe. There is no liquid to leak, no glitter-to-glycerin ratio to calculate, and no risk of miniature trees slowly floating away as if they have abandoned Christmas entirely.
Supplies for DIY Wine Glass Snow Globes
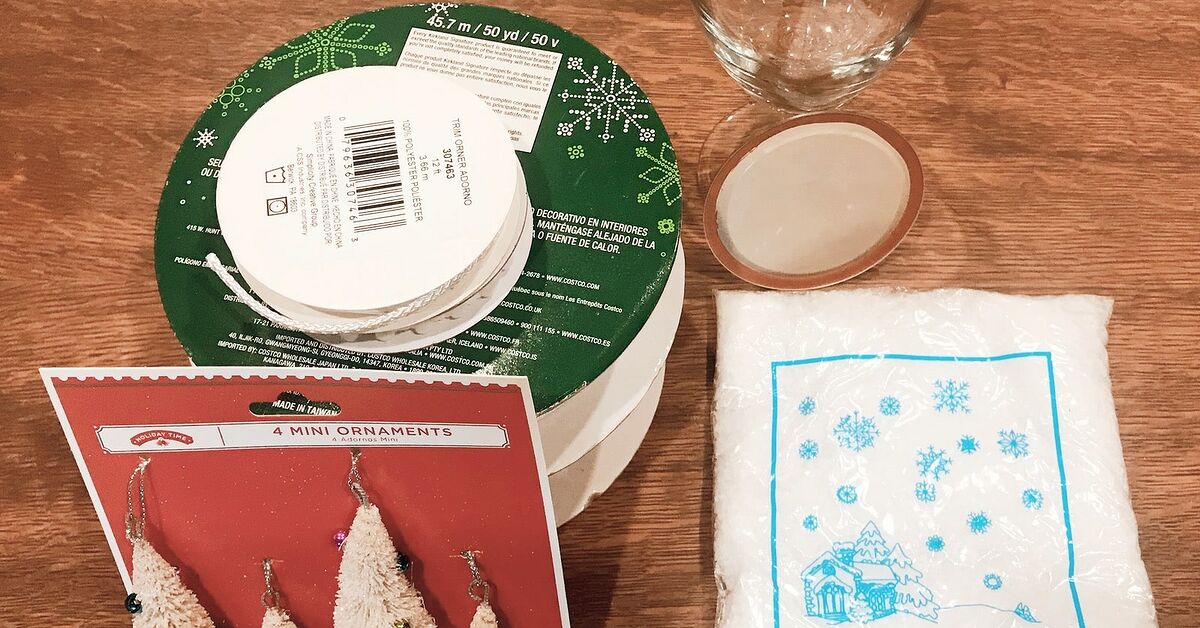
Gather everything before heating the glue gun. Once hot glue is involved, searching through closets for a missing snowman becomes an unnecessarily athletic activity.
Essential Materials
- Clear wine glasses with intact rims and stems
- Thin cardboard, sturdy cardstock, cork sheet, or lightweight craft wood
- Pencil
- Scissors or a craft knife
- Miniature bottlebrush trees
- Small holiday figurines
- Artificial snow, white glitter, foam snowballs, or iridescent flakes
- Hot glue gun and compatible glue sticks
- White acrylic craft paint
- Small paintbrush
- Ribbon, twine, bells, greenery, or decorative trim
- Battery-operated LED tea lights
Optional Decorative Supplies
- Mini wrapped presents
- Tiny wooden houses
- Miniature deer, penguins, snowmen, or woodland animals
- Sequins or confetti snowflakes
- Small pinecones
- Metallic paint pens
- Fine glitter paint
- Small name tags for personalized gifts
- Artificial berries
- Mini string lights designed for crafts
Hot glue products are commonly formulated to bond materials such as glass, cardboard, wood, foam, and plastic. High-temperature glue generally creates a stronger bond on rigid surfaces, while low-temperature glue is better suited to delicate foam, floral materials, and lightweight embellishments. Always follow the instructions supplied with your particular adhesive and glue gun.
How to Make Adorable DIY Wine Glass Snow Globes
Step 1: Inspect and Clean the Wine Glass
Check the glass carefully for chips, cracks, or a loose stem. Do not use damaged glass, even if the crack looks tiny. A holiday craft should inspire compliments, not a dramatic trip for bandages.
Wash the wine glass with warm soapy water, rinse it thoroughly, and allow it to dry. Wipe the rim with rubbing alcohol to remove fingerprints, grease, or residue that could weaken the adhesive bond.
Dollar-store and thrifted wine glasses are excellent for this project, but choose glasses with a wide, stable foot. A broad base provides more room for an LED candle and makes the finished snow globe less likely to tip.
Step 2: Trace and Cut the Circular Base
Place the wine glass upright on your cardboard, cardstock, cork, or thin craft wood. Trace around the rim with a pencil. Cut out the circle slightly outside the traced line so it fully covers the opening.
Test the circle against the rim before decorating it. The base should extend approximately one-sixteenth to one-eighth of an inch beyond the glass. That small overhang gives the glue more surface area and makes it easier to disguise the seam with ribbon or trim.
If you are making several DIY wine glass snow globes, cut one accurate circle and use it as a template for the rest.
Step 3: Paint the Base
Paint both sides of the circular base with white acrylic paint. Two thin coats usually look smoother than one thick coat. Allow the first coat to dry before applying the second.
White creates the illusion of a snowy landscape, but it is not your only choice. Dark green works well for a forest scene, pale blue creates an icy appearance, and metallic gold adds an elegant holiday-table look.
Painting both sides matters because the underside will remain visible after the glass is flipped over. A finished underside makes the project look intentional rather than like Santa ran out of time.
Step 4: Plan the Miniature Winter Scene
Arrange the miniature decorations on the painted circle without gluing them. Place the wine glass over the scene to confirm that everything fits comfortably beneath the bowl.
Keep taller pieces near the center, where the wine glass bowl provides the most height. Position shorter figures toward the edges. Leave a narrow border around the entire circle so the rim can be glued down securely.
A simple arrangement often looks better than a crowded one. One bottlebrush tree, one small figure, and one tiny present can tell a complete story. Five trees, four deer, Santa, a mailbox, and a miniature marching band may create zoning problems.
Step 5: Glue Down the Figurines
Once you are satisfied with the arrangement, glue each miniature to the base. Apply a small amount of adhesive beneath each item and press it firmly into place.
Use only enough glue to secure the piece. Large blobs can remain visible after drying and may prevent loose snow from moving naturally around the scene. If a figurine has a narrow base, reinforce it with a tiny amount of glue behind the object where it will be less noticeable.
Allow the glue to set completely. Drying and curing times vary by adhesive, and stronger bonds may require several hours or a full day. Craft and snow-globe instructions consistently emphasize allowing glued decorations to dry fully before final assembly.
Step 6: Add the Artificial Snow
Place the wine glass on its side or hold it at a gentle angle. Add a small spoonful of artificial snow to the bowl. Start with less than you think you need; you can always add more before sealing the globe.
Fine iridescent flakes create a sparkling effect, while shredded white plastic looks like fluffy snow. Tiny foam balls produce a playful appearance but can be staticky enough to cling to everything, including your sleeves, your cat, and possibly neighboring counties.
For more visual depth, combine two textures. A mixture of soft faux snow and a small pinch of glitter looks more realistic than glitter alone. Avoid overfilling the globe. Too much loose material can bury the figures and make the scene look as though a blizzard has closed all local roads.
Step 7: Seal the Scene Inside the Glass
Apply a continuous bead of hot glue around the rim of the wine glass. Work steadily so the adhesive remains hot enough to bond when the base is attached.
Turn the decorated circle upside down and carefully align it with the rim. The miniatures should now point into the glass. Press the base against the rim without shifting it sideways.
Hold the pieces together until the glue begins to set. Inspect the entire edge and fill any visible gaps with additional glue. A complete seal prevents artificial snow from escaping every time the decoration is moved.
Let the globe rest with the bowl facing upward until the adhesive has hardened. Do not flip it prematurely. Holiday excitement is powerful, but it is not a recognized substitute for curing time.
Step 8: Turn the Glass Over
Once the adhesive has fully set, slowly turn the wine glass upside down. The miniature scene should now sit beneath the bowl, with the stem and foot extending upward.
Gently tap the side of the glass to distribute the artificial snow. This is not a traditional shakeable liquid globe, so avoid aggressive shaking. Think gentle snowfall, not an avalanche documentary.
Step 9: Hide and Decorate the Seam
Wrap ribbon, decorative cord, miniature garland, or twine around the edge where the glass meets the base. Secure the trim with small dots of hot glue.
A narrow satin ribbon creates a polished finish, while jute twine suits farmhouse Christmas decor. Metallic cord works well for glamorous centerpieces. Add a miniature bow, bell, sprig of greenery, or artificial berry cluster at the front.
Step 10: Add an LED Tea Light
Place a battery-operated tea light on the upward-facing foot of the wine glass. The gentle glow reflects through the glass and illuminates the miniature scene below.
Flameless candles are the safest and easiest option, especially when the snow globes are displayed near ribbon, artificial greenery, children, pets, or crowded dinner tables. The U.S. Consumer Product Safety Commission recommends using flameless candles whenever possible and advises keeping burning candles in sight and away from flammable decorations.
Creative Wine Glass Snow Globe Ideas
Classic Christmas Village
Combine a miniature house, a bottlebrush tree, and a tiny lamppost. Use white faux snow with a touch of silver glitter. Finish the edge with red velvet ribbon for a traditional Christmas centerpiece.
Woodland Winter Scene
Place a miniature deer beside a small pine tree and add a tiny pinecone. Use jute twine around the base and a wooden snowflake embellishment for a rustic look.
Snowman Family Globe
Create a small group of snowmen representing members of your household. Add name tags to the base or paint initials on miniature scarves. Personalized snow globes make charming handmade Christmas gifts.
Elegant White-and-Gold Globe
Use white trees, gold stars, pearl-like snowballs, and a cream satin ribbon. Place the finished globes along a table runner with greenery for an upscale holiday dinner arrangement.
Whimsical Candyland Scene
Fill the globe with miniature candy canes, gumdrop-style ornaments, pastel trees, and iridescent snow. Pink ribbon around the base completes the playful theme.
Winter Wedding Centerpiece
Use a miniature white chapel, silver trees, and the couple’s initials. A set of matching wine glass snow globe candle holders can decorate reception tables without consuming much space.
Non-Christmas Winter Decor
Skip Santa and red ribbon in favor of polar bears, snowy owls, bare trees, and soft blue accents. The result can remain on display throughout January and February without looking like the Christmas decorations missed their ride back to the attic.
Snow-globe projects are particularly adaptable because miniature scenes can feature traditional holiday motifs, woodland themes, family photos, colorful trees, unusual characters, or year-round designs.
Common Problems and Easy Fixes
The Artificial Snow Is Escaping
Inspect the seam for small gaps. Apply another narrow bead of glue around the outside edge, then cover the repair with ribbon or decorative trim.
The Figurines Keep Falling Over
The adhesive may not be suitable for both the miniature and the base. Remove loose glue, clean the surfaces, and try a stronger craft adhesive formulated for the materials involved. Give it the full recommended curing time before assembling the globe.
The Scene Looks Buried
Too much artificial snow is the usual culprit. Before sealing the glass, remove some with a spoon. If the globe has already been sealed, opening it may damage the base. Consider adding taller trees or figures in your next version.
The Cardboard Base Is Warping
Thin paper may absorb moisture from paint or glue. Use heavy cardstock, chipboard, cork, foam board, or a thin wooden circle. Paint both sides and allow each coat to dry on a flat surface.
The Glass Looks Cloudy
Clean the inside of the wine glass before adding snow. After sealing the globe, use a microfiber cloth on the exterior. Avoid spraying cleaner directly onto ribbon, painted cardboard, or decorative trim.
The Finished Globe Wobbles
Check whether the glass foot is flat and whether the LED candle is centered. Attach small transparent silicone bumpers to the foot if the decoration will be displayed on a slick table.
How to Display Your Homemade Snow Globes
Group three wine glass snow globes of different heights to create an easy Christmas centerpiece. Use glasses with varying bowl shapes, but repeat the same ribbon or color palette so the collection feels coordinated.
For a dining table, place the globes on a narrow runner with faux evergreen branches and battery-powered fairy lights. Keep the arrangement low enough that guests can see one another. Nobody wants to spend dinner leaning around a decorative forest to request the potatoes.
Wine glass snow globes also look attractive on:
- Fireplace mantels
- Entryway tables
- Bookshelves
- Holiday dessert tables
- Kitchen islands
- Office reception desks
- Winter wedding tables
- Guest bedroom nightstands
When giving one as a gift, wrap it in tissue paper and place it inside a sturdy box with padding around the bowl, stem, and foot. Label the package as fragile and include a battery-operated tea light.
Safety Tips for This Christmas Craft
- Wear eye protection when cutting rigid cardboard, cork, or thin wood with a craft knife.
- Place the glass on a padded work surface so it cannot roll or chip.
- Keep hot glue guns away from children unless an adult is handling the tool.
- Unplug the glue gun after use and allow it to cool completely before storage.
- Never use a cracked or chipped wine glass.
- Keep loose glitter and tiny figurines away from babies and young children.
- Use LED tea lights instead of open flames whenever possible.
- Do not place the decoration in a dishwasher or submerge it in water.
If you choose to use a real tea light, place the globe on a stable, heat-resistant surface, keep the flame within sight, and maintain generous clearance from ribbon, greenery, curtains, paper, and other combustible materials. A sturdy candle holder and a minimum distance of 12 inches from flammable objects are recommended candle-safety practices.
How to Store Wine Glass Snow Globes
Remove the LED tea light and battery before seasonal storage. Dust the glass with a soft, dry cloth and inspect the glued seam for loose areas.
Wrap each snow globe separately in acid-free tissue paper or soft packing paper. Add extra protection around the stem, which is the most vulnerable part. Store the globes upright in a rigid plastic bin with dividers or crumpled paper preventing movement.
Avoid hot attics, damp basements, and locations with extreme temperature changes. Heat can soften some adhesives, while moisture can warp cardboard bases or damage miniature decorations.
Practical Experience Notes: What You Learn While Making Wine Glass Snow Globes
The first practical lesson with this project is that the smallest scene is rarely the least interesting. It is tempting to purchase an entire village of tiny decorations and squeeze every resident beneath one wine glass. In practice, a carefully positioned tree and one expressive figurine usually produce a clearer, more charming design. Empty space helps viewers recognize the scene instead of staring through the glass and wondering whether a miniature yard sale is taking place.
Dry fitting is the step most likely to be skipped and the one most likely to prevent frustration. Miniatures that appear perfectly sized on the craft-store shelf can suddenly become enormous when placed beneath a curved wine glass. A tree may fit near the center but hit the glass when moved toward the edge. Testing the entire arrangement under the bowl before applying glue saves both time and a surprising amount of muttering.
The choice of artificial snow also changes the finished result more than expected. Very fine glitter reflects light beautifully, but it can make the display look flat when used alone. Fluffy faux snow adds volume but may hide small details. Combining mostly soft snow with a tiny pinch of iridescent glitter tends to create the best balance. The word “tiny” deserves emphasis. Glitter has no understanding of moderation.
Another common discovery is that a slightly oversized base is easier to work with than a perfectly flush circle. The narrow overhang provides room for glue and creates a ledge for ribbon. Once the seam is covered, the base looks polished and deliberate. A circle that is too small, by contrast, can leave gaps through which artificial snow escapes in festive little drifts.
Cardboard quality matters. Lightweight cereal-box cardboard may work for a quick children’s activity, but it can bend after being painted. Chipboard, heavy cardstock, cork, or a thin wooden disc creates a sturdier finished decoration. When cardboard is used, painting both sides helps balance moisture and reduce curling.
Patience during drying is another major factor. Figurines that feel secure after five minutes can still shift when the base is turned upside down. Allowing adhesive to cure according to the manufacturer’s directions greatly reduces failed scenes. It is much easier to wait overnight than to watch a tiny reindeer fall face-first into a snowbank after the glass has been sealed.
Working in batches makes the project faster. Trace and cut all bases first, paint them together, arrange every miniature scene, and then complete the gluing stage. An assembly-line approach is especially useful when making holiday favors or gifts. Even so, small differences in tree placement, ribbon, or figurines keep each globe looking handmade rather than mass-produced.
Finally, LED tea lights are not merely a safety compromise. They are often the better design choice. Their cool light can remain on for hours, they do not drip wax onto the glass foot, and they can be used near ribbons and artificial greenery with far less concern. Warm-white LEDs create a traditional candlelike glow, while cool-white lights complement icy blue or silver scenes.
The most successful DIY wine glass snow globes usually share three qualities: a simple story, a clean seal, and enough restraint to let the miniature scene breathe. Get those right, and an inexpensive wine glass becomes a decoration that guests will assume required specialized tools, advanced training, and at least one elf.
Conclusion
Learning how to make adorable DIY wine glass snow globes is an easy way to transform inexpensive materials into memorable holiday decor. The project requires no liquid, no specialized snow-globe container, and no advanced crafting experience. With a clean wine glass, a strong base, a few miniatures, artificial snow, and reliable adhesive, you can create a glowing winter scene in an afternoon.
Customize each globe to match your Christmas color palette, personalize it for someone special, or make a coordinated set for your holiday table. The process is simple enough for beginners but flexible enough to keep experienced crafters entertained. Just remember to measure before gluing, use less snow than your inner blizzard enthusiast demands, and allow the adhesive to cure completely.
The result is charming, reusable, and delightfully unexpecteda tiny winter world sitting beneath a wine glass, proving once again that holiday magic often begins with turning an ordinary object upside down.

