
Beauty Unlocked
How to Make a DIY Rain Barrel in 5 Easy Steps
Aug
If you’ve ever watched rain pour off your roof like it’s trying to speed-run straight into the storm drain, congratulations:
you’ve witnessed a free resource doing a dramatic exit. A DIY rain barrel helps you capture that runoff and reuse it for
gardens, lawns, and other non-drinking purposeswhile also reducing the amount of stormwater rushing into streets and streams.
It’s one of the rare home projects that’s inexpensive, eco-friendly, and mildly addictive (because once you build one, you’ll start
eyeballing every downspout like, “You… could be more useful.”).
This guide breaks it down into 5 genuinely doable steps, plus real-world tips that prevent the classic mistakes:
leaky fittings, sad water pressure, and accidentally hosting a mosquito timeshare.
Quick Safety & Common-Sense Notes (Read This, Future You Will Thank You)
-
Rain barrel water is non-potable. Don’t drink it, cook with it, or use it for brushing teeth. Rooftops and gutters can add
debris and contaminants, so keep it for landscaping and similar uses. -
Check local rules. Some cities/HOAs have placement requirements, mosquito rules, or overflow requirements. Most places allow rain barrels,
but it’s smart to confirm. - Plan the overflow. A full barrel must send excess water somewhere safeaway from your foundation and away from places that puddle.
- Kid/pet safety matters. Use a tight lid and stable stand so nobody can tip it or access open water.
What You’ll Need (Simple, Hardware-Store Friendly)
Most rain barrels are built from a sturdy plastic drum (often 55 gallons) plus a spigot, screened inlet, and an overflow outlet.
Keep the parts list practicaland aim for a food-grade barrel if possible.
Materials
- Barrel: 50–55 gallon polyethylene drum (food-grade recommended)
- Spigot assembly: hose bib/spigot + bulkhead fitting (or threaded fittings designed for barrels)
- Overflow fitting: bulkhead fitting sized for a hose or PVC (many DIY builds place it near the top)
- Screening: fine mesh screen for the inlet (and any openings)
- Sealants: Teflon tape + silicone sealant (for watertight threads and edges)
- Downspout connection: downspout elbow or a downspout diverter kit (optional but very convenient)
- Hose: short garden hose for watering + optional hose to direct overflow
- Stand materials: cinder blocks/bricks or a sturdy platform (strong enough for a very heavy barrel)
Tools
- Drill + hole saw bits (or spade bits) sized to your bulkhead fittings
- Jigsaw (optional) for larger inlet cuts
- Utility knife, marker, tape measure, level
- Wrench/pliers
- Safety glasses (because eyeballs are not replaceable parts)
Step 1: Pick the Perfect Spot (And Do 30 Seconds of Math)
Choose a downspout that’s close to the area you want to water. You’ll also want level ground and enough clearance to elevate the barrel.
Elevation isn’t just for looksit improves water pressure at the hose.
Placement checklist
- Stable + level: Your barrel should sit flat and not wobble.
- Near the garden: Long hoses are annoying. Short hoses are happiness.
- Safe overflow path: Overflow should go away from your foundation and away from spots that puddle.
- Room to access the spigot: You need space to attach a hose and turn the valve.
How fast will it fill? (Spoiler: faster than you think)
A widely used rule of thumb: Gallons collected = Roof area (sq ft) × Rainfall (inches) × 0.623.
Translation: even a modest roof section can fill a 55-gallon barrel quickly.
Example: If your downspout drains about 200 sq ft of roof, then a 1-inch rain can yield:
200 × 1 × 0.623 = 124.6 gallons. That’s more than two 55-gallon barrelsso yes, you need an overflow plan.
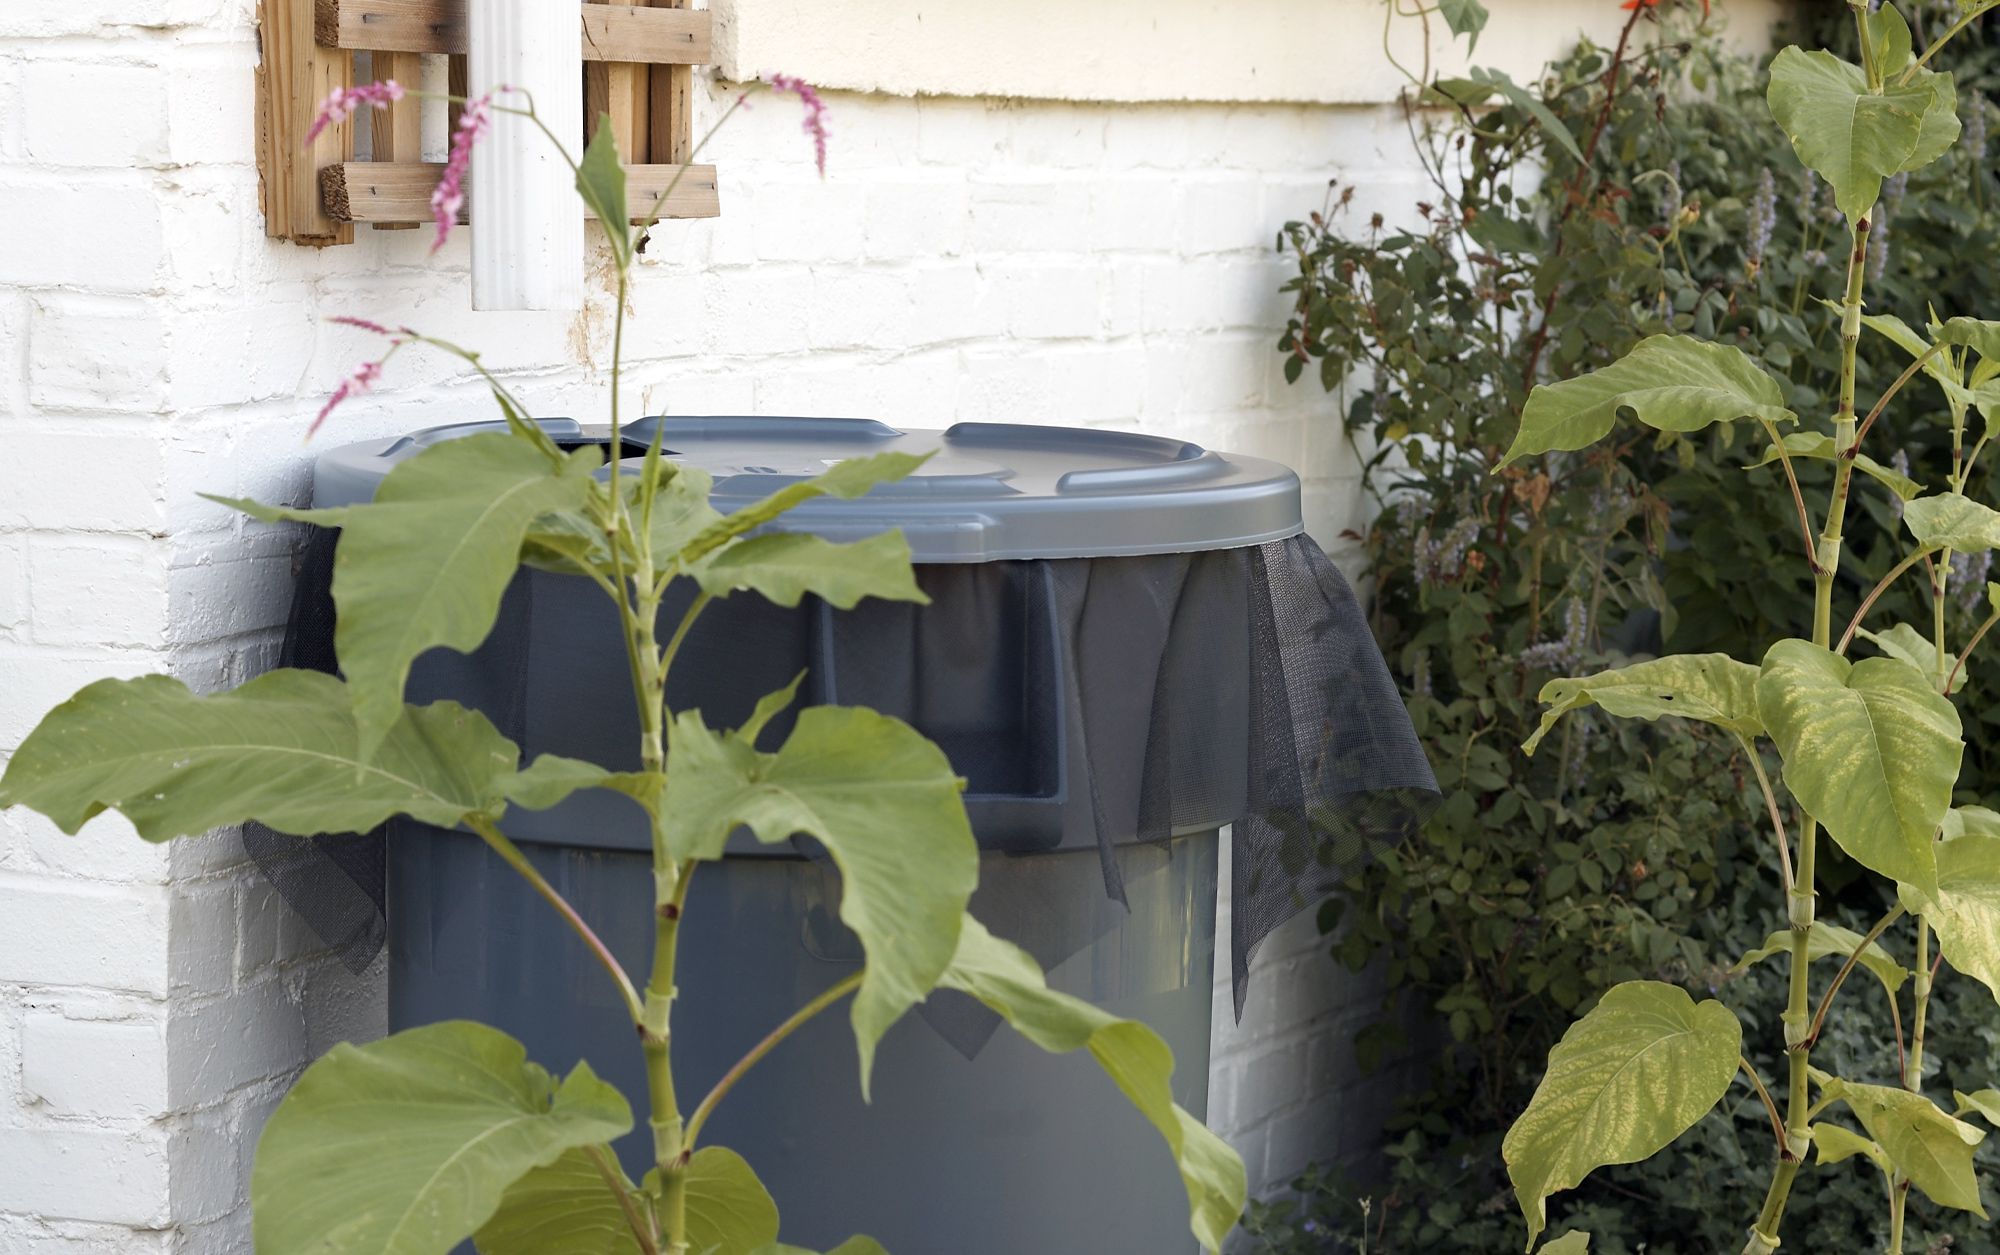
Step 2: Create a Screened Inlet (Keep Leaves Out, Keep Mosquitoes Out)
The inlet is where roof water enters the barrel. Your mission: let water in, keep debris and insects out.
Many DIY designs cut an opening on top and attach screen securely.
How to do it
- Mark the inlet area on the top of the barrel.
- Cut the opening (hole saw for a round cut, jigsaw for a larger access opening).
-
Attach the screen over the opening from the inside or outside (depending on your lid design),
and seal edges so there are no gaps. The goal is “bug-proof,” not “bug-adjacent.” - Make it cleanable: You’ll remove leaves and grit from this screen after storms.
Pro tip: Add a simple “pre-filter”
If your gutters shed a lot of gunk, consider a gutter guard or downspout screen upstream. Less debris in the barrel means
less funk later (and fewer clogs at the spigot).
Step 3: Install the Spigot (The Part That Makes It Feel Like a Real Project)
The spigot lets you fill watering cans or connect a hose. It should be installed a few inches above the bottom so sediment can settle
below itotherwise, you’ll be watering with “roof tea.”
How to do it
- Mark the spigot hole about 2–4 inches above the barrel bottom (high enough to fit the bulkhead and washers).
- Drill the hole to match your bulkhead fitting size (follow the fitting instructions).
-
Install the bulkhead fitting (typically: fitting + gasket inside/outside as directed).
Use Teflon tape on threaded parts and a small bead of silicone if needed for watertight sealing. - Thread in the spigot and tighten snuglydon’t Hulk-smash it and crack the plastic.
Optional upgrade: Add a short internal elbow
Some builders point the inside intake slightly upward so the spigot draws cleaner water from above the sediment layer.
Not required, but it can reduce clogging if your roof sheds grit.
Step 4: Add an Overflow (Because Rain Does Not Respect Your Schedule)
Overflow is non-negotiable. Once the barrel fills, excess water must exit safelyideally back to the downspout system or to a splash block
that carries water away from your foundation.
How to do it
- Mark the overflow hole near the top sidewall (usually a couple inches below the rim).
- Drill the hole to match your overflow fitting/bulkhead.
- Install the overflow fitting with gaskets/washers as directed; seal threads properly.
-
Attach an overflow hose (or PVC) and route it:
- away from the house foundation,
- to a splash block, rain garden, or safe drainage area,
- or into a second barrel (daisy-chain style) if you’re feeling ambitious.
Connecting the downspout: elbow vs. diverter
Elbow method: Cut the downspout and aim it into the screened inlet. Simple and low-cost.
Diverter method: Install a downspout diverter that sends water to the barrel and automatically returns overflow to the downspout.
This can reduce splashing and make the system tidier.
Step 5: Set It Up, Test It, Maintain It (The “Don’t Skip This” Step)
Once everything is assembled, it’s time for a controlled testbecause discovering leaks during a thunderstorm is a hobby nobody wants.
Setup and test
- Build a solid stand using cinder blocks/bricks or a sturdy platform. Make sure it’s level and can handle weight.
- Place the barrel on the stand beneath the downspout connection.
-
Test with a hose by running water into the inlet:
- Check for leaks around the spigot and overflow fittings.
- Confirm overflow water exits exactly where you planned.
- Open the spigot and verify flow into a watering can or hose.
Mosquito prevention (a.k.a. “No, you may not run a free insect daycare”)
- Keep all openings screened and sealed. Even small gaps invite mosquitoes.
- Fix leaks and puddles around the barrelstanding water nearby can breed mosquitoes.
-
If a container can’t be dumped weekly or fully sealed, consider a labeled larvicide option such as
Bti mosquito dunks/bits used according to instructions.
Cleaning and seasonal care
- After big storms: remove leaves and grit from the inlet screen.
- Every so often: drain and rinse out sediment (frequency depends on roof/gutter debris).
- Freezing climates: disconnect and drain before hard freezes. Water expands when frozen, and barrels dislike becoming ice sculptures.
Common DIY Rain Barrel Mistakes (And How to Avoid Them)
1) No overflow plan
Without overflow, your barrel becomes a “water feature” that conveniently pours next to your foundation. Install overflow, route it safely, and sleep better.
2) Weak stand = scary physics
A full 55-gallon barrel is extremely heavy. Use a strong, level baseno wobbly stacks of random yard bricks you found behind the shed.
3) Expecting fire-hose pressure
Rain barrels are gravity-fed. Elevation helps, but it’s not municipal water pressure. Use it for watering cans, gentle hose flow, or drip irrigation designed for low pressure.
4) Forgetting screens and seals
A screened inlet and sealed fittings help prevent mosquitoes and reduce debris. If you can see daylight through a gap, a mosquito can throw a party through it.
Conclusion: Your Roof Can Be a Water Source, Not Just a Hat for Your House
A DIY rain barrel is one of the easiest ways to dip a toe into rainwater harvesting: you capture runoff, cut down on stormwater, and keep your plants happier during dry stretches.
Build it thoughtfullyscreen the inlet, seal the fittings, elevate the barrel, and manage overflowand you’ll have a system that’s simple, durable, and surprisingly satisfying.
Bonus: Real-World Rain Barrel “Experience Lessons” (About )
Here’s the part most people only learn after their first few storms: the “hard” part of rain barrels isn’t building themit’s living with them.
The barrel is basically a tiny, polite water system that only behaves if you treat it like one.
First surprise: it fills ridiculously fast. People install a single 55-gallon barrel and assume it’ll last weeks. Then a one-inch rain shows up and
the roof casually produces hundreds of gallons of runoff. That’s why veteran rain-barrel folks obsess over overflow routing. When overflow is pointed to a splash block,
rain garden, or a safe drainage area, it’s a non-event. When overflow dumps next to the foundation (or into a low spot that puddles), you’ve invented a new chore.
Second surprise: water pressure is a mood. Gravity-fed barrels deliver “gentle encouragement,” not “power wash the driveway.”
Most DIYers end up loving watering cans because they’re predictable. If you want better hose flow, the simplest improvement is elevation: a stable stand that lifts the barrel
high enough to create more head pressure. Just remember that higher also means heavier consequences if the stand is weakso upgrade sturdiness before you upgrade height.
Third surprise: the screen is your best friend… until you ignore it. A screened inlet stops leaves, seeds, and mystery roof grit from dropping into your stored water.
But screens clog. After a big storm, many people discover the barrel didn’t fill well because the screen turned into a leaf pancake. The fix is boring but effective:
quick inspections after major rain, a brush-off, and you’re back in business. If your area drops lots of debris, adding gutter guards or a downspout pre-filter can reduce maintenance.
Fourth surprise: mosquito control is not optional. Even well-built systems can develop tiny gaps around lids, screens, or fittings.
People who have the smoothest experience treat “mosquito-proofing” like a checklist: tight lid, intact screens, no puddles nearby, and quick repairs for cracks or leaks.
In areas with heavy mosquito pressure, some homeowners use labeled larvicide products (like Bti) according to directions for standing water that can’t be dumped weekly.
The goal is simple: the only thing you want thriving near your barrel is your garden.
Final surprise: you’ll start thinking in rainfall. After you build a rain barrel, weather apps become less “Do I need a jacket?” and more
“How many gallons is my roof about to donate?” You’ll notice how much water a “small” storm produces, and you’ll get better at timing your watering.
That little behavior shiftusing stored rain first, then supplementing only when neededis where many people see the practical payoff: healthier plants,
less runoff, and a satisfying sense that your downspout is finally pulling its weight.

