Body Care
How to Freeze Dutch Apple Pies
May
There are few kitchen victories sweeter than pulling a Dutch apple pie from the freezer and realizing dessert is already halfway done. No last-minute flour storm. No frantic apple peeling. No mysterious panic when guests say, “We brought ice cream!” and you suddenly remember you promised pie. Freezing Dutch apple pies is one of the smartest ways to preserve homemade flavor, save holiday prep time, and keep a buttery crumb-topped dessert ready for any occasion.
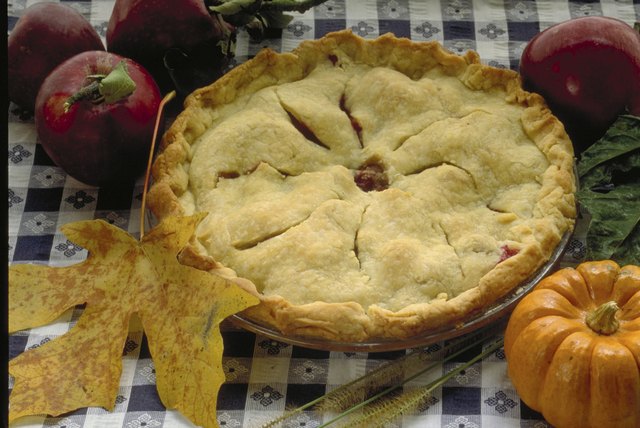
A Dutch apple pie is especially freezer-friendly because it combines a sturdy pastry crust, spiced apple filling, and a crumb topping made with flour, butter, sugar, and sometimes oats or nuts. Unlike delicate cream pies or custard pies, a classic fruit-based Dutch apple pie can handle freezing beautifully when wrapped correctly and baked or reheated with care. The trick is knowing when to freeze it, how to protect the topping, and how to avoid the dreaded soggy bottom crust. Nobody invites a soggy bottom to Thanksgiving.
This guide explains how to freeze Dutch apple pies before baking, after baking, and even as separate components. You will also learn how long frozen apple pie lasts, how to bake it from frozen, how to thaw it safely, and how to keep that crumb topping crisp instead of sad and sandy.
Can You Freeze Dutch Apple Pie?
Yes, you can freeze Dutch apple pie, and in many cases, freezing it unbaked gives the best final texture. An unbaked frozen Dutch apple pie often tastes fresher because the apples cook for the first time when you finally bake the pie. The crust has a better chance of becoming crisp, the filling bubbles properly, and the topping browns in the oven instead of drying out during storage.
You can also freeze a fully baked Dutch apple pie. This method is convenient if you already baked the pie or want a ready-to-reheat dessert. However, baked pies are slightly more likely to lose crispness because the crust and crumb topping have already absorbed moisture from the filling. That does not mean baked frozen pie is bad. It simply needs a little oven refresh to wake everything back up.
Freezing Unbaked vs. Baked Dutch Apple Pie
Best Option: Freeze the Pie Unbaked
If you are planning ahead, freeze your Dutch apple pie before baking. This method gives you the closest result to a freshly made pie. Assemble the crust, apple filling, and crumb topping, freeze until firm, wrap tightly, and bake straight from the freezer or after a short refrigerator thaw depending on your recipe and pie dish.
Freezing unbaked pie works especially well for holidays because you can prepare several pies days or weeks ahead. When the big meal arrives, your dessert plan is basically: unwrap, bake, accept compliments, pretend it was difficult.
Good Option: Freeze the Pie After Baking
A baked Dutch apple pie can be frozen once it has cooled completely. This is important. If you wrap a warm pie, steam gets trapped inside the packaging and turns into ice crystals. Later, those ice crystals melt into the crust and topping. Translation: your pie becomes less “bakery window” and more “forgotten lunchbox.”
To freeze baked Dutch apple pie successfully, cool it for several hours, freeze it uncovered until firm, then wrap it in plastic wrap and foil. Reheat it in the oven, not the microwave, if you want the topping and crust to regain some crunch.
What You Need Before Freezing
Before freezing Dutch apple pie, gather the right supplies. Good wrapping matters almost as much as the recipe itself. Freezer air is dry, and it loves stealing flavor from baked goods. It also causes freezer burn, which can make pie taste stale even when it is technically safe to eat.
- A freezer-safe pie plate, preferably metal or disposable aluminum
- Plastic wrap or freezer-safe wrap
- Heavy-duty aluminum foil
- A large freezer bag, if the pie fits
- A baking sheet for flash freezing
- A label with the date and baking instructions
Metal pie plates are ideal because they handle temperature changes well and help conduct heat to the bottom crust. Be careful with glass or ceramic pie plates when baking directly from frozen. Sudden temperature changes can cause some dishes to crack. If you use glass, check that it is freezer-to-oven safe and follow the manufacturer’s instructions.
How to Freeze an Unbaked Dutch Apple Pie
Freezing an unbaked Dutch apple pie is simple, but the order matters. Think of it as putting your pie into a tiny winter coat. A stylish, practical winter coat. Preferably one that smells like cinnamon.
Step 1: Prepare the Crust
Roll out your pie dough and fit it into the pie plate. Crimp the edges, then chill the crust while you prepare the filling. A cold crust freezes better and keeps its shape. If your kitchen is warm, chill the crust for 15 to 30 minutes before filling.
Step 2: Make the Apple Filling
Use firm baking apples such as Granny Smith, Honeycrisp, Braeburn, Jonagold, or Golden Delicious. A mix of tart and sweet apples gives the filling better flavor and texture. Slice the apples evenly so they cook at the same pace. Toss them with sugar, cinnamon, lemon juice, and a thickener such as flour, cornstarch, tapioca starch, or Clear Jel if your recipe calls for it.
Do not overload the filling with liquid. Apples release moisture as they freeze and bake, so a balanced thickener is important. If your apples are extremely juicy, let the filling sit for 10 to 15 minutes, then drain off excess liquid before adding it to the crust.
Step 3: Add the Crumb Topping
Dutch apple pie gets its signature charm from the crumb topping. Combine flour, brown sugar, granulated sugar, cinnamon, salt, and cold butter until the mixture forms clumps. Sprinkle it evenly over the apples. For freezing, slightly larger crumbs are better than a sandy topping because they hold their texture longer.
Step 4: Flash Freeze the Pie
Place the assembled pie uncovered on a baking sheet and freeze until solid, usually 3 to 6 hours. Flash freezing firms up the crust, filling, and topping so the wrap does not crush the pie. It also helps preserve the shape of the crumb topping.
Step 5: Wrap It Tightly
Once the pie is frozen solid, wrap it in two layers of plastic wrap, followed by a layer of heavy-duty foil. If it fits, slide the wrapped pie into a large freezer bag and press out as much air as possible. Label it with the date, pie type, and baking directions.
Step 6: Store It Flat
Place the pie on a flat freezer shelf. Avoid stacking heavy containers on top unless you enjoy crumb topping that looks like it lost a wrestling match. Once fully frozen and protected, the pie can be stored more flexibly, but flat storage is best.
How to Freeze a Baked Dutch Apple Pie
Freezing a baked Dutch apple pie is just as useful, especially when you have leftovers or want to make dessert ahead for a party. The key is patience. Let the pie cool completely before wrapping. For a deep-dish pie, this can take 4 hours or more.
- Bake the Dutch apple pie according to your recipe.
- Cool it completely at room temperature.
- Place the cooled pie in the freezer uncovered until firm.
- Wrap tightly in plastic wrap.
- Add a layer of heavy-duty foil.
- Label and freeze.
For best quality, use baked frozen Dutch apple pie within 2 to 4 months. It may remain safe longer if kept constantly frozen at 0°F, but quality gradually declines. Butter can pick up freezer odors, and apples may soften over time.
How Long Can You Freeze Dutch Apple Pie?
For best flavor and texture, freeze unbaked Dutch apple pie for up to 3 months. A baked Dutch apple pie is usually best within 2 to 4 months. Some sources allow longer freezer times for fruit pies, but home freezers are opened frequently, which causes temperature swings. The shorter window gives you a better chance of serving pie that tastes fresh instead of “mystery dessert from the back shelf.”
Always label your pie. A frozen Dutch apple pie can look surprisingly similar to a frozen peach crumb pie, chicken pot pie, or experimental casserole from three Tuesdays ago. Labels are cheaper than dinner-table confusion.
How to Bake a Frozen Unbaked Dutch Apple Pie
Many unbaked fruit pies can go from freezer to oven without thawing. For Dutch apple pie, the crumb topping needs a little extra attention because it can brown faster than the apples soften. A foil shield is your best friend.
Basic Frozen Baking Method
- Preheat the oven to 425°F.
- Remove all plastic wrap and foil from the frozen pie.
- Place the pie on a parchment-lined baking sheet.
- Cover the top loosely with foil to protect the crumb topping.
- Bake for 15 to 20 minutes at 425°F.
- Reduce the oven temperature to 375°F.
- Continue baking for 45 to 70 minutes, removing the foil near the end.
- Bake until the filling bubbles thickly and the topping is golden brown.
The exact time depends on the depth of the pie, the type of apples, the thickness of the slices, and the pie plate. A frozen deep-dish Dutch apple pie may take much longer than a shallow 9-inch pie. The filling should bubble in the center, not just around the edges. Bubbling is a sign that the thickener has activated and the apples are fully hot.
How to Reheat a Frozen Baked Dutch Apple Pie
If your Dutch apple pie was baked before freezing, you are not trying to bake raw apples. You are warming the pie and re-crisping the crust and topping.
- Thaw the wrapped pie in the refrigerator overnight, if time allows.
- Preheat the oven to 350°F.
- Remove wrapping and place the pie on a baking sheet.
- Cover loosely with foil for the first part of reheating.
- Warm for 25 to 40 minutes, depending on size.
- Remove foil for the last 10 minutes to crisp the topping.
You can reheat from frozen, but it will take longer. Keep the pie loosely covered at first so the topping does not burn before the center warms. Avoid microwaving a whole Dutch apple pie unless your dessert goal is “warm apples under a soft granola blanket.” The oven gives much better texture.
How to Freeze Dutch Apple Pie Filling Separately
If freezer space is tight, freeze the apple filling separately. This is also helpful if you want to decide later between pie, crisp, cobbler, turnovers, or spooning warm apple filling over pancakes like a breakfast genius.
To freeze the filling, prepare the apples with sugar, spices, lemon juice, and thickener. Line a pie plate with parchment or plastic wrap, add the filling, and freeze until firm. Once solid, lift out the frozen filling “disk,” wrap it tightly, and place it in a freezer bag. When you are ready to bake, place the frozen filling into a prepared crust, add crumb topping, and bake with extra time.
This method frees up your pie plate and keeps the filling shaped for easy assembly later. It is especially useful during apple season when you have more apples than counter space and your fruit bowl has become a small orchard.
Tips for Preventing a Soggy Crust
A soggy crust is the main fear when freezing apple pie. Fortunately, a few smart habits make a big difference.
Use a Cold Crust
Cold dough holds its shape and resists soaking up juice too quickly. Chill the crust before filling and freeze the assembled pie before wrapping.
Control Apple Moisture
If your apples release a lot of juice after mixing with sugar, drain some liquid before filling the crust. Too much loose juice can overwhelm the thickener and soften the bottom crust.
Choose the Right Apples
Firm apples are better for freezing because they keep structure during baking. Granny Smith, Honeycrisp, Braeburn, Pink Lady, and Golden Delicious are reliable choices. Avoid very soft or overripe apples unless you want filling that leans toward applesauce.
Bake on a Preheated Sheet Pan
A hot baking sheet helps the bottom crust start cooking quickly. It also catches bubbling juices, which is important unless you enjoy cleaning caramelized apple lava from the oven floor.
Let the Pie Cool Before Slicing
After baking, let the pie cool for at least 3 hours. This gives the filling time to set. Cutting too soon releases the juices and can make even a well-baked pie seem runny.
Common Mistakes When Freezing Dutch Apple Pie
Wrapping Before the Pie Is Frozen
If you wrap an unbaked pie while the topping is still soft, the wrap can crush the crumbs. Flash freeze first, then wrap.
Leaving Air Gaps
Air causes freezer burn. Wrap tightly and use foil or a freezer bag for extra protection.
Forgetting the Label
Write the date and baking temperature on the package. Future you will not remember. Future you will be busy looking for the whipped cream.
Using Too Much Spice
Freezing can slightly dull some flavors, but that does not mean you should triple the cinnamon. Keep the spice balanced so the apples still taste like apples.
Skipping the Foil Shield
Dutch crumb topping browns quickly. Use foil early in baking and remove it near the end for a golden finish.
Food Safety Notes for Frozen Dutch Apple Pie
A classic Dutch apple pie made with fruit, sugar, flour, butter, and spices is generally easier to store than pies made with custard, cream, eggs, or dairy fillings. However, recipes vary. If your Dutch apple pie includes sour cream, custard, cream cheese, eggs, or a dairy-based layer, refrigerate it promptly and follow stricter storage rules.
Keep your freezer at 0°F or below for best safety and quality. Frozen food kept continuously at that temperature remains safe for a long time, but quality is best within recommended storage windows. If a pie has thawed for an unknown length of time, smells off, shows mold, or has an unusual texture, throw it out. Pie is wonderful, but no dessert is worth a food-safety gamble.
Experience Notes: What Freezing Dutch Apple Pies Teaches You Over Time
After freezing more Dutch apple pies than any reasonable person needs to admit publicly, one lesson becomes clear: the freezer rewards calm bakers. Rushing is the enemy. The best pies are the ones that are cooled properly, frozen firmly, wrapped tightly, and labeled clearly. The pie does not need drama. It needs structure, cold air, and a little respect.
One practical experience is that unbaked pies almost always feel more “freshly made” after baking. The apples release their juices in the oven, the crumb topping browns naturally, and the kitchen fills with that cinnamon-butter smell that makes everyone wander in pretending they need a glass of water. Baked frozen pies are still useful, especially for leftovers, but they rarely have the same crispness as a pie baked for the first time.
Another lesson is that the crumb topping deserves special treatment. Tiny crumbs can become dense after freezing, while larger buttery clumps bake into a better crunchy topping. When making the crumble, squeeze some of the mixture together with your fingers before sprinkling it over the apples. Those bigger clusters survive freezing better and create the classic Dutch apple pie texture people love.
Pie plates also matter more than expected. Metal pans tend to give the most dependable results, especially when baking from frozen. They heat quickly, help the bottom crust brown, and do not carry the same thermal-shock worry as some glass or ceramic dishes. Disposable aluminum pans are handy for gifting because nobody has to return your favorite pie plate, which, let us be honest, they might not.
One small but powerful habit is freezing the pie uncovered before wrapping. It may feel like an extra step, but it prevents the topping from sticking to the plastic wrap and keeps the crust edges intact. A fully frozen pie is much easier to package neatly. It also looks better when unwrapped, and presentation counts. Even rustic pie deserves dignity.
Finally, the best serving experience comes from planning the bake time generously. Frozen Dutch apple pie often takes longer than expected, particularly if it is deep-dish. Do not judge doneness only by the topping color. Look for bubbling filling in the center and tender apples when tested with a knife. If the topping browns too early, cover it loosely with foil and keep baking. The pie is done when the apples are soft, the juices are thick, and the kitchen smells like you made excellent life choices.
Conclusion
Freezing Dutch apple pies is one of the easiest ways to enjoy homemade dessert without doing all the work on serving day. For the best texture, freeze the pie unbaked, wrap it well, and bake it from frozen with a foil shield to protect the crumb topping. If the pie is already baked, cool it completely, freeze it solid, wrap it tightly, and reheat it in the oven to restore crispness.
The formula is simple: firm apples, controlled moisture, cold crust, airtight wrapping, and patient baking. Follow those steps and your freezer becomes a dessert vault stocked with buttery, cinnamon-spiced confidence. Whether you are preparing for Thanksgiving, saving apple-season abundance, or simply protecting yourself from future dessert emergencies, a frozen Dutch apple pie is always a smart plan.
