
Hair Care
Homemade Fresh Pumpkin Pie Recipe
Aug
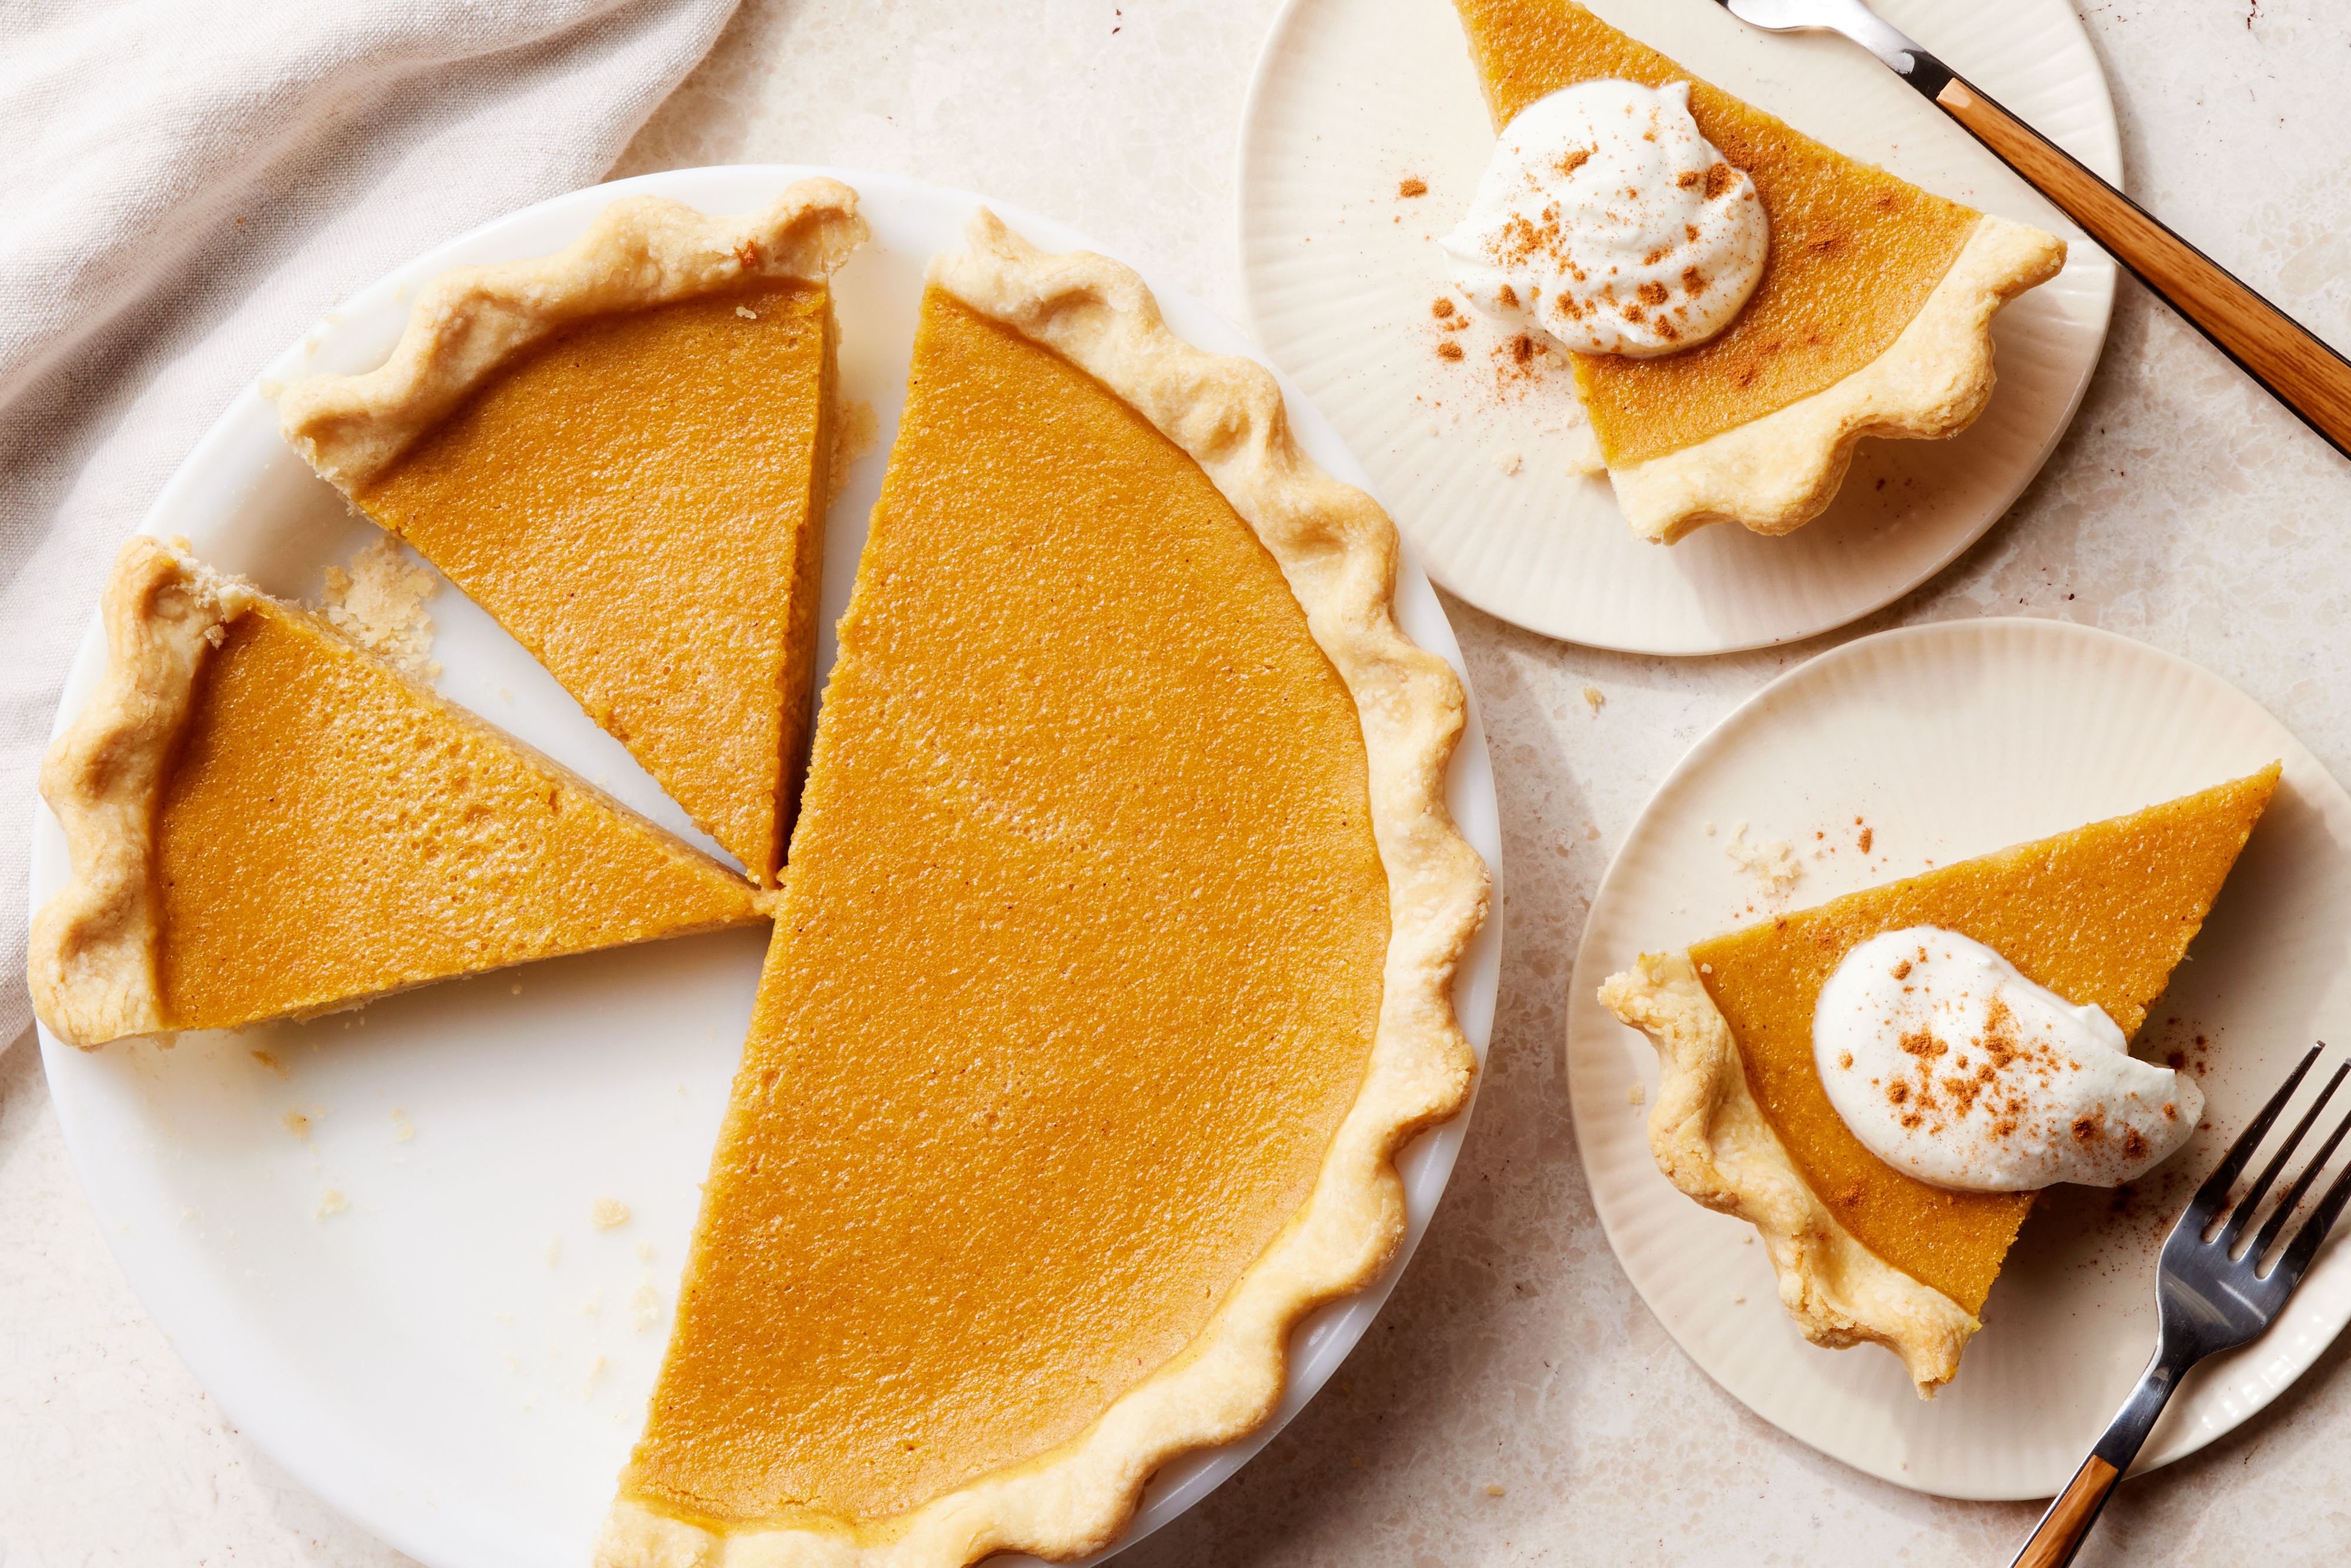
If pumpkin pie season had a theme song, it would be “warm spices, buttery crust, and everyone pretending they’re only having one slice.” This homemade fresh pumpkin pie recipe takes you from real pumpkin (yes, the orange orb) to a silky, classic pie that tastes like fall decided to put on cozy socks and show off.
We’re doing it the from-scratch waymaking fresh pumpkin purée, dialing in the moisture so your filling sets like a dream, and using a baking method that helps the crust cook through without the top cracking like a tiny dessert earthquake. The result: a pumpkin pie that’s deeply flavored, creamy, and sliceable enough to make you look like you’ve got a secret pie hotline (you do now).
Why Fresh Pumpkin Pie Is Different (and When It’s Worth It)
Fresh pumpkin pie has a flavor that’s a little brighter and more “vegetable-forward” than cannedthink subtle squash notes behind the cinnamon and vanilla. The big catch? Fresh pumpkin holds more water than most canned purée, which can make the filling looser, grainier, or weepy if you don’t manage moisture.
So here’s the honest, practical take: fresh pumpkin pie is absolutely worth it when you want that “I made this with my own hands” satisfaction and a fresher flavor. It’s also worth it if you have pie pumpkins on hand or you’re already roasting pumpkin for another recipe. If you’re racing the clock on Thanksgiving morning… you can still do it, but maybe don’t add three other new dishes and a personality change to your schedule.
Fresh pumpkin pie pros
- Fresher, more nuanced pumpkin flavor
- Control over texture (you decide how thick and smooth the purée is)
- Bragging rights that are socially acceptable
Fresh pumpkin pie “watch-outs”
- Moisture varies by pumpkin (so your purée may need draining or reducing)
- More steps (not hardjust more)
- You’ll need time to cool the pie properly for clean slices
Ingredients
This recipe keeps the flavor classicwarm spice, creamy custard, flaky crustwhile using a couple of smart techniques (a touch of cornstarch and moisture control) to help fresh purée behave like a pro.
For the fresh pumpkin purée
- 1 medium pie pumpkin (also called sugar pumpkin), about 3–4 pounds
- Optional: a pinch of salt (helps the flavor pop)
How much purée do you need? You’re aiming for about 1 3/4 to just under 2 cups of thick pumpkin purée (roughly the amount many recipes call “one 15-ounce can”). Because fresh pumpkins vary, measure by volume (or weight) rather than guessing.
For the crust (choose your path)
- 1 (9-inch) pie crust, homemade or store-bought, chilled
- 1 egg + 1 tablespoon milk (optional egg wash, helpful for preventing soggy bottoms)
For the pumpkin pie filling
- 1 3/4 cups thick fresh pumpkin purée (cooled)
- 3 large eggs
- 3/4 cup packed light brown sugar
- 1/4 cup granulated sugar
- 1 tablespoon cornstarch
- 1 1/2 teaspoons ground cinnamon
- 1 teaspoon ground ginger
- 1/4 teaspoon ground cloves (or allspice, if you prefer)
- 1/4 teaspoon freshly grated nutmeg (or 1/8 teaspoon ground)
- 1/2 teaspoon fine salt
- 1 teaspoon vanilla extract
- 1 (12-ounce) can evaporated milk
- Optional (but excellent): 2 tablespoons heavy cream for extra silkiness
- Optional: a tiny pinch of freshly ground black pepper (yes, reallyuse a light hand)
Step-by-Step: Make Fresh Pumpkin Purée
You can steam or roast pumpkin, but roasting gives you richer flavor and helps drive off moisture. Either way, the goal is a purée that’s thick, not watery. Pumpkin pie is custard; too much liquid and it’ll stay loose longer than your aunt’s Thanksgiving politics.
- Heat the oven to 350°F. Line a baking sheet with parchment.
- Prep the pumpkin. Cut the pie pumpkin in half (carefullypumpkins are tough). Scoop out seeds and stringy bits. Save seeds if you want to roast them later.
- Roast cut-side down. Place pumpkin halves cut-side down on the baking sheet. Roast until the flesh is very tender when pierced, about 45–60 minutes (timing depends on size).
- Cool and drain. Flip the halves over and let them cool. If you see a lot of liquid pooling, let the halves rest on a rack over a sheet pan for a few minutes so excess moisture can drip away.
- Scoop and purée. Scoop flesh into a food processor and blend until smooth.
- Make it pie-ready (important). If your purée looks loose or glossy-wet, thicken it using one of these methods:
- Drain: Spoon purée into a cheesecloth-lined strainer and let it drain 30–60 minutes (longer in the fridge if needed).
- Reduce: Cook purée in a saucepan over medium-low heat, stirring often, for 10–15 minutes until thicker.
You want a purée that holds soft peaks on a spooncloser to canned consistency.
- Cool completely. Warm purée can partially “cook” eggs later and make the filling grainy. Let it cool to room temp (or chill briefly) before mixing the pie.
Step-by-Step: Bake the Pie
1) Prep the crust (and avoid the dreaded soggy bottom)
A pumpkin pie filling is basically custardso it’s going to try to soften your crust like it’s negotiating a peace treaty. You have options:
- Quick method: Use a chilled crust and bake the pie on the lower rack with a hot start (we’ll do that).
- Extra-crisp method: Blind bake the crust for 10–15 minutes with pie weights, then brush with egg wash and bake 2–3 minutes more to “seal” it.
2) Mix the filling
- In a large bowl, whisk together brown sugar, granulated sugar, cornstarch, salt, and spices.
- Whisk in eggs until smooth (no streaks). Add vanilla.
- Whisk in the cooled fresh pumpkin purée until fully combined.
- Slowly whisk in evaporated milk (and heavy cream, if using) until silky.
3) Bake with a “hot start,” then finish low and slow
- Heat oven to 425°F. Place a baking sheet on the lower rack (this catches drips and helps with bottom heat).
- Pour filling into chilled crust.
- Bake 15 minutes at 425°F.
- Without opening the oven too much, reduce to 350°F. Bake another 40–55 minutes, until the edges are set and the center still has a gentle wobble.
- If the crust edges brown too fast, shield them with foil or a pie shield around the 25–30 minute mark.
4) Know when it’s done (without sacrificing the top)
Pumpkin pie is done when the outside is set and the center jiggles like Jell-O that’s getting its life together. You can test it three ways:
- Jiggle test: The center should wobble slightly, not ripple like soup.
- Thermometer test: Aim for about 180°F in the center for a safely set custard.
- Knife test: A knife inserted near (not dead-center) comes out mostly clean. This can cause a crack, so use if you don’t care.
5) Cool, slice, and store safely
This is where many pies go wrong: you cut too soon. Fresh pumpkin pie needs time to finish setting as it cools. Cool on a rack for at least 2 hours. Then refrigerate. For food safety (egg-rich custard), don’t leave it out longer than about 2 hours after baking.
Troubleshooting + Pro Tips
“My filling is watery.”
Fresh purée is the usual suspect. Next time, drain or reduce the purée until thick. Also make sure your pie cools fullycustard firms up as it cools. If it’s still runny after chilling overnight, it was underbaked or the purée was too wet.
“My pie cracked.”
Cracks typically come from overbaking or baking too hot/too close to the top element. Pull it when the center still wobbles slightly. Even if it cracks, whipped cream exists for a reason. (And cracks are basically proof it’s homemade.)
“My crust is pale or soggy.”
Bake on a lower rack and use the hot-start method. Blind baking helps, especially with homemade dough. You can also bake on a preheated baking sheet for extra bottom heat.
“The texture is grainy.”
Fresh purée can be a bit fibrous. Purée longer, and consider pressing through a fine sieve for ultra-smooth filling. Also make sure the purée is fully cooled before mixing with eggs.
Fun Variations (Same Cozy Vibes)
- Maple swap: Replace 2 tablespoons of sugar with maple syrup (reduce milk slightly if your purée is loose).
- Bourbon glow-up: Add 1–2 tablespoons bourbon with the vanilla.
- Gingersnap crust: Use a cookie crust for extra spice and crunch (great if you don’t want to fuss with pastry).
- Dairy-free: Use full-fat coconut milk instead of evaporated milk (expect a light coconut note).
- Spice dial: Love cinnamon? Add a little. Hate cloves? Use allspice. This is your pie; you are the boss of it.
Serving Ideas
Classic whipped cream is undefeated. For extra flair, add a pinch of cinnamon to the cream, or finish slices with toasted pecans. If you want to be dramatic (in a good way), serve slightly chilled with a warm caramel drizzle and watch people suddenly “find room.”
Recipe Card: Homemade Fresh Pumpkin Pie
Quick Overview
- Yield: 1 (9-inch) pie, 8 slices
- Total time: About 5 hours (includes cooling)
- Active time: About 45 minutes
Ingredients
Fresh Pumpkin Purée
- 1 medium pie pumpkin (3–4 lb)
Crust
- 1 chilled 9-inch pie crust (homemade or store-bought)
- Optional egg wash: 1 egg + 1 tablespoon milk
Filling
- 1 3/4 cups thick fresh pumpkin purée (cooled)
- 3 large eggs
- 3/4 cup packed light brown sugar
- 1/4 cup granulated sugar
- 1 tablespoon cornstarch
- 1 1/2 tsp cinnamon
- 1 tsp ginger
- 1/4 tsp cloves (or allspice)
- 1/4 tsp nutmeg
- 1/2 tsp salt
- 1 tsp vanilla
- 1 (12 oz) can evaporated milk
- Optional: 2 tbsp heavy cream
- Optional: tiny pinch black pepper
Instructions
- Make purée: Heat oven to 350°F. Halve pumpkin, remove seeds, roast cut-side down 45–60 minutes until very tender. Cool, scoop flesh, purée until smooth. Drain or reduce purée if watery. Cool completely.
- Prep oven: Heat oven to 425°F. Place a baking sheet on the lower rack.
- Mix filling: Whisk sugars, cornstarch, salt, spices. Whisk in eggs + vanilla, then pumpkin purée. Slowly whisk in evaporated milk (and cream).
- Fill & bake: Pour into chilled crust. Bake 15 minutes at 425°F, then reduce to 350°F and bake 40–55 minutes more. Shield crust edges if browning fast.
- Cool: Cool at least 2 hours, then refrigerate. Slice once fully set (best after chilling).
Kitchen Notes From the Real World: Fresh Pumpkin Pie Experiences
Here’s what usually happens when someone makes a homemade fresh pumpkin pie recipe for the first time: excitement, confidence, and the sudden realization that pumpkins are basically nature’s bowling balls. The second thing that happens is the “purée surprise.” You roast your pumpkin, blend it up, and think, “Wow, look at medomestic royalty.” Then you tilt the bowl and discover it’s watery enough to qualify as a smoothie.
The good news is that this is normal. Fresh pumpkin has a wide range of moisture depending on variety, age, and even how it was stored. That’s why experienced home bakers treat purée like a personality test: if it’s thick and calm, you proceed. If it’s a little chaotic, you drain or reduce it until it behaves. Once you start thinking of purée thickness as the “secret lever” for texture, fresh pumpkin pie stops being mysterious and starts being predictable (which is the nicest thing you can say about a custard dessert).
Another very real experience: the waiting game. Pumpkin pie smells amazing while it bakes, and your kitchen starts giving off those cozy cinnamon-and-vanilla signals that tell your brain, “Slice it now.” But custard pies set as they cool. If you cut early, you’ll get a filling that looks too soft, even if it will firm up later. Chilling isn’t just for food safetyit’s also for clean slices that hold their shape. In most households, the compromise is: let it cool on the counter, then “accidentally” put it in the fridge where you can keep checking on it every 20 minutes like it’s a newborn.
Cracks are another rite of passage. People fear cracks like they’re a moral failing. They’re not. Cracks usually mean the pie baked a little long or a little hot, or cooled in a drafty kitchen. They can also happen when the filling “skins over” while the center continues expanding. The funny part is that most guests do not care. They care that it tastes good and that there is whipped cream. If you want a crack-free top, you pull the pie while the center still wobbles slightly, and you cool it gently. If you get a crack anyway, you cover it with whipped cream and pretend it was “a design choice.” This is not lying; it’s dessert styling.
One more common experience: deciding whether fresh is “better” than canned. The answer is: it depends on what you mean by better. Fresh purée can taste lighter and more squash-forward, sometimes even a bit herbal. Canned purée is consistent, thicker, and often produces a sturdier texture with less effort. Some bakers love fresh for the flavor; others prefer canned for the classic texture. If you’re serving a crowd that expects “traditional Thanksgiving pumpkin pie,” you can still use freshjust make sure your purée is thick, your spice is warm and balanced, and your bake is right.
Practical “been-there” tips home bakers tend to learn quickly:
- Measure your purée. Don’t assume one pumpkin equals one pie.
- Thicken first, bake second. Fix watery purée before it goes into the filling.
- Use a shield. Foil on the crust edges saves you from burnt rims and heartbreak.
- Trust the wobble. A slightly wobbly center sets into that perfect sliceable custard.
- Let it chill. For texture, for safety, and for the cleanest slices.
And finally, the most universal pumpkin-pie experience: the second slice. You’ll serve the first slice politely. You’ll offer whipped cream like a responsible adult. Then you’ll return to the kitchen “to put something away” and suddenly you’re holding a second slice the size of a paperback novel. This is the circle of life. Accept it. The pie has chosen you.
Conclusion
Making pumpkin pie from fresh pumpkin is part recipe, part technique, part cozy seasonal ritual. Once you control the purée’s moisture and bake the pie until it’s set-but-still-wobbly, you get a filling that’s creamy, fragrant, and proudly homemade. Whether it’s for a holiday table or a random Tuesday when you need comfort food with a résumé, this homemade fresh pumpkin pie recipe delivers.

