Hair Care
Halloween Fake Blood – How to Make Fake Blood and Guts for Halloween
May
Halloween is the one night of the year when dripping red goo on your shirt can be considered “craftsmanship” instead of “a laundry emergency.” Whether you are building a zombie costume, decorating a haunted house, staging a vampire dessert table, or creating a creepy-but-fun party scene, homemade Halloween fake blood is one of the easiest special effects you can make with common kitchen ingredients.
The secret is not simply making something red. Realistic fake blood needs the right color, thickness, shine, and flow. Too watery, and it looks like fruit punch had a bad day. Too thick, and it becomes red glue with commitment issues. The best DIY fake blood recipe depends on where you plan to use it: skin, clothes, props, dessert, windows, or fake guts. This guide explains how to make fake blood and guts for Halloween safely, affordably, and with enough spooky realism to impress guests without horrifying your carpet.
Before You Start: Choose the Right Type of Fake Blood
Not all fake blood is created for the same purpose. Edible fake blood is best for mouths, vampire bites, cakes, cupcakes, and food displays. Costume fake blood is designed for skin and clothing, though it may stain. Prop fake blood can be thicker, darker, or messier because it does not need to be safe for lips or food. Fake guts need texture, weight, and a little theatrical confidence.
Before mixing anything, decide where the blood will go. If it will touch skin, use food-safe or cosmetic-safe ingredients and do a patch test on a small area first. If it will go near the eyes, skip homemade mixtures and use only products labeled safe for that area. If it will touch food, every ingredient must be edible. And if it will touch your favorite white couch, please pause, breathe, and choose a washable prop instead.
Basic Ingredients for DIY Halloween Fake Blood
Most homemade fake blood recipes are built from a few simple ingredients. Corn syrup gives shine and a slow drip. Water thins the mixture. Red food coloring creates the base color. A tiny amount of blue or green food coloring deepens the red so it looks less like candy syrup. Cocoa powder, chocolate syrup, or coffee adds a darker brown undertone. Cornstarch or flour makes the blood more opaque and thicker.
For the most realistic results, avoid using pure red alone. Realistic Halloween fake blood usually needs a touch of darkness. A drop of blue, a dot of green, or a spoonful of cocoa can turn bright cherry red into a deeper horror-movie shade. Add dark colors carefully, though. One drop too many and your vampire bite becomes barbecue sauce.
Recipe 1: Classic Edible Fake Blood
This is the best fake blood recipe for vampire mouths, dessert drizzles, fake bite marks, and food-safe Halloween effects. It is sticky, glossy, dramatic, and easy to adjust.
Ingredients
- 1/2 cup light corn syrup
- 1 tablespoon water
- 8 to 12 drops red food coloring
- 1 tiny drop blue food coloring
- 1 teaspoon cocoa powder or chocolate syrup
- 1/2 teaspoon cornstarch, optional, for thickness
Instructions
- Add corn syrup and water to a small bowl.
- Stir in red food coloring until the mixture is bright red.
- Add one tiny drop of blue food coloring. Stir well before adding more.
- Mix in cocoa powder or chocolate syrup to create a deeper, more realistic tone.
- Add cornstarch if you want a thicker, less transparent blood effect.
- Test a drop on a white plate. Adjust color and thickness as needed.
This recipe works beautifully for fake vampire blood, dripping cake decorations, red velvet cupcakes, doughnuts, and Halloween dessert boards. Because it contains sugar, it can attract insects outdoors, so apply it close to party time and keep food displays covered until guests arrive.
Recipe 2: Thick Costume Blood for Skin and Clothing
For zombie shirts, monster hands, fake wounds, and haunted-house props, you need a thicker mixture that clings instead of running everywhere. This version uses cornstarch to give the blood body and opacity.
Ingredients
- 1/2 cup corn syrup
- 1 tablespoon water
- 10 to 15 drops red food coloring
- 1 drop green or blue food coloring
- 1 tablespoon cornstarch
- 1 teaspoon cocoa powder
Instructions
- Combine corn syrup and water in a bowl.
- Whisk in red food coloring, then add a tiny amount of blue or green.
- Stir in cocoa powder for a darker color.
- Add cornstarch slowly and mix until smooth.
- Let it sit for 5 minutes so the texture thickens slightly.
This DIY fake blood is excellent for torn shirts, zombie sleeves, bandages, and fake cuts. It may stain skin, clothing, towels, grout, wood, and anything else that has ever dreamed of being permanently pink. Use old clothes, cover surfaces, and test first.
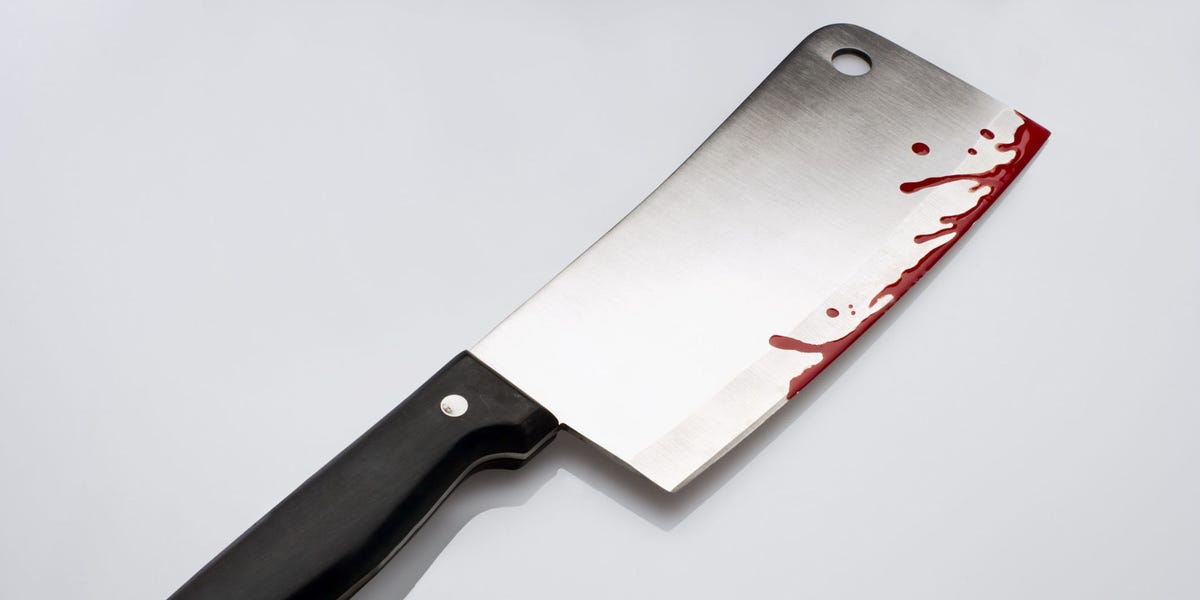
Recipe 3: Washable-Looking Prop Blood for Decorations
For props that will not touch skin, lips, pets, or food, you can create a thinner blood effect for plastic knives, fake windows, shower curtains, haunted mirrors, and outdoor decorations.
Ingredients
- 1/2 cup water
- 2 tablespoons corn syrup
- 8 drops red food coloring
- 1 drop blue food coloring
- 1 teaspoon chocolate syrup
Instructions
- Mix all ingredients in a disposable cup.
- Stir until the color is even.
- Use a brush, spoon, squeeze bottle, or spray bottle to apply it.
- Test on a hidden spot before using it on walls, floors, fabric, or painted surfaces.
Even when a recipe seems washable, food coloring can stain. Use this prop blood on items you can rinse easily, such as plastic trays, fake tools, disposable tablecloths, or cardboard signs. Avoid porous surfaces unless you are emotionally prepared to explain the red mark until Thanksgiving.
How to Make Fake Blood Look More Realistic
The best Halloween fake blood is not always the reddest blood. Realistic blood effects come from layering color, texture, and placement. Fresh blood is usually brighter and shinier. Older dried blood looks darker, browner, and thicker. Clotted blood has texture. A small drip can look scarier than dumping an entire bowl on a costume.
Use Gravity
Apply fake blood where it would naturally run. For a vampire bite, let it drip from the corner of the mouth. For a zombie shirt, add blood around tears, cuffs, and collar edges. For a haunted prop, tilt the item and let the blood choose its own creepy little path.
Layer Different Textures
Start with a watery red stain, then add thicker syrup blood on top. This creates depth and makes the effect look less flat. For dried blood, dab on a darker mixture made with cocoa powder and less water.
Add Tiny Amounts of Texture
For fake scabs or old wounds, mix in a pinch of coffee grounds, cocoa powder, oats, or crushed cereal. Keep textured mixtures away from eyes and mouths. Texture is great for props and fake wounds, not for chewing. Halloween is spooky enough without unexpected granola in your vampire scene.
How to Make Fake Guts for Halloween
Fake guts are all about shape and texture. You want something lumpy, flexible, and dramatically unpleasant without being unsafe or impossible to clean. There are three easy methods: edible spaghetti guts, reusable pantyhose guts, and gelatin slime guts.
Method 1: Edible Spaghetti Guts
This is the easiest option for party tables, haunted dinner displays, and food-safe decorations.
- Cook spaghetti or fettuccine until soft.
- Drain and toss with a small amount of oil to prevent sticking.
- Add edible fake blood made from corn syrup and food coloring.
- Mix gently until the noodles look glossy and red.
- Place in a bowl, fake cauldron, or food-safe tray.
Spaghetti guts are wonderfully gross and surprisingly effective. Use darker blood in some areas and brighter blood in others for a layered effect. If serving as food, label it clearly and keep it refrigerated until party time.
Method 2: Pantyhose Fake Intestines
This method is better for costumes, haunted houses, and reusable props.
- Use clean nude or light-colored pantyhose.
- Cut long tube sections from the legs.
- Stuff with paper towels, cotton, fabric scraps, or plastic bags.
- Tie the ends securely.
- Coat with thick fake blood and darker patches of cocoa-tinted blood.
For extra realism, twist the tubes loosely and place them inside a tray, under a torn shirt, or in a fake “monster lab” container. Do not use real animal parts for Halloween displays. They spoil quickly, smell terrible, attract pests, and turn your fun craft project into a sanitation situation with jump scares.
Method 3: Gelatin Slime Guts
Gelatin-style guts create a jiggly, shiny texture. Use this for props, bowls, and haunted-house tables.
- Prepare unflavored gelatin according to package directions, using slightly less water for firmness.
- Add red food coloring and a tiny bit of blue or green.
- Stir in a small amount of corn syrup for shine.
- Let the mixture partially set.
- Break it into strips and clumps with a spoon.
Keep gelatin guts cool until use, especially for outdoor parties. They are slippery, so do not place them where guests might step on them. A fake haunted lab is fun. A real slip-and-fall claim is not festive.
Safety Tips for Halloween Fake Blood and Makeup
DIY fake blood is simple, but safety still matters. Food coloring, cocoa, syrup, and makeup can irritate sensitive skin or stain surfaces. Before applying fake blood to the face or body, test a small amount on the inner arm and wait at least 24 hours when possible. If redness, itching, swelling, or irritation appears, do not use it on skin.
Keep homemade fake blood away from eyes. Even edible ingredients can sting, blur vision, or cause irritation. Avoid applying fake blood directly on eyelids, waterlines, or inside the nose. For children, use non-toxic makeup and remove everything before bedtime. Sticky syrup plus pillowcases equals a laundry villain origin story.
Never use homemade fake blood for public pranks, traffic scenes, school emergencies, or anything that could cause panic. Keep the effect clearly within a costume, party, stage scene, or private decoration. Halloween should scare people in a fun way, not send neighbors sprinting toward their phones.
Cleanup Tips: How to Remove Fake Blood
Food coloring is powerful. It can stain fingers, clothes, countertops, tile grout, wood, and fabric. The best cleanup strategy is prevention. Wear gloves while mixing, use old towels, protect counters with parchment paper or plastic, and apply fake blood in an area that can be rinsed easily.
For Skin
Wash with warm water and mild soap. If color remains, use a gentle oil-based cleanser or a small amount of cooking oil, then wash again. Do not scrub aggressively, especially on children or sensitive skin.
For Clothing
Rinse from the back of the stain with cold water as soon as possible. Apply laundry detergent or stain remover, let it sit, and wash according to the fabric label. Do not use heat until the stain is gone because heat can set dye.
For Counters and Props
Wipe immediately with a damp cloth and mild dish soap. For stubborn stains on washable surfaces, try a baking soda paste. Always test cleaners in a hidden spot first.
Best Uses for Homemade Halloween Fake Blood
Homemade fake blood is useful for more than costumes. Drizzle edible blood over cupcakes, cheesecake, doughnuts, cookies, and ice cream sundaes. Add a few drops to a vampire punch bowl for decoration, but keep non-edible props separate from real drinks. Brush thick blood onto plastic skeleton hands or fake tools. Create bloody footprints on washable paper runners. Add spaghetti guts to a mad-scientist buffet. Use squeeze bottles for controlled drips on pumpkins, tombstones, and cardboard signs.
For a family-friendly effect, make the blood less realistic and more playful. Bright red drips on cupcakes feel spooky without being too intense. For teen or adult parties, darker blood and fake guts can create a stronger haunted-house vibe. The goal is to match the scare level to the audience. A five-year-old ghost may not appreciate cinematic gore with notes of cocoa and regret.
Common Mistakes to Avoid
Using Too Much Food Coloring
More dye does not always mean better blood. Too much red can make the mixture look artificial and increase staining. Start small and adjust gradually.
Skipping the Darkening Step
Pure red syrup looks like candy. A little cocoa, chocolate syrup, blue, or green makes it more believable.
Applying Blood Too Early
Syrup-based fake blood can drip, smear, attract dust, or dry unevenly. Apply it close to the time you need the effect.
Putting Non-Edible Blood Near Food
If it goes on dessert, in the mouth, or near serving plates, every ingredient must be food-safe. Keep prop blood and edible blood in separate labeled containers.
Experience Notes: What Actually Works When Making Halloween Fake Blood and Guts
After experimenting with Halloween fake blood recipes, one lesson becomes clear fast: small adjustments matter. A single drop of blue food coloring can take a batch from cartoon-red to convincingly spooky. Two extra drops can make it look like alien barbecue sauce. The smartest approach is to mix slowly, test often, and keep notes if you plan to recreate the same color later.
For costumes, thick blood usually works better than thin blood. Thin mixtures run quickly and can land in places you did not invite them, such as shoes, floors, and the family dog’s emotional support blanket. Thick corn syrup blood clings to torn fabric and fake wounds, making it easier to control. If you are decorating a shirt, place cardboard inside the shirt before applying blood. This keeps the mixture from soaking through to the back and gives you a cleaner, more intentional design.
For fake guts, spaghetti is the champion of low-budget grossness. It is cheap, flexible, and already intestine-shaped enough to make guests say, “Nope,” which is exactly the energy Halloween deserves. The trick is not overcooking it into mush. Soft but intact noodles look best. Tossing them with a little oil before adding fake blood helps create a slick, unsettling shine. For a darker, older effect, add a little cocoa-tinted blood in streaks instead of mixing everything into one flat red color.
Pantyhose guts are the best option when you want a prop that lasts through the night. Stuff them loosely, not tightly. Realistic fake intestines should bend and twist. If they look like overfilled sausages, remove some stuffing and add irregular lumps. A few darker patches make them more dimensional. Place them in a disposable tray or under torn fabric so guests see just enough to be creeped out without requiring a full biology lecture.
Cleanup is where many Halloween artists learn humility. Food coloring has the confidence of permanent marker. Gloves are worth it. Old clothes are worth it. Covering the counter is worth it. Also, never test fake blood on the front of a costume first. Test it on an inside hem or scrap fabric. Some materials absorb color beautifully; others repel syrup and leave weird shiny blobs. Fake blood has a personality, and sometimes that personality is “chaotic goblin.”
The best final tip is to use restraint. One perfect drip from a vampire mouth often looks better than an entire face covered in red syrup. A few bloody fingerprints on a bathroom mirror can be creepier than a wall that looks like a ketchup factory exploded. Halloween fake blood is theater. Give the audience enough detail to imagine the story, and their brains will do the rest.
Conclusion
Making Halloween fake blood and guts is easy, affordable, and wildly customizable. With corn syrup, food coloring, cocoa powder, cornstarch, pasta, gelatin, or pantyhose, you can create everything from edible vampire blood to realistic zombie guts. The key is choosing the right recipe for the job, testing colors slowly, protecting surfaces, and keeping safety in mind. Use edible mixtures for food and mouths, skin-safe mixtures for costumes, and prop-only mixtures for decorations. Add texture carefully, let gravity help your drips, and remember: spooky is fun, but stains are forever if you ignore the laundry gods.
