
Body Care
DIY Stained Glass for Privacy on Doors and Windows
Aug
Clear glass is wonderful when it frames a garden, a sunrise, or a suspiciously photogenic tree. It is less wonderful when it gives delivery drivers, neighbors, and passing pedestrians a front-row seat to your entryway. Fortunately, you do not need to replace the glassor develop a lifelong commitment to keeping the curtains closed.
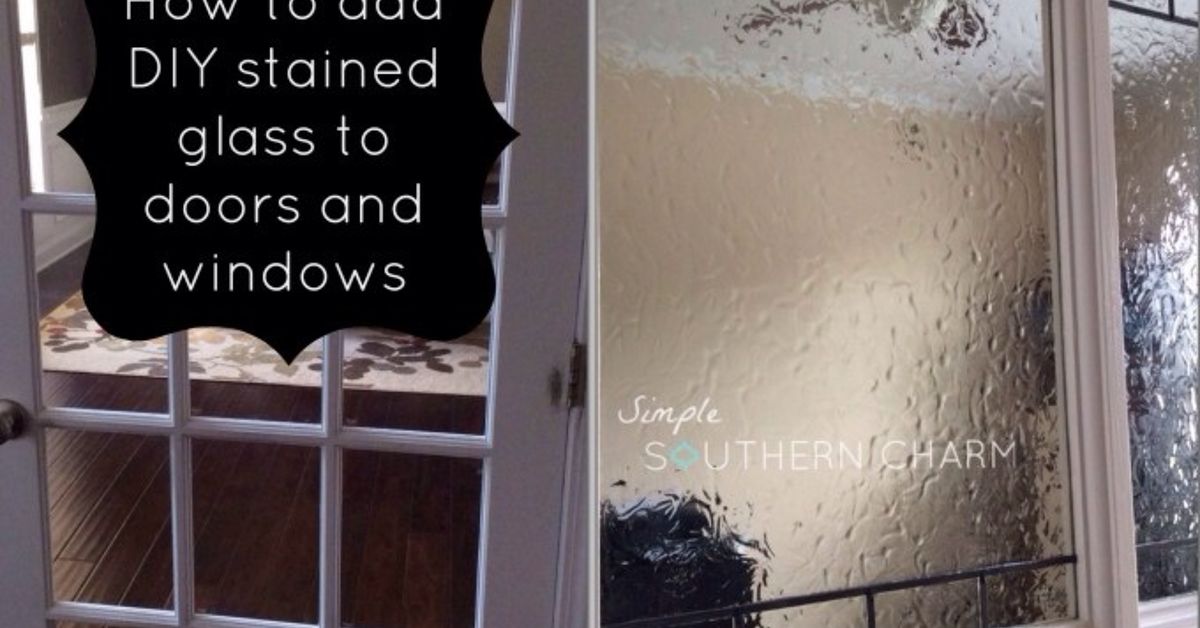
DIY stained glass can transform plain doors and windows into colorful privacy features while preserving much of the natural light. Depending on your budget, skill level, and tolerance for craft-related chaos, you can use removable window film, specialty glass paint, faux leading, or a separate decorative panel. These methods recreate the look of traditional stained glass without cutting dozens of glass pieces or learning how to solder before lunch.
Decorative films, frosted treatments, and stained-glass-style inserts are commonly used to obscure views while allowing daylight to enter. The amount of privacy depends on the opacity, texture, colors, pattern size, and lighting on each side of the glass.
Why Choose DIY Stained Glass for Privacy?
Traditional curtains and blinds work, but they can make a narrow entryway feel darker, interfere with door hardware, or collect enough dust to qualify as supporting characters in a Western movie. Faux stained glass treats the glass itself, so it does not consume floor space or require rods, brackets, and repeated adjustments.
It Preserves Natural Light
Most decorative window films and translucent glass paints diffuse incoming light rather than blocking it completely. A colorful design may tint the light, while a frosted design produces a softer glow. This makes the technique especially useful for bathrooms, stair landings, sidelights, kitchen doors, basement windows, and home offices.
It Can Be Renter-Friendly
Static-cling window film is usually the safest choice for renters because it can be removed without scraping paint from the window frame or permanently altering the glass. Hanging stained glass panels are another reversible option. Permanent paint, etching cream, caulked inserts, and adhesive products should be approved by the property owner first.
It Adds Character to Plain Architecture
A basic glass door can suddenly feel appropriate for a Craftsman bungalow, Victorian-inspired apartment, Art Deco entryway, or colorful modern home. Geometric patterns create a structured look, botanical designs soften hard architectural lines, and simple frosted sections complement minimalist interiors.
Choose the Right DIY Stained Glass Method
There is no single best technique. The correct option depends on whether you want a weekend experiment, a removable rental upgrade, or a custom design that remains in place for years.
Option 1: Stained Glass Privacy Window Film
Decorative film is the easiest method for most beginners. It is sold in patterns that imitate leaded glass, frosted glass, textured glass, colored mosaics, rice paper, and beveled crystal. Static-cling varieties attach using water instead of permanent glue, while adhesive-backed products provide a stronger bond.
Film works best on clean, flat, smooth glass. It is less reliable on deeply textured panes, cracked glass, or surfaces that remain constantly wet. Because designs often repeat, multiple sheets can cover a larger window, although careful pattern alignment is necessary to keep the seams from looking like the window changed its mind halfway through.
Manufacturers and home-improvement guides generally recommend wetting the glass and film, positioning the sheet, pressing out water and bubbles with a squeegee, and trimming the edges after alignment.
Option 2: Specialty Stained Glass Paint
Specialty translucent window color offers greater creative control. You draw the outlines with simulated liquid leading or flexible leading strips, let those lines set, and then fill the enclosed sections with translucent color.
This method is ideal when you want a custom monogram, house number, floral motif, Prairie-style grid, or design that matches existing tile and paint colors. Specialty window colors are formulated to level as they dry, creating a more glasslike appearance than ordinary wall paint. Product drying and curing periods vary, so follow the label rather than testing the surface every seven minutes with an impatient fingertip.
Option 3: Frosted Glass Spray With Decorative Details
Frosted glass spray creates a semi-transparent coating on the interior side of suitable windows and glass doors. You can apply it over the entire pane or use stencils and painter’s tape to create borders, diamonds, stripes, or negative-space patterns.
This option provides a restrained look rather than a jewel-toned cathedral effect. It is useful when privacy matters more than color. Ventilation, masking, and overspray control are essential, and the product instructions must confirm that the coating is appropriate for the specific glass surface.
Option 4: A Removable Painted Acrylic Panel
Instead of painting directly on a door or window, create the design on a thin clear acrylic sheet. The panel can be mounted inside the frame, attached with removable fasteners, or hung in front of the glass.
This approach reduces the risk of damaging an expensive door and allows you to work horizontally on a table. Horizontal work is much easier because wet paint stays where you place it instead of migrating south like it has vacation plans.
Tools and Materials
Your supply list will vary by technique, but a typical DIY stained glass privacy project may require:
- Measuring tape or metal ruler
- Microfiber cloths
- Glass-safe cleaner
- Spray bottle filled with water and a small amount of mild dish soap
- Plastic squeegee or application card
- Sharp craft knife with replacement blades
- Cutting mat and straightedge
- Decorative static-cling or adhesive window film
- Specialty translucent glass paint
- Liquid leading or self-adhesive leading strips
- Printed pattern or hand-drawn template
- Painter’s tape
- Drop cloths and protective gloves
Measure every pane individually. Old doors and windows are not always perfectly square, even when they look innocent from across the room.
How to Install Stained Glass Privacy Film
Step 1: Check the Glass
Inspect the pane for cracks, loose glazing, failing seals, moisture between insulated panes, or sharp edges. Decorative film is not a repair material and should not be used to disguise structural damage.
Check the film manufacturer’s compatibility information before treating insulated, laminated, tempered, tinted, or low-emissivity glass. Some aftermarket films can affect heat absorption or conflict with a window warranty.
Step 2: Measure and Plan the Pattern
Measure the visible glass area at several points. Decide where the pattern should begin and end before cutting. On sidelights or paired windows, orient matching sheets in the same direction so the designs look intentional.
For maximum privacy, choose a dense pattern with small shapes, textured sections, or frosted backgrounds. Large transparent areas may still reveal faces, furniture, and movement.
Step 3: Clean the Glass Thoroughly
Dust the frame first so debris does not fall onto the wet glass. Clean the pane and wipe the corners carefully. Paint specks, grease, pet hair, and dried cleaner can create visible bumps beneath film.
Use lint-free microfiber cloths and avoid leaving cleaner residue. Working away from intense direct sunlight can slow evaporation and give you more time to position the material.
Step 4: Cut the Film Slightly Oversize
Place the film on a protected cutting surface and cut it slightly larger than the pane. The extra material gives you room to adjust the pattern. Final trimming happens after the film is positioned.
Step 5: Wet the Surface Generously
Mist the glass with the application solution recommended by the film manufacturer. Adequate moisture allows the sheet to slide into position and helps the squeegee move trapped air toward the edges.
Step 6: Remove the Backing and Position the Film
Peel away the liner without touching the application side more than necessary. For a large pane, a second person can hold the lower portion away from the glass while you align the top edge.
Step 7: Squeegee From the Center Outward
Press gently from the center toward the edges in overlapping strokes. Wipe away expelled water as you work. Do not attack a stubborn bubble with enough force to launch the squeegee into another room. Lift and reposition the film when necessary.
Step 8: Trim the Perimeter
Use a sharp blade and straightedge to trim the film neatly along the frame. Leaving a tiny clearance at the edge can help water escape and prevent the material from catching on seals or moving hardware.
Step 9: Let It Dry
Some haziness or tiny moisture pockets may remain immediately after installation. Allow the film to dry according to the manufacturer’s directions before judging the final appearance or cleaning the surface.
How to Paint a Faux Stained Glass Design
1. Create a Full-Size Template
Draw the design on paper or enlarge a printed pattern to match the pane. Tape it to the opposite side of the glass so you can trace it. Designs with medium-size sections are easier for beginners than scenes containing 400 flower petals and the architectural history of Paris.
2. Apply the Leading
Trace the main outlines using liquid leading or flexible strips. Keep line thickness consistent and simplify intersections wherever possible. Allow the leading to dry or set before adding color.
3. Fill Each Section
Apply specialty window color inside the boundaries. Work on one small area at a time and bring the paint up to the leading so clear gaps do not remain. Remove obvious bubbles with the tool recommended by the paint manufacturer.
4. Build Privacy Strategically
Use darker, textured, or frosted colors at eye level. Reserve clearer colors for upper sections where daylight is welcome but direct views are less likely. For a front door, consider placing the most opaque pattern between approximately waist and head height.
5. Allow a Full Cure
Keep hands, cleaning products, and curious pets away during the stated drying and curing period. Some specialty window colors appear cloudy while wet and become more translucent as they dry.
Privacy Design Ideas for Different Spaces
Front Door Sidelights
Use a vertical botanical pattern, Art Nouveau vines, or repeating geometric panels. Keep small clear sections near the outer edge if you still want to check who is standing outside.
Bathroom Windows
Choose dense frosted backgrounds with limited transparent color. Test the finished design both during the day and at night. A treatment that appears private in daylight may reveal silhouettes when the bathroom is brightly lit after dark.
Kitchen Doors and Windows
Try citrus colors, herbs, leaves, simple diamonds, or Craftsman-inspired grids. Avoid placing delicate craft coatings where they will receive frequent grease splatter or aggressive cleaning.
Home Office Doors
A restrained grid of amber, smoke, blue, and clear sections can obscure visual distractions without making the room feel sealed off. For video calls, observe how colored light affects the wall and your camera image.
Basement and Street-Level Windows
Use a nearly opaque design across the lower portion and a lighter pattern above it. This blocks direct sightlines while preserving daylight near the ceiling.
Important Safety Considerations
Decorative film and craft paint do not automatically convert ordinary glass into certified safety glazing. U.S. safety requirements cover glazing used in hazardous locations such as certain glass doors, sliding patio doors, shower enclosures, and glazed panels. If you are replacing glass, altering a door assembly, or working with an older pane of uncertain construction, consult a qualified glass professional and follow applicable building codes.
- Do not apply a decorative treatment over cracked or unstable glass.
- Do not block required safety markings, door hardware, locks, or visibility needed for safe operation.
- Keep coatings away from weatherstripping and moving channels.
- Use adequate ventilation for sprays, paints, and cleaners.
- Keep craft knives capped when not in use.
- Confirm that the product is intended for interior or exterior exposure as applicable.
- Never assume decorative privacy film is equivalent to security film.
Common DIY Stained Glass Mistakes
Choosing a Pattern With Too Much Clear Space
A beautiful pattern is not automatically a private pattern. Evaluate it from several distances and under nighttime lighting before covering an entire door.
Skipping the Cleaning Stage
A single trapped hair can become the visual center of the project. Clean the glass, frame, tools, and nearby work surface before removing the backing.
Cutting to the Exact Size Too Early
Small measuring errors become obvious at the edges. Cut oversize, position the film, and perform the final trim in place.
Using Ordinary Paint Without Testing It
Not every craft paint remains translucent, flexible, removable, or stable under sunlight. Use a product designed for glass or test your chosen system on a spare pane or acrylic sample.
Ignoring Seams
If multiple sheets are necessary, incorporate seams into the design. Align them with a leading line, geometric boundary, or natural division in the window.
Expecting Perfect Nighttime Privacy
Interior lighting can make shapes and movement more visible from outside. Perform a night test with the room lights on. Add a shade, curtain, or more opaque lower layer if the result is not private enough.
Cleaning and Maintaining Faux Stained Glass
Use a soft microfiber cloth and a mild cleaner approved for the specific film or coating. Avoid abrasive pads, scrapers, and harsh chemicals. Spray cleaner onto the cloth rather than flooding edges where liquid could work beneath the material.
Check corners periodically, especially on exterior doors that experience temperature changes and frequent vibration. A lifting section of static-cling film can often be cleaned, rewetted, and reapplied. Painted designs should be repaired only with compatible materials after the surface has been cleaned and dried.
A Realistic Weekend Experience: What the Project Actually Feels Like
The following account is a practical composite based on commonly reported DIY outcomes rather than a claim of one person’s private experience.
The project usually begins with confidence. The window looks rectangular, the film looks rectangular, and basic geometry appears to be on your side. Then the measuring tape reveals that the left side of the pane is slightly taller than the right. This is the first useful lesson: measure at the top, middle, and bottom rather than assuming an older frame was built by robots with laser-guided tools.
The cleaning stage takes longer than expected. From a few feet away, the glass may look spotless. Up close, it contains fingerprints, paint dots, dust along the frame, and one mysterious speck that survives three cleanings. Removing this debris is worth the effort because every bump becomes more noticeable after the film is installed.
Applying a small piece of static-cling film is pleasantly easy. Applying a tall sheet to a door sidelight is a different sport. The wet application method gives you time to slide the material, but the lower half may curl, stick to itself, or attract dust while you align the top. A helper makes the process far calmer. One person controls the film while the other checks the pattern and begins squeegeeing.
The first few passes with the squeegee can look alarming. The surface may appear cloudy, streaked, and full of small water pockets. The temptation is to pull everything down and declare the project cursed. In many cases, patient overlapping strokes remove the larger pockets, while minor haziness improves as the remaining moisture dries.
Trimming is the stage most likely to separate a polished installation from a visibly homemade one. A fresh blade matters. A dull blade drags the film, creates uneven edges, and inspires language unsuitable for a family home-improvement blog. Using a straight application card as a guide helps maintain a narrow, consistent gap along the frame.
The most important test comes after sunset. During the day, the pattern may beautifully obscure the view. At night, a brightly lit interior can reveal shadows and movement. Stepping outside while another person walks around indoors provides a far more accurate privacy test than staring at the glass from the same side where it was installed.
Painted faux stained glass creates a different experience. The design stage is slower but more satisfying because every line and color is custom. The leading rarely looks perfect on the first attempt. Small variations, however, often disappear once the entire pattern is filled and illuminated. Traditional stained glass itself contains handmade irregularities, so surgical precision is not required.
Beginners tend to use too many colors. On a sample board, twelve shades look exciting. Across a large door, they can create the visual equivalent of a candy store experiencing an electrical emergency. Limiting the palette to three or four colors, plus clear or frosted areas, usually produces a more cohesive result.
Projects documented by home and design publications frequently emphasize the same benefits: inexpensive film can substantially change an entryway or bathroom, visitors often assume it is real decorative glass from a distance, and privacy improves without sacrificing all incoming light.
The final result is rarely flawless, but it can be remarkably effective. From normal viewing distance, tiny bubbles and slightly imperfect lines tend to disappear into the overall pattern. What remains is color, softer light, and the relief of knowing that passersby can no longer conduct an unsolicited visual inventory of your hallway.
Final Thoughts
DIY stained glass for privacy is one of those rare home projects that can be affordable, functional, decorative, and reversible. Static-cling film offers the fastest transformation, specialty window paint provides the most creative freedom, and removable acrylic panels protect the original glass while supporting elaborate designs.
Start with one small pane, test the privacy after dark, and choose a design that complements the architecture rather than competing with every object in the room. With careful cleaning, patient installation, and a sharp trimming blade, an ordinary window can become a feature that looks custom-madewithout requiring a cathedral-sized renovation budget.

