
Hair Care
#HelloSpring Rejuvenating A Generic Apartment Kitchen For Around $100
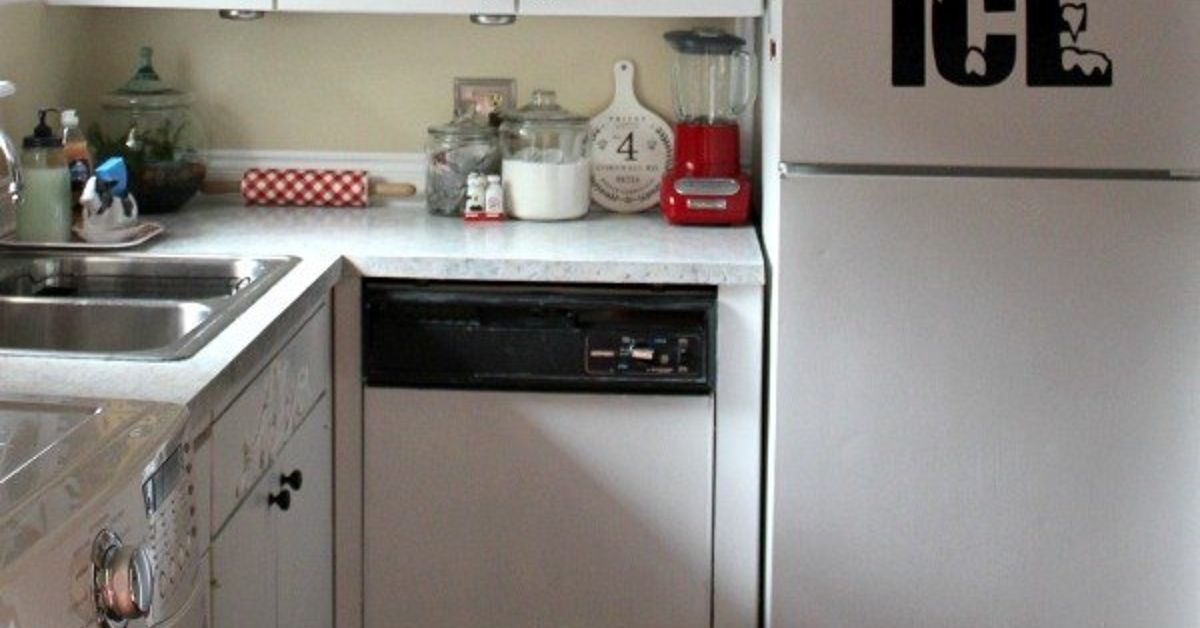
Aug
A generic apartment kitchen usually has all the personality of an instruction manual: beige cabinets, anonymous hardware, one heroic ceiling light, and countertops selected because they offend absolutely nobody. The good news is that you do not need a contractor, a demolition permit, or a winning lottery ticket to wake it up.
With approximately $100, a focused plan, and a free weekend, you can create a brighter, warmer, more functional kitchen without making permanent changes. The secret is not buying dozens of decorative objects. It is identifying the surfaces and details that control how the room feels, then directing your money toward those high-impact areas.
This #HelloSpring kitchen refresh uses removable materials, reversible hardware, improved task lighting, practical organization, and a few cheerful accents. The result is not a luxury renovation pretending to be cheap. It is a realistic apartment kitchen makeover that makes an ordinary space feel intentional, personal, and ready for a new season.
Why a $100 Kitchen Refresh Can Make a Real Difference
A kitchen is visually dominated by a handful of large or frequently repeated elements: cabinet doors, knobs, countertops, backsplash walls, lighting, and whatever is sitting on the counter. You may not be able to replace the cabinets or appliances, but you can change how those fixed features are perceived.
Removable backsplashes, temporary wallpaper, contact paper, rugs, plug-in lights, and replacement cabinet knobs are widely used in rental makeovers because they can create substantial visual change without a traditional remodel. Peel-and-stick materials are especially useful when they are applied to smooth, clean surfaces and selected according to the conditions in the kitchen.
The most successful low-cost makeovers also work with the existing kitchen instead of fighting every inherited finish. If the cabinets are warm oak, for example, adding more warm neutrals, earthy green, muted terracotta, or soft cream can make the wood appear deliberate. Covering everything in bright white simply because the internet told you to may create a kitchen that looks like it is arguing with itself.
Start With a Rental-Safe Reality Check
Read the lease before releasing your inner contractor
Before painting, drilling, changing a faucet, or applying adhesive materials, review your lease and ask the property manager when necessary. Painting cabinets without permission can turn a cheerful spring project into a fascinating discussion about your security deposit.
Even removable products should be tested in an inconspicuous spot. Adhesives react differently to fresh paint, aged paint, textured walls, laminate, sealed tile, and wood veneer. Rental design guidance consistently recommends reserving permanent changes for projects approved by the landlord and favoring reversible upgrades when permission is uncertain.
Photograph everything before you begin
Take clear pictures of the original kitchen, including cabinet hardware, wall surfaces, appliance placement, and any existing damage. Put removed screws, knobs, switch plates, and brackets in a labeled container. “Kitchen partsdo not throw away” is a much better label than “miscellaneous,” the traditional gateway to never finding anything again.
Build a Spring Color Story Before Shopping
A $100 budget leaves little room for random purchases. Choose a three-part palette before entering a store:
- Base color: the existing cabinet, counter, or wall color you cannot change.
- Supporting color: a calm shade that connects the permanent finishes.
- Accent color: one brighter spring-inspired tone used in small doses.
For a kitchen with white cabinets and gray counters, try soft green with warm wood accents. For honey-oak cabinets, consider cream, olive, and muted coral. For dark cabinets, pale blue, ivory, and brass can add contrast without turning the kitchen into a theme park.
Colorful cookware, dish towels, storage containers, lighting, and a carefully chosen backsplash can give a small kitchen personality without consuming valuable counter space. Designers also recommend repeating a limited palette through useful objects rather than filling the room with purely decorative clutter.
A Realistic $100 Apartment Kitchen Makeover Budget
The following budget is an example rather than a fixed shopping list. Prices vary by location, sales, kitchen size, and whether you buy new, thrifted, or from a local resale marketplace.
| Project | Target Cost | Purpose |
|---|---|---|
| Degreaser, sponge, and microfiber cloths | $6 | Prepare surfaces and improve the kitchen immediately |
| Peel-and-stick backsplash for one focal area | $24 | Add pattern, texture, and a finished appearance |
| Clearance or secondhand cabinet knobs | $16 | Modernize repeated cabinet details |
| Battery or rechargeable task lights | $18 | Brighten countertops and food-preparation areas |
| Washable kitchen runner | $14 | Cover unattractive flooring and add softness |
| Removable hooks or compact organizer | $8 | Free counter space and improve storage |
| Dish towel and small herb or plant | $9 | Introduce spring color and life |
| Contingency fund | $5 | Cover extra blades, adhesive tabs, or unexpected supplies |
| Estimated Total | $100 | A complete, renter-conscious refresh |
Step 1: Deep-Clean Before Decorating
Cleaning is not the glamorous part of a kitchen makeover, but it is often the cheapest transformation. Grease dulls cabinet doors, discolors backsplash walls, collects around handles, and gives appliances the mysterious patina known as “previous tenant chic.”
Remove everything from the counters. Clean cabinet fronts, handle areas, switch plates, the wall behind the stove, the top of the refrigerator, and the edges around the sink. Use products appropriate for each surface and avoid soaking laminate seams or unfinished wood.
This step is essential when applying peel-and-stick products. Installation instructions generally call for a flat, smooth, dry surface free of grease, dust, loose debris, and texture. Some products are appropriate for sealed tile or painted drywall, while porous or uneven materials may not hold reliably.
Once the kitchen is clean and mostly empty, you may discover that it needs fewer new objects than expected. Sometimes the first $0 makeover is simply removing the bread maker you last used during a brief burst of optimism four years ago.
Step 2: Create a Small Peel-and-Stick Backsplash
Cover the focal zone, not necessarily the whole kitchen
Trying to cover every inch of backsplash can consume the entire budget. Instead, focus on the most visible section, such as the wall behind the sink, the coffee station, or a short uninterrupted stretch of counter.
Peel-and-stick tiles are available in designs that imitate ceramic, stone, metal, subway tile, and other materials. They require no traditional grout or tile adhesive, making them attractive for small DIY projects and temporary spaces.
Measure twice, peel once
- Measure the height and width of the area.
- Buy a little extra material for pattern matching and cutting errors.
- Lay the pieces out on the counter before removing any backing.
- Mark a straight starting line with a removable pencil mark or painter’s tape.
- Peel back a small section of backing and smooth the material gradually.
- Cut around outlets carefully, with power switched off when removing outlet covers.
Do not assume every peel-and-stick product belongs directly behind a stove. Check the manufacturer’s heat-clearance instructions, especially near gas burners. A charming backsplash is less charming when it begins curling like a potato chip.
Step 3: Replace Cabinet Hardware Without Creating New Holes
Cabinet knobs and pulls appear repeatedly throughout the room, which gives them more visual influence than their size suggests. Replacing dated white plastic knobs or scratched nickel pulls can make existing cabinet doors look noticeably more polished.
Measure the center-to-center distance between the screw holes before buying replacements. The easiest rental-friendly swap uses hardware that fits the existing holes. Store every original knob and screw so the cabinets can be restored before moving.
Design and DIY sources consistently identify hardware replacement as one of the fastest reversible kitchen upgrades. Secondhand shops, architectural salvage stores, clearance sections, and online resale listings can lower the cost further.
For spring, brushed brass adds warmth, matte black creates contrast, and wood knobs can soften a sterile kitchen. Match the finish to at least one existing element, such as a faucet, appliance handle, light fixture, or decorative tray.
Step 4: Fix the Lighting Before Buying More Decor
Many apartment kitchens have one overhead fixture that produces enough light to locate the refrigerator but not enough to determine whether an onion is properly diced. Adding under-cabinet task lighting can improve both function and atmosphere.
Battery-powered or rechargeable light bars are generally easier for renters to install than hardwired fixtures. Under-cabinet lighting brightens work surfaces, improves visibility during food preparation, and gives the kitchen a more layered, finished appearance.
Choose warm-white light around 2700 Kelvin when the goal is a cozy residential feeling. Cooler light can be useful for certain tasks, but extremely blue-white bulbs may make food and warm finishes look flat.
Mount lights where they illuminate the counter without shining directly into your eyes. Keep them away from steam, splashing water, and hot cooking surfaces unless the product is specifically rated for those locations.
Step 5: Use a Runner to Hide the Floor
If the floor is the kitchen’s loudest problem, a washable runner can quiet it without adhesive, tools, or negotiations with the landlord. Rugs add color and texture while visually connecting cabinets, counters, and accent pieces.
Choose a low-pile design that is easy to clean and does not interfere with doors or appliances. Add a nonslip pad when needed. Rental design experts frequently recommend runners as a practical way to soften cookie-cutter kitchens and disguise flooring that cannot be changed.
A narrow vintage-style pattern is forgiving around crumbs and cooking splashes. A solid cream runner is beautiful too, provided you enjoy living dangerously.
Step 6: Recover Counter Space With Vertical Storage
A small kitchen looks more generic when every surface is crowded. Before buying decorative accessories, remove duplicate utensils, expired pantry items, unused appliances, and containers missing their lids. Somewhere in every apartment is a lid waiting for a container that moved away years ago.
Use removable hooks for lightweight dish towels, measuring spoons, potholders, or an apron. A magnetic rack may work on the side of a refrigerator, while a tension rod can create hanging storage beneath a sink without drilling.
Keep the countertop limited to items used frequently. Group coffee supplies on one tray, place cooking oils on another, and move occasional appliances into cabinets. Multipurpose furniture and vertical organizers are particularly useful in compact apartments because they preserve limited work surfaces.
Step 7: Add Spring Without Adding Clutter
The #HelloSpring layer should feel light and fresh, not like a craft store experienced a weather event. One small herb pot, one colorful towel, and one bowl of lemons can introduce more energy than fifteen miniature signs explaining that the kitchen is where meals happen.
Good low-cost spring accents include:
- A small pot of basil, mint, parsley, or rosemary near a bright window
- A striped or floral dish towel that repeats the backsplash color
- A thrifted ceramic bowl for fruit
- A framed postcard or small print attached with removable strips
- A wooden cutting board displayed upright to add warmth
- A clear jar filled with frequently used dry ingredients
Plants, removable wall treatments, useful colorful objects, and personal pieces can help a rental feel less temporary. The goal is not to conceal every trace of the apartment’s original design. It is to add enough of your own story that the room no longer feels anonymous.
Common $100 Kitchen Makeover Mistakes
Spending the entire budget on one trendy material
A beautiful backsplash will not solve poor lighting, cluttered counters, and mismatched accessories. Divide the money between one visual statement and several functional improvements.
Covering damaged or unsuitable surfaces
Peel-and-stick material cannot repair loose paint, moisture damage, crumbly grout, or heavily textured walls. Report leaks and structural problems to the property manager rather than decorating over them.
Applying contact paper too quickly
Countertop contact paper can be affordable and dramatic, but large surfaces, corners, sink edges, and seams require patience. Real-world rental makeovers show that it can look convincing while also revealing every rushed cut and trapped bubble.
Buying decor before decluttering
Adding baskets to organize items you do not need is simply giving clutter better housing. Edit first, organize second, decorate third.
Forgetting the move-out plan
Keep original hardware, photograph each modification, save product removal instructions, and avoid adhesives that are incompatible with the existing finish.
Conclusion: A Small Budget Can Still Produce a Fresh Start
Rejuvenating a generic apartment kitchen for around $100 is less about imitation marble and more about thoughtful priorities. Clean the room thoroughly, create a limited color palette, improve one major surface, update repeated details, and add lighting where the kitchen needs it most.
A peel-and-stick focal backsplash can establish the design. New knobs can sharpen the cabinets. Under-cabinet lights can make food preparation easier. A runner can disguise tired flooring, while better organization gives the counters room to breathe. Finish with one or two spring accents, then stop before the kitchen begins requesting its own social media account.
The best budget kitchen makeover is not the one that looks most expensive in photographs. It is the one that makes you enjoy entering the room, preparing food, and living in the apartment you have right now.
My Experience Refreshing a Generic Apartment Kitchen on a Tiny Budget
The most surprising part of a low-budget kitchen refresh is how unimpressive it looks during the first hour. You remove everything from the counters, unscrew a few knobs, and suddenly the room appears worse. The coffee maker is on the floor, cabinet doors are missing hardware, and every cleaning cloth you own has volunteered for active duty.
That temporary chaos is useful because it exposes the real problem. In many generic apartment kitchens, the issue is not one spectacularly ugly feature. It is the accumulation of small visual interruptions: greasy switch plates, crowded counters, mismatched containers, weak lighting, faded towels, and hardware that looks as though it was ordered by the thousand in 1994.
Cleaning produced the first noticeable improvement. Once grease was removed from the cabinets and backsplash, the existing colors looked lighter. The room did not suddenly become luxurious, but it stopped looking tired. That made it easier to choose improvements based on the actual kitchen rather than on resentment.
The peel-and-stick backsplash took the most patience. Measuring was easy; keeping the first row straight was not. The temptation was to rush after the first two pieces, especially when the pattern began lining up correctly. That is precisely when a tiny alignment error can travel across the wall and become a half-inch problem near the final corner.
The best approach was to expose only a small amount of adhesive at a time, press from the center outward, and step back frequently. A smoothing tool helped, although a clean plastic card wrapped in a soft cloth also worked. One piece had to be removed and repositioned. This was annoying for approximately forty seconds and far less annoying than staring at a crooked pattern for the next two years.
Changing the cabinet knobs was the fastest morale boost. The doors were identical, but the repeated new hardware made them look more intentional. Saving the old knobs in a labeled bag felt excessively responsible at the time, yet it prevented the future move-out scavenger hunt that usually ends with someone whispering, “I know I put them somewhere safe.”
The under-cabinet lights created the biggest functional difference. Before the makeover, the counter beneath the upper cabinets was shadowy even when the ceiling light was on. After adding simple task lights, chopping vegetables became easier, the backsplash looked more dimensional, and the kitchen felt warmer in the evening.
The runner and dish towel supplied most of the spring color. This was a useful reminder that not every improvement needs adhesive or tools. Textiles can change the mood immediately, move easily to another apartment, and be replaced later without requiring a removal tutorial.
The project also proved that stopping is part of decorating. After the major updates, there was a strong urge to buy matching jars, a new utensil crock, framed prints, another plant, and a tiny lamp. Some of those additions might have looked good, but they would have pushed the project beyond its purpose and budget.
Living with the refreshed kitchen for several days revealed the real success: the room was easier to use. The counters stayed clearer because each zone had a purpose. The lighting encouraged evening meal preparation. The rug made the floor less visually distracting. Nothing structural had changed, yet the kitchen felt more personal and less temporary.
That is the valuable lesson behind a $100 apartment kitchen makeover. A small budget forces you to notice which changes affect daily life and which purchases merely look exciting in a shopping cart. When every dollar has a job, the finished room often feels more coherent than a makeover assembled from unlimited impulse buys.
Note: Product prices and lease restrictions vary. Test removable materials before full installation, follow manufacturer instructions, maintain safe clearances around heat and water, and obtain written landlord approval for permanent changes.

