
Beauty Tools & Accessories
Turn a Pants Hanger into a Super Simple Belt Organizer
Aug
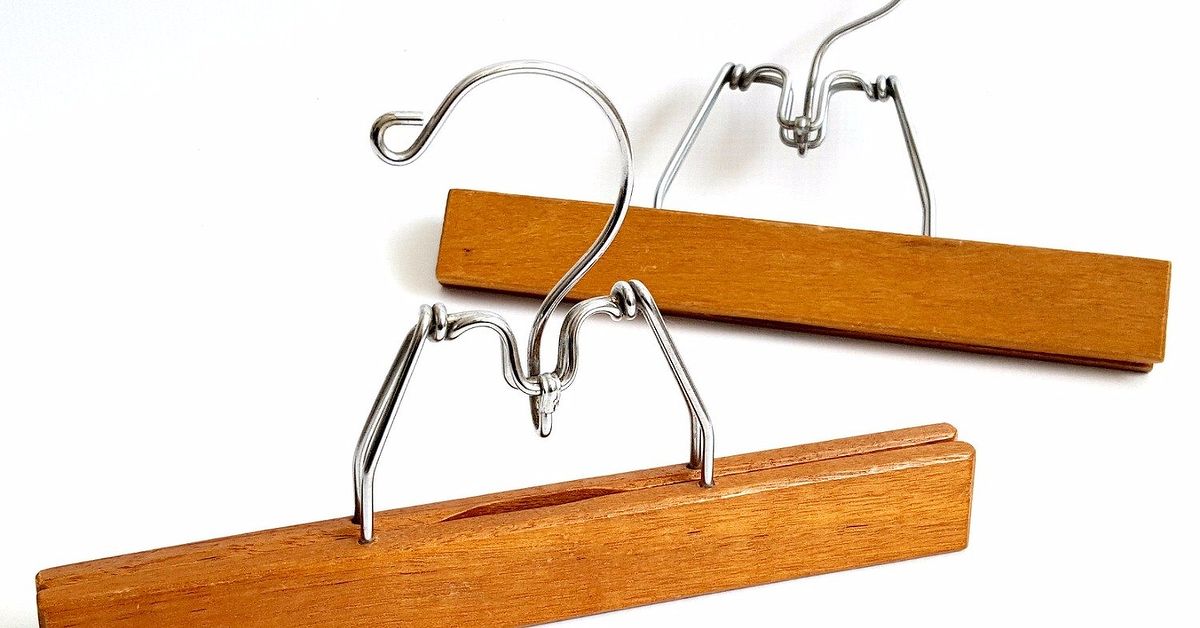
Belts are tiny wardrobe rebels. Leave them unattended for a few days and they somehow end up curled in a drawer, draped over a doorknob, buried beneath jeans, or tangled together like leather spaghetti. The good news is that solving the problem does not require an expensive custom closet system. In fact, one of the easiest DIY belt organizer projects starts with something you may already have: a wooden pants hanger.
With a sturdy hanger, a handful of small hooks, and a few minutes of basic DIY work, you can create a compact belt storage solution that hangs directly from your closet rod. Your belts stay visible, accessible, and separated, while valuable drawer and shelf space remains available for things that actually belong there.
This simple hanger hack also fits nicely with a broader closet-organization principle: accessories are easier to use when you can see them. Modern organizers commonly rely on hooks, hanging racks, vertical storage, and specialty hangers for belts, ties, scarves, and jewelry. Instead of buying another organizer, however, you can borrow the same basic design and build one yourself.
Why a Pants Hanger Makes Such a Good Belt Organizer
A wooden pants hanger already has several advantages built into its design. It has a closet hook, it is relatively compact, and it is intended to carry weight. Older clamp-style pants hangers are especially useful because their wooden construction gives you a solid base that can be modified or used to grip an additional wood strip.
Commercial belt racks follow surprisingly similar logic. Many place several small hooks along a horizontal bar so belts can hang vertically from their buckles. Other models hang directly from a closet rod and organize multiple accessories in roughly the footprint of an ordinary clothes hanger.
Your homemade version simply removes the retail packaging and the mysterious ability of closet accessories to cost more than expected.
Vertical Storage Saves Usable Closet Space
If ten belts are rolled into a drawer, they may consume most of that drawer while hiding underneath one another. Hang those same belts from individual hooks, and the collection occupies a narrow slice of vertical closet space.
This approach is particularly useful in apartments, dorm rooms, guest bedrooms, and older homes where closet real estate is treated like beachfront property.
You Can See Every Belt at Once
Visibility is one of the biggest practical advantages. A brown leather belt, black dress belt, braided casual belt, and canvas weekend belt can each have a designated place. Instead of digging through a pile while already five minutes late, you simply grab the one you need.
It also becomes easier to notice what you own. Apparently, three nearly identical black belts look much less necessary when they are hanging next to each other.
What You Need for This DIY Belt Organizer
The project can be extremely inexpensive, especially if you already have an unused hanger.
- One sturdy wooden pants hanger
- Small screw-in cup hooks or utility hooks
- A drill with a small drill bit
- Measuring tape or ruler
- Pencil
- Optional narrow wood strip
- Optional wood glue or strong adhesive
- Optional sandpaper
- Optional paint, stain, or clear protective finish
For the simplest direct-hook version, use a wooden hanger thick enough to accept small screw hooks without splitting. Another popular variation uses the pants hanger to clamp onto a separate narrow wooden strip. Hooks are installed along that strip rather than directly into the hanger.
The second method offers more room for hooks and may be preferable when you own a larger belt collection.
How to Turn a Pants Hanger into a Belt Organizer
Step 1: Inspect the Hanger
Before reaching for the drill, examine the wood carefully. Avoid hangers with major cracks, loose joints, severe warping, or brittle wood.
This step matters particularly with vintage hangers. Older wood can look wonderfully charming while having roughly the structural confidence of a stale cracker.
If the hanger feels questionable, use the clamp-and-board method rather than drilling directly into it.
Step 2: Decide How Many Belts You Want to Store
Lay your belts beside the hanger and estimate how many hooks you need. Six to ten hooks will handle many everyday collections, although a longer wooden strip can accommodate substantially more.
Do not cram hooks together simply because there is technically room. Large buckles need clearance, especially western, decorative, double-ring, and oversized fashion buckles.
A little breathing room also prevents neighboring belts from becoming tangled.
Step 3: Mark the Hook Positions
Use a ruler and pencil to mark evenly spaced locations for the hooks. Consistent spacing makes the organizer look intentional rather than like something constructed during a power outage.
If your collection contains several wide belts, increase the spacing around those positions.
Step 4: Drill Small Pilot Holes
This is arguably the most important construction step.
Use a drill bit slightly narrower than the threads of your screw hooks and create shallow pilot holes at each mark. The holes make the hooks easier to install and reduce stress on the wood.
DIY builders working with older wooden hangers have reported splitting when hardware was forced directly into fragile material, so drilling conservatively is worthwhile. If the wood begins cracking, stop rather than attempting to persuade it with increasingly aggressive drilling.
Step 5: Install the Hooks
Twist each cup hook into its pilot hole until secure. Orient the openings consistently so belts can be added and removed easily.
You do not need industrial hardware. Belts are comparatively lightweight, and several small hooks distributed across a sturdy wooden base provide ample organization for an ordinary wardrobe.
Still, make sure each hook feels firmly seated before loading the organizer.
Step 6: Add an Optional Wood Strip
If you are using a clamp-style pants hanger, another clever method is to cut a narrow wooden strip approximately the width of the hanger, install hooks along the strip, and clamp the hanger around it.
Wood glue can be added where appropriate for extra stability. Allow adhesive to cure completely according to its instructions before hanging belts.
This variation offers two advantages: more surface area for hooks and less drilling into an older hanger.
Step 7: Hang Your Belts
Place the finished organizer on your closet rod and hang each belt from its buckle or buckle opening.
Arrange belts however your brain prefers: by color, material, width, frequency of use, or degree of fanciness. The organizational police will not be inspecting your closet.
How to Organize Belts on the Finished Hanger
Simply getting belts off the floor is a victory, but a little organization makes the rack even more useful.
Put Frequently Used Belts Up Front
Your everyday black, brown, or casual belt should occupy the easiest positions to reach. Formal belts used twice a year can move toward the back.
This small decision makes the system easier to maintain because returning frequently used items requires almost no effort.
Group Similar Belts Together
Try simple categories such as:
- Dress belts
- Casual leather belts
- Braided belts
- Fabric or web belts
- Statement belts
- Seasonal belts
For a smaller collection, sorting by color may be even simpler.
Give Large Buckles More Space
Oversized buckles can bump against neighboring belts. Leave an empty hook between especially large pieces if necessary.
Why This DIY Organizer Can Beat Rolling Belts in a Drawer
Rolling belts is not automatically wrong. It can work well when you have deep drawers or cubbies designed for accessories. The problem begins when rolled belts are stacked two or three layers deep.
The bottom belts disappear from view, the drawer becomes harder to close, and accessing one belt may require reorganizing everything above it.
A hanging belt organizer makes use of vertical space already available beneath a closet rod. The buckle remains visible, and retrieving one belt does not disturb the rest.
For flexible fabric belts that lack suitable buckles, you can loop the belt over a hook or add small clips.
Common DIY Belt Organizer Mistakes
Using Weak or Damaged Wood
A beautiful old hanger is not automatically a strong old hanger. If the material is dry or cracked, use adhesive hooks, a clamped wooden strip, or another hanger instead of forcing screws into it.
Skipping Pilot Holes
Small hooks may look harmless, but driving them directly into narrow wood can split the grain. A tiny pilot hole takes seconds and gives the screw a controlled path.
Installing Too Many Hooks
More capacity is not necessarily better. A hanger packed with twenty heavy belts can become awkward, crowded, and annoying to browse.
If your belt collection could supply a small department store, make two organizers.
Ignoring Closet Clearance
Check the distance between your closet rod and shelves, drawers, or the floor. Long belts should be able to hang naturally without collecting at the bottom of the closet.
Building Before Decluttering
Before creating storage for every belt you own, ask whether every belt deserves storage.
Closet professionals regularly recommend evaluating what you actually use before buying or building additional organizers. A DIY rack works better when it stores useful accessories instead of becoming a museum for belts last worn during a questionable fashion phase.
Other Accessories You Can Store on the Hanger
The best DIY projects rarely agree to perform only one job.
Depending on your hook spacing and hanger strength, the finished rack can also organize:
- Neckties
- Scarves
- Lightweight necklaces
- Bracelets
- Tank tops with narrow straps
- Small handbags
- Baseball caps with adjustable straps
- Hair accessories
Dedicated commercial multi-use hangers are built around this same concept. Some store belts, scarves, and ties together while occupying approximately the width of one hanger. That makes the DIY version useful even if your belt collection is small.
Easy Ways to Upgrade the Organizer
Paint It
A coat of matte black, white, navy, or another favorite color can make an inexpensive hanger look surprisingly polished.
If painting, remove or mask metal parts first and allow the finish to dry fully before putting the organizer near clothing.
Stain the Wood
A natural wood stain works particularly well with traditional closets and leather accessories. Follow it with a suitable protective finish if desired.
Label Sections
Small labels such as “dress,” “casual,” or “fabric” can help if several people share a closet or if the organizer stores more than belts.
Add Hooks to Both Sides
If there is enough clearance, hooks can be installed on opposite sides of a sturdy wooden bar. This essentially doubles capacity without using another section of closet rod.
Just keep the load balanced so the hanger does not constantly rotate toward the heavier side.
A Space-Saving Closet Organizer Without Buying Another Plastic Bin
One reason this project works so well is that it uses space differently instead of simply adding another container.
Closet organization experts frequently emphasize vertical space, hooks, slim hangers, doors, walls, and otherwise unused areas. Commercial products follow the same strategy with sliding belt racks, multi-hook hangers, tiered pants hangers, and accessory organizers.
A pants hanger belt organizer applies that idea for almost no money. You are transforming an object already designed to live on the closet rod into storage for items that otherwise create clutter.
It is simple, adaptable, and refreshingly free of complicated assembly instructions containing drawings of a tiny person looking confused beside an Allen wrench.
Experience-Based Notes: What You Learn After Using a DIY Belt Hanger
The interesting part of a project like this is not construction. The organizer can be assembled quickly. The useful lessons appear after it becomes part of the daily closet routine.
One of the first things people tend to notice with hanging belt storage is how much easier wardrobe decisions become. When belts are rolled in drawers, the most visible options receive nearly all the attention. Hanging them side by side brings forgotten styles back into circulation. A braided brown belt that had spent six months beneath a stack of accessories suddenly becomes an obvious choice again.
Another practical lesson concerns spacing. During construction, squeezing an extra hook onto the hanger seems efficient. During actual use, wider buckles reveal why generous spacing matters. Giving each belt enough room makes removal faster and keeps metal buckles from knocking together whenever the hanger moves.
Weight distribution matters too. Placing every heavy leather belt on one side can make a lightweight organizer tilt. Alternating heavier belts or spreading them across the rack creates better balance.
Older wooden hangers introduce another lesson: vintage does not always mean invincible. DIY examples involving secondhand pants hangers have shown that aged wood may crack when screws are inserted, even when the project appears straightforward. Pilot holes help, but sometimes switching to glue or attaching hooks to a separate strip of wood is the smarter solution. Good DIY is less about stubbornly following instructions and more about adapting when the material objects.
The organizer also encourages a surprisingly useful wardrobe audit. Once every belt hangs in the same place, redundant purchases become obvious. You may discover two nearly identical black belts, a cracked leather belt you stopped wearing years ago, or a novelty belt that apparently survived three closet cleanouts through sheer charisma.
That visibility makes decluttering easier. Keep the belts that fit, function, and match your current wardrobe. Donate usable extras where appropriate and remove badly damaged pieces.
Maintenance is minimal. Every few months, check that the hooks remain tight and inspect the wooden base for cracks. Wipe dust from belts and hardware, particularly if the organizer hangs in an open wardrobe. Leather belts should also be cared for according to the manufacturer’s recommendations rather than treated with random household cleaners.
The biggest success factor, however, is convenience. An organizing system only works when returning an item is easier than abandoning it somewhere else. A belt hanger succeeds because putting a belt away takes roughly two seconds: open the closet, place the buckle on a hook, and continue with your day.
That simplicity is more valuable than an elaborate storage system that looks magnificent on installation day but requires a twelve-step procedure every time you change clothes.
For small closets in particular, this project demonstrates a useful organizational mindset: before buying another basket, cabinet, or shelf, look at what you already own and ask whether it can perform a second job. Sometimes the solution to an annoying storage problem is already hanging three feet away.
Conclusion: A Tiny DIY Project That Makes a Big Difference
Turning a pants hanger into a super simple belt organizer is exactly the kind of home project that earns its keep. It requires little money, minimal tools, and almost no closet space, yet it solves an everyday annoyance surprisingly well.
Start with a sturdy wooden pants hanger, add properly spaced hooks, drill pilot holes when working directly with wood, and give larger buckles enough room. In return, you get a DIY belt organizer that keeps accessories visible, prevents drawer clutter, and makes getting dressed easier.
You can keep the design basic or customize it with paint, stain, additional wood, labels, or extra hooks. You can even use the same organizer for ties, scarves, jewelry, and other accessories.
Most importantly, this project proves that effective closet organization does not always involve buying a matching collection of acrylic containers. Sometimes an old hanger, a few hooks, and fifteen minutes of ingenuity are more than enough.
Note: Use a sturdy hanger and inspect older wood before drilling. Pilot holes can reduce the risk of splitting, but fragile vintage hangers may be better suited to a glued or clamped wood-strip design.
Research synthesis included DIY hanger conversions, professional closet-organization guidance, hanging accessory storage, and commercial belt-rack design patterns from U.S.-focused sources including Sadie Seasongoods, Shanty 2 Chic, ManMadeDIY, Real Simple, Better Homes & Gardens, The Spruce, Bob Vila, The Home Depot, IKEA U.S., Architectural Digest, House Beautiful, Good Housekeeping, and Walmart.

