Beauty Unlocked
How to Make a Christmas Cracker Decoration From an Old Pill Bottle
May
Some holiday decorations arrive in velvet boxes. Others begin their glamorous lives holding allergy tablets, vitamins, or that one prescription you forgot was still in the medicine cabinet. If you have an empty pill bottle, a scrap of wrapping paper, and a tiny bit of Christmas spirit, you can turn everyday plastic into a cheerful Christmas cracker decoration that looks charming on a tree, mantel, table setting, or gift package.
This project is a simple, budget-friendly way to reuse old pill bottles while making handmade Christmas decorations with personality. Unlike a traditional Christmas cracker, this version is decorative rather than pull-apart. That makes it sturdier, easier to hang, and less likely to send glitter, paper scraps, and your dignity flying across the dining room.
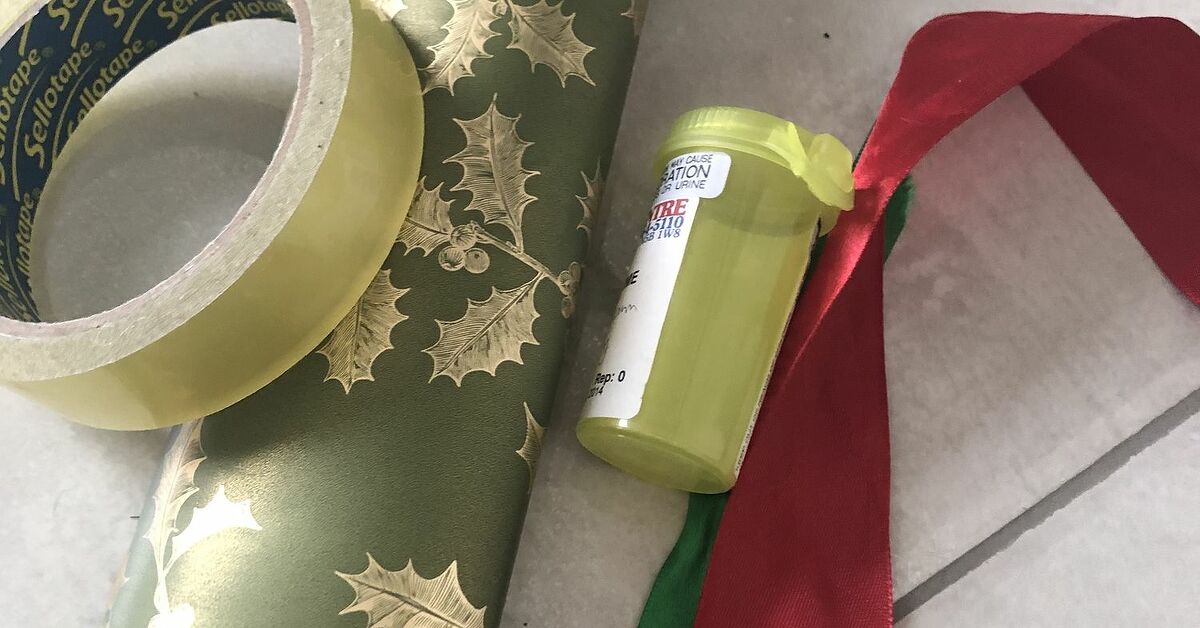
Before you start, use only an empty bottle. Remove the label or scratch out all personal information, wash the bottle thoroughly, and let it dry completely. Do not use bottles that still contain medicine, powder, residue, or odor. Holiday crafting should smell like cinnamon and pine, not mystery pharmacy.
Why Turn an Old Pill Bottle Into a Christmas Cracker Decoration?
A Christmas cracker is traditionally a wrapped paper tube with twisted ends, often placed at holiday dinners as a festive table favor. The classic shape resembles an oversized wrapped candy, which is exactly why it works so well as a decoration. An old pill bottle already has the sturdy center tube built in, so half the structure is finished before you even touch the glue.
There are three reasons this craft is worth making. First, it is inexpensive. You can use leftover wrapping paper, ribbon ends, tissue paper, magazine pages, fabric scraps, or brown kraft paper. Second, it is beginner-friendly. No sewing machine, woodworking tools, or advanced crafting credentials are required. Third, it is a smart reuse project. Small plastic containers are not always accepted by local recycling programs, so repurposing them into seasonal decor can give them one more joyful job before disposal.
The result is a lightweight Christmas cracker ornament that can be customized for farmhouse decor, traditional red-and-green Christmas themes, candy-cane color palettes, vintage holiday styling, or modern metallic displays. In other words, this tiny bottle has range.
Supplies You Will Need
Gather your materials before beginning. This keeps the project smooth and prevents the classic crafter’s sprint around the house while holding a gluey piece of ribbon.
Basic Materials
- One empty, clean pill bottle with the label removed
- Wrapping paper, scrapbook paper, tissue paper, or fabric
- Ribbon, twine, yarn, or thin cord
- Scissors
- Craft glue, glue stick, double-sided tape, or low-temperature hot glue
- Optional: stickers, bells, faux greenery, beads, pom-poms, glitter, or name tags
- Optional for hanging: ornament hook, loop of ribbon, or baker’s twine
Safety Notes Before You Craft
If children are helping, choose washable, non-toxic craft glue and supervise scissors, small embellishments, and hot glue. Tiny bells, beads, sequins, and pom-poms can be choking hazards for young children and pets. This decoration is not a toy and should not be filled with candy or small objects if it will be handled by little kids.
Also, do not make this project with a bottle that has not been cleaned. Remove any remaining medication safely according to local guidance, then wash and dry the container. The bottle should be completely empty before it becomes part of your Christmas craft lineup.
Step-by-Step: How to Make a Christmas Cracker Decoration From an Old Pill Bottle
Step 1: Clean and Prepare the Pill Bottle
Remove the cap and peel off the prescription label. If the label is stubborn, soak the bottle in warm, soapy water for several minutes, then rub away the paper and adhesive. A little rubbing alcohol on a cotton pad can help remove sticky residue, but wash the bottle again afterward so the surface is clean for glue.
Let the bottle dry completely. Moisture trapped under paper can cause wrinkling, peeling, or that sad homemade look where everything appears to have survived a snowstorm indoors.
Step 2: Choose Your Cracker Style
Decide whether you want your Christmas cracker decoration to look elegant, rustic, whimsical, or bold. For a classic holiday look, use red wrapping paper with gold ribbon. For farmhouse charm, wrap the bottle in kraft paper and tie the ends with jute twine. For a kid-friendly tree, use bright paper, candy stripes, and pom-poms. For a fancy dinner table, try metallic paper, velvet ribbon, and a handwritten name tag.
Because the pill bottle is small, choose patterns that are not too large. Tiny stars, plaid, dots, holly leaves, snowflakes, or stripes usually work better than giant Santa faces. Unless, of course, you enjoy the dramatic effect of one enormous Santa eyebrow wrapping around a bottle.
Step 3: Cut the Paper
Place the pill bottle on the wrong side of your paper and roll it once to measure the width needed to cover the bottle. Add about half an inch of overlap so the paper can be secured neatly. For the length, leave enough extra paper on both ends to twist into the cracker shape. Two to three inches of extra paper on each side usually works well for a standard pill bottle.
If you are using tissue paper, consider doubling it or layering tissue over a sturdier paper. Tissue creates soft, pretty ends, but it can tear if pulled too tightly. Wrapping paper and scrapbook paper hold their shape better, while fabric gives the decoration a cozy, reusable feel.
Step 4: Wrap the Bottle
Lay the paper flat, decorative side down. Place the pill bottle in the center and roll the paper around it. Secure the edge with a glue stick, craft glue, or double-sided tape. Try to keep the seam straight and place it on the back side of the decoration.
If the pill bottle cap creates a bump, you can remove the cap before wrapping or keep it on for a slightly fuller shape. For ornaments, leaving the cap on can make the decoration sturdier. For table decor, removing the cap may help the cracker sit more evenly.
Step 5: Shape the Cracker Ends
Gently pinch the extra paper at one end of the bottle, just beyond the plastic edge. Twist it lightly to create the classic cracker shape. Tie the twist with ribbon, twine, or yarn. Repeat on the other side.
The key word is “gently.” If you twist too hard, the paper can tear or wrinkle. The goal is festive candy-wrapper energy, not a wrestling match with stationery.
Step 6: Add Decorative Details
Now comes the fun part. Add a narrow ribbon band around the center, glue on a tiny bow, attach a sprig of faux pine, or stick on mini snowflakes. A small jingle bell tied to one end makes the decoration feel extra cheerful. You can also add a tag with a guest’s name and use the cracker as a place card for Christmas dinner.
For a polished look, repeat one design element across several crackers. For example, make six crackers using different wrapping papers but the same gold ribbon. Or use the same kraft paper and vary the decorations: one with a bell, one with a pine sprig, one with a cinnamon-stick accent, and one with a tiny paper star.
Step 7: Turn It Into an Ornament
To hang your Christmas cracker decoration on a tree, tie a loop of ribbon around the center of the bottle before adding the final decorative band. You can also glue a loop to the back seam, but tying it around the body is usually stronger. If the ornament tilts, adjust the loop until the cracker hangs evenly.
For a garland, make several pill bottle crackers and tie them along a length of twine. Space them between dried orange slices, wooden beads, paper stars, or mini ornaments for a handmade holiday look that says, “Yes, I crafted this,” without screaming, “I panic-glued until midnight.”
Design Ideas for Different Christmas Styles
Traditional Christmas Cracker Decoration
Use red, green, and gold paper with satin ribbon. Add a small gold bell or star sticker in the center. This style looks great on a formal tree, mantel, or holiday table.
Rustic Farmhouse Cracker
Wrap the bottle with kraft paper, sheet music, or old book pages. Tie the ends with jute twine and add a sprig of faux evergreen. This version pairs beautifully with wood beads, burlap stockings, and warm white lights.
Candy Cane Cracker
Use red-and-white striped paper, then add a peppermint-style sticker or small white pom-pom. This is a cheerful option for kids’ trees, kitchen decor, or gift toppers.
Elegant Metallic Cracker
Choose gold, silver, champagne, or pearl paper and pair it with velvet ribbon. Keep embellishments minimal. A single pearl bead, tiny bow, or metallic tag can make the decoration look expensive, even if its secret identity is “former pill bottle.”
Where to Use Your Finished Decoration
These DIY Christmas cracker decorations are surprisingly versatile. Hang them on the tree as ornaments, tuck them into wreaths, tie them onto gift bags, place them at dinner settings, or string them together as garland. They also work well as small stocking decorations or as part of a centerpiece with pinecones, candles, and greenery.
If you are decorating a Christmas party table, make one cracker per guest and add name tags. They will look festive beside napkins or across plates. Just make sure guests know they are decorations, not real pull-apart crackers. Otherwise someone may tug one dramatically and discover that pill bottles are very committed to staying intact.
Common Mistakes and How to Avoid Them
Using Paper That Is Too Short
If the paper does not extend far enough beyond the bottle, the ends will look stubby instead of cracker-like. Always give yourself extra length. You can trim later if needed.
Skipping the Label Removal
Labels can show through thin paper, and personal information should never be left on a container used for crafting. Remove or fully cover every bit of identifying information before decorating.
Using Too Much Glue
Heavy glue can wrinkle paper and create lumpy seams. Use thin, even lines of adhesive. Double-sided tape is especially neat for wrapping paper.
Overloading the Decoration
A pill bottle is small, so too many embellishments can overwhelm it. Choose one or two focal details, such as ribbon and a bell, rather than trying to attach the entire Christmas aisle to one tiny cylinder.
Extra Tips for a More Professional Finish
For cleaner edges, fold the long paper seam under slightly before gluing it down. This hides the raw cut edge and makes the back look tidy. If your paper is thin, wrap the bottle in plain white paper first so the orange or amber color of the pill bottle does not show through.
To make multiple decorations quickly, create a paper template after your first successful cracker. Use that template to cut the rest of your paper pieces the same size. This is especially helpful if you are making a garland, party favors, or handmade ornaments for a craft sale.
If you want a soft, vintage look, use fabric instead of paper. Cotton scraps, flannel, or linen can be wrapped around the bottle and tied with ribbon. Fabric is more forgiving than paper because it does not crease as sharply, and it can make the decoration feel like something from a cozy Christmas cottage.
Experience Notes: What I Learned Making Pill Bottle Christmas Crackers
The first thing you learn when turning an old pill bottle into a Christmas cracker decoration is that pill bottles are sturdier than they look. That is great for durability, but it also means the decoration will not collapse into the exact shape of a paper cracker unless you create soft ends with extra paper. The bottle forms the center, while the illusion comes from the wrapping and the tied ends. Once you understand that, the whole project becomes much easier.
I found that wrapping paper works best for beginners because it has enough structure to hold its shape but is still flexible enough to twist. Tissue paper looks beautiful, especially when layered, but it tears quickly if your ribbon is too tight. Scrapbook paper gives the cleanest finish, although thicker sheets need more careful shaping at the ends. Fabric is the most forgiving option, but it creates a softer, less traditional cracker silhouette.
Removing the label is the least glamorous part of the project, but it makes a huge difference. A bottle with sticky residue can cause paper to bubble or shift. Soaking the bottle first saves frustration. After washing, I like to let it air-dry upside down for several hours. If there is any moisture inside, it can make the decoration feel less fresh, especially if you plan to store it with other ornaments after the holidays.
Another useful lesson is to decorate in layers. Wrap the bottle first, tie the ends second, then add embellishments last. If you glue on bells, greenery, or tags too early, they get in the way while you are trying to twist the paper. It is also easier to hide seams with a center ribbon after the main wrapping is secure.
For a set of decorations, consistency matters more than perfection. A group of handmade crackers looks charming when they share a common color, ribbon, or tag style. They do not need to be identical. In fact, slight differences make them feel handmade in the best way. One can have plaid paper, another can use kraft paper, and another can sparkle like it has been personally blessed by a glitter-loving elf. As long as they share a theme, they look intentional.
The best use I found was as a gift topper. A small pill bottle cracker tied to a wrapped present adds dimension and makes even plain paper look special. It is also a fun conversation starter because people are usually surprised when they learn what is inside the decoration. For tree ornaments, lighter embellishments work better. Heavy beads or large bells can make the cracker tilt forward, which gives it the posture of a sleepy reindeer.
Storage is simple. Place the finished crackers in a small box where the twisted ends will not be crushed. If you used paper, avoid damp storage areas. If you used fabric, they will hold up better from year to year. Either way, the project proves that holiday decorating does not need to be expensive or complicated. Sometimes the most delightful Christmas craft begins with something ordinary, rescued from the recycling pile, and dressed up with ribbon like it has somewhere fabulous to be.
Conclusion
Making a Christmas cracker decoration from an old pill bottle is a clever way to combine holiday creativity, upcycling, and affordable decorating. With a clean empty bottle, pretty paper, ribbon, and a few embellishments, you can create ornaments, gift toppers, garlands, or festive table accents that look far more charming than their humble beginnings suggest.
This project is especially appealing because it is flexible. You can make it rustic, elegant, colorful, vintage, or playful depending on the materials you already have. It is also a great reminder that handmade Christmas decorations do not need to be perfect. They just need a little imagination, a safe workspace, and maybe enough ribbon to cover the occasional crafting crime scene.
Note: Use only empty, clean pill bottles with all personal information removed. This project is intended as a decorative faux Christmas cracker, not a working pull-apart cracker or toy.
