Makeup
How to Deep Clean a Coffee Maker
May
Your coffee maker has one job: turn water and ground beans into joy. But after weeks of brewing, splashing, dripping, steaming, and quietly collecting mineral deposits, it may begin producing coffee that tastes less like “good morning” and more like “wet cardboard with ambition.” That is your machine politely asking for a deep clean.
Learning how to deep clean a coffee maker is not just about making it look shiny on the counter. A proper coffee maker cleaning routine helps remove coffee oils, hard-water scale, stale residue, and hidden grime from the reservoir, brew basket, carafe, spray head, and internal water lines. The reward is better-tasting coffee, a faster brew cycle, fewer odd smells, and a machine that does not sound like it is coughing through a midlife crisis.
This guide explains how to deep clean a drip coffee maker, how to descale a coffee maker safely, what to clean daily, what to avoid, and how to keep your machine fresh with simple habits. Whether you use a classic 12-cup brewer, a single-serve machine, or a programmable model with a “clean” light that seems to judge you from across the kitchen, the process is easier than you think.
Why Deep Cleaning a Coffee Maker Matters
Coffee makers deal with two messy forces every day: coffee residue and water minerals. Coffee oils cling to baskets, lids, carafes, reusable filters, and internal surfaces. Over time, those oils turn stale and bitter. Meanwhile, minerals from water can build up inside the machine, especially if you live in a hard-water area. This mineral buildup, often called scale, can slow the brewing process and affect water temperature and flow.
There is also the moisture problem. A coffee maker reservoir is dark, damp, and often left closed after brewing. That makes it a cozy little spa retreat for unwanted buildup. Nobody invites mold, mildew, or bacteria to breakfast, yet a neglected reservoir can become a prime hiding place for them. A regular deep clean keeps that hidden environment under control.
The first sign your coffee maker needs attention is usually flavor. If your coffee tastes sour, flat, bitter, metallic, or oddly musty, do not immediately blame the beans. Your brewer may be the real culprit. Other signs include a slow drip, cloudy water in the reservoir, visible white crust around openings, brown stains in the carafe, a clogged spray head, or a “clean” indicator light.
How Often Should You Deep Clean a Coffee Maker?
For a coffee maker used every day, deep cleaning about once a month is a practical schedule. If your household brews multiple pots a day, uses hard water, or often leaves water sitting in the reservoir, clean it more often. If you brew only occasionally, every two to three months may be enough, but do not let the machine sit damp between uses.
Daily maintenance matters just as much as monthly deep cleaning. After each use, discard used grounds, rinse or wash the brew basket, and wash the carafe with warm, soapy water. Once a week, give removable parts a more careful scrub. Monthly, run a descaling cycle through the machine and clean the parts you normally ignore, such as the lid hinges, water reservoir corners, warming plate, and spray head.
Always check your owner’s manual before using vinegar or any commercial descaling product. Some brands recommend vinegar, some recommend a branded descaling solution, and some warn that repeated vinegar use may affect internal parts. When in doubt, the manual wins. It is not exciting reading, but neither is replacing a coffee maker because you treated it like a science experiment.
Supplies You Need to Deep Clean a Coffee Maker
You do not need a cleaning cart worthy of a hotel hallway. For most coffee makers, you need basic kitchen supplies:
- Distilled white vinegar or a manufacturer-approved descaling solution
- Warm water
- Mild dish soap
- A soft sponge or microfiber cloth
- A bottle brush or small cleaning brush
- A clean toothbrush for crevices
- Fresh paper filters, if your machine uses them
- A dry towel for air-drying parts
Do not use bleach inside the coffee maker. Do not mix bleach with vinegar, ammonia, descaling solution, or any other cleaner. Mixing cleaning chemicals can create dangerous fumes. Also avoid abrasive pads on plastic parts, harsh powders inside the water tank, and strongly scented cleaners that can leave your next cup tasting like “lemon bathroom spray roast.”
Step-by-Step: How to Deep Clean a Drip Coffee Maker
Step 1: Empty the Machine Completely
Start with a cool, unplugged coffee maker. Remove old grounds, used paper filters, water from the reservoir, and leftover coffee from the carafe. If your machine has a reusable filter, take it out. If it has a charcoal water filter, remove it before running a vinegar or descaling cycle unless your manual says otherwise.
This step sounds basic, but it prevents a common cleaning mistake: brewing vinegar through old coffee grounds. That creates a swampy smell strong enough to make your kitchen question your life choices.
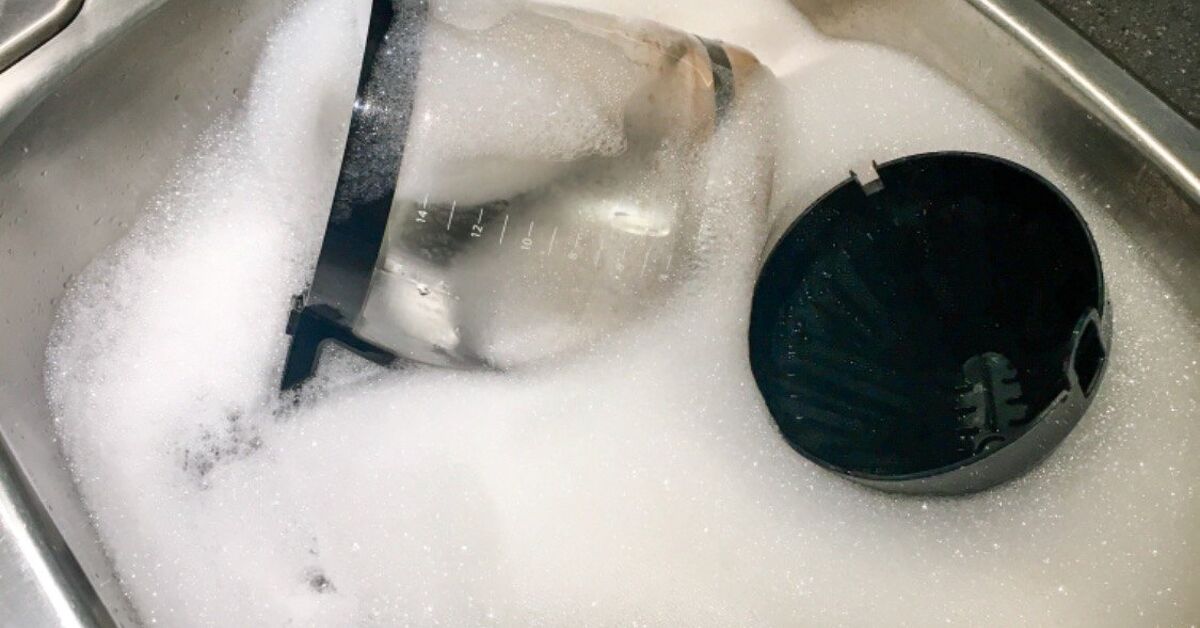
Step 2: Wash the Removable Parts
Wash the carafe, lid, brew basket, reusable filter, and any removable reservoir parts with warm water and mild dish soap. Use a soft sponge to remove coffee stains and oily residue. A bottle brush works well for the carafe, especially near the bottom where brown stains like to form a tiny coffee mural.
Rinse thoroughly and let the parts air dry. If your manufacturer says the parts are dishwasher-safe, you can use the top rack for many removable pieces. Still, hand washing is often gentler, especially for lids, gaskets, and plastic baskets.
Step 3: Wipe the Exterior and Warming Plate
Use a damp microfiber cloth to wipe the outside of the coffee maker, the control panel, the area around the brew basket, and the warming plate. If the warming plate has burnt-on coffee spots, let a warm, damp cloth rest on the stains for a few minutes, then wipe again. Avoid soaking the base of the machine, because electrical parts and water have never had a healthy relationship.
Step 4: Clean the Spray Head and Basket Area
The spray head is the part that distributes hot water over the coffee grounds. It can collect mineral deposits and coffee splatter. Use a damp cloth, cotton swab, or soft toothbrush to gently clean around the holes. If you see white scale, a little vinegar on the cloth can help loosen it. Do not poke hard metal objects into the spray holes, because damaging the spray head can affect brewing.
Step 5: Prepare the Descaling Solution
For many drip coffee makers, a common home method is a mixture of equal parts distilled white vinegar and water. Some manufacturers recommend a milder ratio, such as one part vinegar to two or three parts water. Others prefer a commercial descaler. Use the ratio recommended for your specific machine whenever possible.
Pour the solution into the water reservoir. Place an empty paper filter in the basket if your machine normally uses one. Put the empty carafe in place.
Step 6: Run a Partial Brew Cycle
Start a brew cycle. When the carafe is about halfway full, turn off the machine and let it sit for 30 to 60 minutes. This pause gives the vinegar or descaling solution time to loosen mineral deposits inside the water lines and heating area.
If your coffee maker has a dedicated “clean” button, use that function instead of a normal brew cycle. The clean cycle is designed to move solution through the machine at the right pace. Your coffee maker may know more about its plumbing than you do, which is fair.
Step 7: Finish the Brew Cycle
Turn the machine back on and let the cycle finish. Discard the used cleaning solution from the carafe. Do not reuse it. By this point, it has collected dissolved minerals, oils, and residue, which is not exactly the flavor profile anyone wants in a beverage.
Step 8: Rinse With Fresh Water
Fill the reservoir with clean water and run a full brew cycle with no coffee. Discard the water. Repeat this rinse cycle two or three times, or until the vinegar smell is gone. This step is essential. A rushed rinse can make your next pot taste like salad dressing, and while coffee has many wonderful notes, vinaigrette should not be one of them.
Step 9: Dry and Reassemble
After rinsing, leave the reservoir lid open and allow the machine to air dry. Reassemble the clean parts only after they are dry. Leaving moisture trapped under lids or inside baskets encourages the same problem you just cleaned away.
How to Deep Clean a Single-Serve Coffee Maker
Single-serve coffee makers need the same basic care, but they have a few extra parts. Remove the water reservoir, drip tray, pod holder, and any removable needle or funnel parts if your model allows it. Wash these pieces with warm, soapy water, rinse thoroughly, and let them dry.
Next, descale the machine using the brand’s recommended descaling solution or a vinegar-water mix if your manual allows it. Run the solution through the machine in several brew cycles without a pod. Then run multiple fresh-water cycles to flush the system. Pay special attention to the pod holder and exit needle, where coffee grounds can clog the flow. Use only the cleaning tool or method approved by the manufacturer.
For single-serve machines, do not leave used pods sitting in the holder. Remove them after brewing, wipe splashes from the pod area, and empty the drip tray often. A forgotten pod can become a tiny compost project with excellent branding.
How to Remove Coffee Stains From the Carafe
A stained glass carafe can make even a clean machine look suspicious. For everyday cleaning, warm water and dish soap usually work. For stubborn stains, fill the carafe with warm water and add a small amount of baking soda, then scrub gently with a bottle brush. Rinse well.
For a thermal carafe, check the manual first. Many insulated carafes should not be submerged because water can get trapped between layers. Use a soft brush, mild soap, and plenty of rinsing. Avoid harsh abrasives that can scratch stainless steel interiors. Scratches create more places for coffee oils to cling, which is rude behavior from a cleaning tool.
What Not to Do When Cleaning a Coffee Maker
Do not pour bleach into the reservoir. Do not combine vinegar with bleach, ammonia, hydrogen peroxide, or commercial cleaners. Do not use dishwasher detergent inside the water tank. Do not scrub the reservoir with steel wool. Do not ignore the rinse cycles. And do not assume hot brewing water cleans everything automatically.
It is also smart to avoid scented cleaners near coffee-contact surfaces. Coffee absorbs odors easily. If your machine smells like lavender, pine, or “mountain waterfall,” your morning brew may taste like it was filtered through a candle aisle.
How to Keep Your Coffee Maker Cleaner for Longer
After each brew, discard grounds quickly. Wash the carafe and basket instead of letting them sit until tomorrow. Empty unused water from the reservoir at the end of the day. Leave the lid open so the inside can dry. If you use a reusable filter, rinse it immediately and wash it regularly with soap to remove oils.
Use filtered water if your tap water is very hard. Filtered water may reduce mineral buildup and improve flavor, although it does not replace descaling. Replace charcoal filters on the schedule recommended by your machine’s manufacturer. Keep the area under the coffee maker dry, especially around the warming plate and power cord.
Finally, put coffee maker cleaning on your calendar. A recurring monthly reminder is better than waiting until the machine wheezes, flashes a warning light, or produces coffee that tastes like it has been emotionally unavailable since Tuesday.
Common Coffee Maker Cleaning Problems and Fixes
The Coffee Still Tastes Like Vinegar
Run more fresh-water cycles. Use a clean carafe each time and smell the reservoir after each rinse. If the odor lingers, let the machine sit open for an hour, then run another water cycle.
The Coffee Maker Is Still Brewing Slowly
Scale may be heavy. Run a second descaling cycle using the manufacturer-approved method. If the machine still struggles, check the spray head, filter basket, and water outlet for clogs.
The Clean Light Will Not Turn Off
Some machines require a specific clean-cycle sequence or reset step. Check the manual. In many cases, the light remains on because the cycle was interrupted or the rinse process was not completed.
The Reservoir Smells Musty
Wash removable reservoir parts, descale the machine, rinse thoroughly, and leave the lid open after use. Avoid storing the coffee maker with water inside.
Personal Experience: What Actually Works in a Real Kitchen
After cleaning several coffee makers over the years, I have learned that the hardest part is not the vinegar cycle, the scrubbing, or even remembering where the tiny removable filter holder went. The hardest part is admitting that a machine used every morning can get surprisingly gross while still looking perfectly innocent on the counter. Coffee makers are quiet about their problems. They do not spill dramatic evidence across the kitchen. They simply slow down, taste worse, and hope you notice.
One of the best habits I have picked up is cleaning the brew basket and carafe right after breakfast instead of “later.” Later is a magical land where coffee grounds dry into cement and the carafe develops a brown ring with the confidence of permanent marker. A quick rinse and soap wash takes less than two minutes when everything is fresh. Wait until evening, and suddenly you need hot water, patience, and a motivational speech.
I have also found that the pause in the descaling cycle makes a noticeable difference. Running vinegar water straight through the machine helps, but letting it sit halfway through gives the solution time to work on mineral buildup. This is especially useful in homes with hard water. If the coffee maker has been neglected for months, one cycle may not be enough. A second cleaning cycle followed by several rinses can make the brew stream faster and the coffee taste cleaner.
The rinse cycles are where many people get impatient. I understand the temptation. Once the machine looks clean, it feels like the job is done. But if you stop too soon, your first real pot of coffee may smell faintly like vinegar. That is not a subtle tasting note; that is your machine sending a strongly worded memo. Two full water cycles are usually the minimum, and three are better if you used a strong vinegar solution.
Another practical lesson: leave the lid open. It sounds almost too simple to matter, but it helps the reservoir dry instead of staying damp all day. I also pull the basket out slightly after washing so air can circulate. A dry machine stays fresher longer, and it reduces that stale smell that sometimes appears when a coffee maker has been closed up for days.
For households with multiple coffee drinkers, I recommend assigning one monthly “coffee maker reset” day. Clean the brewer, wipe the grinder, toss ancient filters, wash the scoop, and check the water filter if your machine has one. It turns a forgotten chore into a small kitchen ritual. The reward comes the next morning, when the coffee tastes brighter, the machine runs smoother, and nobody has to wonder whether the brewer is secretly growing a tiny ecosystem behind the plastic wall.
Conclusion
Knowing how to deep clean a coffee maker is one of the simplest ways to improve your morning coffee without buying better beans, a fancier grinder, or a machine with more buttons than a spaceship. Clean removable parts daily, descale the machine regularly, rinse thoroughly, and let everything dry between uses. The process is simple, inexpensive, and surprisingly satisfying.
A clean coffee maker brews faster, smells fresher, and gives your coffee the chance to taste like coffee again. Your beans did their part. Your mug showed up. Now it is the machine’s turn to stop hoarding old oils and mineral crust like a tiny caffeinated dragon.
