Beauty Tools & Accessories
Creating a Mosaic Vase With Eggshells
May
There are two kinds of people in this world: people who throw eggshells away, and people who look at breakfast scraps and think, “That could be a vase.” If you are in the second group, welcome. You are among friends, glue, and tiny crunchy art pieces.
Creating a mosaic vase with eggshells is one of the most satisfying upcycled craft projects because it looks far more expensive than it is. Eggshells have a natural texture that mimics ceramic tile, stone, or crackled porcelain. Once cleaned, colored, glued, and sealed, they can transform a plain glass jar, thrift-store vase, plastic container, or old ceramic piece into something that looks boutique-made. The best part? You do not need tile cutters, fancy grout, or an art degree from a school where everyone wears black turtlenecks.
This guide walks you through the full process: choosing a vase, preparing eggshells safely, planning a design, applying the shell pieces, sealing the finished surface, troubleshooting mistakes, and caring for your new handmade décor. Whether you want a soft farmhouse-style eggshell mosaic vase, a bold jewel-toned centerpiece, or a quirky handmade gift, this project is beginner-friendly, budget-friendly, and surprisingly forgiving.
Why Eggshells Make Beautiful Mosaic Material
Traditional mosaics use pieces of glass, stone, ceramic, or tile. Eggshell mosaics borrow the same idea but replace hard tile with thin, curved shell fragments. The result is lighter, softer, and easier to apply on curved surfaces such as vases, jars, planters, and candle holders.
Eggshells are naturally irregular, which is exactly why they work so well. A perfectly uniform surface can look manufactured, but eggshell pieces create a handmade crackle effect. When pressed into glue, the fragments split slightly and form tiny vein-like lines. These lines mimic grout without requiring actual grout, making eggshell mosaic art ideal for beginners.
Another advantage is sustainability. Instead of buying new craft materials, you can reuse clean shells from meals, baking projects, or dyed Easter eggs. A dozen eggshells can cover a small vase, and a larger container can be completed gradually as you collect more shells. Think of it as slow crafting: one omelet at a time.
Materials You Will Need
Before you begin creating a mosaic vase with eggshells, gather everything in one place. This project is simple, but once your fingers are sticky with glue, you will not want to hunt for tweezers like a tiny craft raccoon.
Basic Supplies
- Clean, dry eggshells with inner membranes removed
- A vase, glass jar, ceramic container, or plastic vessel
- Acrylic craft paint or egg dye for coloring shells
- Decoupage medium, craft glue, or a strong clear-drying adhesive
- Small paintbrushes or foam brushes
- Tweezers, toothpicks, or a manicure stick
- Paper plates or small bowls for sorting colors
- Pencil, painter’s tape, or washable marker for layout lines
- Clear acrylic sealer, gloss medium, or dishwasher-safe decoupage sealer
- Rubbing alcohol for cleaning glass or ceramic surfaces
- Paper towels, gloves, and a protected work surface
Optional Supplies
- Fine sandpaper for lightly roughening slick surfaces
- Gold paint, metallic wax, or paint pens for accents
- Ribbon, twine, lace, or beads for the rim
- Small stencil for repeating patterns
- Disposable gloves if you are using stain, dye, or strong adhesive
Step 1: Choose the Right Vase Base
The best base for an eggshell mosaic vase is sturdy, clean, and not too flexible. Glass jars, ceramic vases, terra-cotta containers, and hard plastic vessels all work. A smooth cylinder is easiest for beginners because the surface is predictable. A curvy vase looks elegant but requires smaller shell pieces around bends and narrow areas.
If you are using glass, clean it with rubbing alcohol to remove fingerprints, dust, oil, and label residue. Glue sticks better to a clean surface. If the vase is glossy ceramic or slick plastic, lightly scuffing the outside with fine sandpaper can help the adhesive grip. Do not sand so aggressively that you scratch through the surface or create visible grooves. You are preparing the vase, not interrogating it.
For a first project, choose a medium-size vase between six and ten inches tall. Tiny vases can be fiddly, while large vases require patience, more shells, and possibly a second cup of coffee.
Step 2: Clean and Prepare the Eggshells
Eggshell preparation matters. Raw eggs can carry bacteria on the shell, so treat used shells like any kitchen item that touched raw egg. Rinse them well, wash your hands, and clean your work surface. Many crafters soak shells briefly in warm soapy water, then peel away the thin inner membrane. Removing the membrane helps the shell dry faster and adhere more smoothly.
After rinsing, place the shells on paper towels and let them dry completely. You can leave them overnight or speed things up by placing them on a baking sheet in a low oven for a short period. Keep the heat gentle; you want dry shells, not breakfast confetti with a smoky aroma.
Once dry, break the shells into manageable sections. For a classic mosaic look, use pieces about the size of a pea or small fingernail. For detailed designs, break them smaller. For bold modern patterns, leave some larger pieces and press them gently into the glue so they crack naturally.
Step 3: Color the Eggshells
You can leave eggshells natural for a soft ivory, beige, and brown palette, or you can color them for a brighter design. Both options look beautiful. Natural eggshells are perfect for farmhouse, coastal, minimalist, or neutral home décor. Painted shells are better for floral designs, geometric patterns, boho vases, and statement pieces.
Using Acrylic Paint
Acrylic craft paint is easy to control and comes in endless colors. Paint the outside of the shells before breaking them into tiny pieces, or paint the fragments after they are glued to the vase. Painting first is faster and gives cleaner color. Painting afterward allows you to adjust details but requires a steadier hand.
Using Food Coloring or Egg Dye
If you have leftover dyed eggshells from Easter, they are excellent for this project. Food coloring mixed with water and a little vinegar can tint shells beautifully. Longer soaking creates deeper color. Let dyed shells dry completely before gluing, or the moisture can weaken the adhesive.
Creating a Color Palette
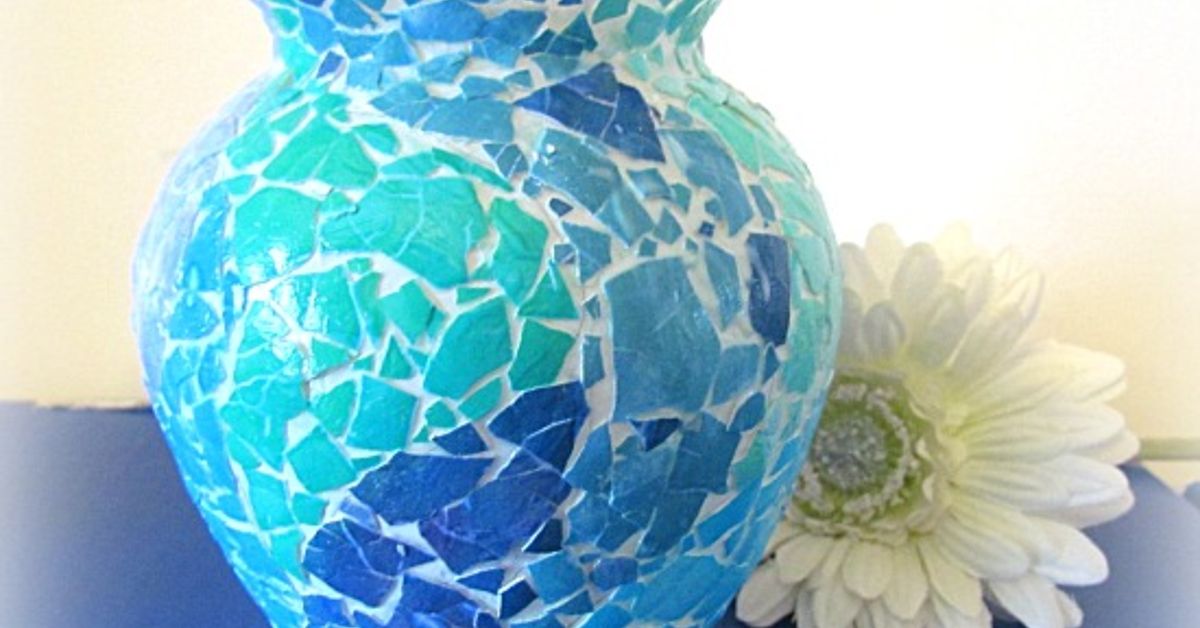
Limit your palette to three to five colors for a polished result. For example, try navy, teal, white, and gold for a modern look; blush, cream, sage, and gray for romantic décor; or terracotta, mustard, olive, and ivory for a warm handmade style. Too many colors can work, but the finished vase may start looking like a piñata had a very emotional day.
Step 4: Plan Your Mosaic Vase Design
You do not have to be a professional artist to create a great eggshell mosaic vase. Simple designs often look the most elegant. Start by deciding whether your vase will have a random crackle pattern, stripes, flowers, waves, a gradient, or a geometric layout.
Beginner Design Ideas
- Random crackle: Cover the entire vase with mixed shell pieces for a natural mosaic texture.
- Color-blocked bands: Use painter’s tape to mark horizontal sections and fill each band with a different color.
- Ombre fade: Start with dark shells at the bottom and gradually move to lighter shades near the top.
- Floral pattern: Use small shell pieces for petals and leaves over a painted background.
- Modern neutrals: Use white and brown eggshells on a black, navy, or charcoal-painted vase.
If you want a structured design, sketch light guidelines on the vase with a pencil or washable marker. For glass, you can place a printed pattern inside the vase and follow it from the outside. This is especially useful for leaves, vines, stars, hearts, or repeating arches.
Step 5: Paint the Background
Painting the vase before adding eggshells helps create contrast between the shell fragments. The background color peeks through the gaps and acts like faux grout. Black creates a dramatic stained-glass effect. White feels clean and soft. Gold or bronze adds warmth. A color that matches your shells creates a subtle textured finish.
Apply one or two thin coats of acrylic paint, allowing each coat to dry. Thin layers are better than one thick coat because they dry smoother and are less likely to peel. If you are working on clear glass and want the vase to stay translucent, skip the opaque background and use clear-drying glue carefully.
Step 6: Glue the Eggshell Pieces
Work in small sections. Brush a thin layer of decoupage medium or clear-drying craft glue onto a two-inch area of the vase. Place a shell fragment onto the wet adhesive, then press gently with your finger, the back of a spoon, or a manicure stick. The shell may crack into smaller pieces as it flattens. That crackle is not a mistake; it is the magic trick.
Leave small gaps between pieces so the background color can show through. If a piece is too large, break it before placing it. If it lands crooked, nudge it with tweezers while the glue is still wet. Continue section by section, rotating the vase only after the previous area has started to set. On curved vases, gravity is not your assistant. It is more like a mischievous intern. Let one side dry before moving to another if the pieces begin sliding.
Tips for Better Placement
- Use tweezers for tiny fragments and detailed areas.
- Keep larger pieces for broad open spaces.
- Use smaller pieces near the rim, base, and curves.
- Do not overload the surface with glue, or pieces may float around.
- Wipe away excess glue before it dries cloudy.
Step 7: Seal the Mosaic Surface
After the vase is fully covered, let it dry thoroughly. Then apply a clear topcoat over the eggshell mosaic. A decoupage medium can work as both glue and sealer for decorative pieces. For a glossier, more durable finish, use a clear acrylic sealer or a dishwasher-safe craft sealer suitable for glass or ceramic. Apply thin coats rather than one heavy coat. Let each coat dry according to the product instructions.
Most sealers need curing time before they reach full durability. Dry-to-the-touch is not the same as fully cured. During curing, avoid water, heavy handling, and rough cleaning. Once cured, your eggshell mosaic vase should feel smoother, stronger, and easier to dust.
Step 8: Finish the Rim and Base
The rim and base can make the difference between “adorable homemade project” and “wait, did you buy that?” Wrap the rim with twine for a rustic look, satin ribbon for a romantic style, or metallic paint for a modern finish. You can also glue small beads around the top edge or use a thin band of air-dry clay to hide uneven shell edges.
For the base, check that no shell pieces extend below the bottom edge. The vase should sit flat and stable. If needed, add felt pads underneath to protect furniture. This is especially helpful if the vase will sit on a wood table, bookshelf, or desk.
Common Mistakes and How to Fix Them
The Eggshell Pieces Are Falling Off
This usually happens because the surface was dusty, oily, too glossy, or the adhesive was not strong enough. Clean the vase well before starting. For glass or ceramic, rubbing alcohol helps. For plastic, choose a glue that bonds to nonporous surfaces.
The Shells Look Lumpy
Large curved shell pieces can sit too high if they are not pressed flat. Use smaller fragments or gently press the shell until it cracks and conforms to the surface. Do not crush it into powder; you want texture, not eggshell snow.
The Colors Look Chaotic
If the design feels too busy, add a unifying topcoat, metallic dry brushing, or a painted rim. Another trick is to use one background color throughout the vase so the gaps visually connect the design.
The Sealer Looks Cloudy
Cloudiness can come from applying too much product, sealing before glue dries, or working in humid conditions. Let the project dry longer, then apply thinner coats. Always test your sealer on a small sample if you are using unusual paint, dye, or adhesive combinations.
Creative Variations for an Eggshell Mosaic Vase
Once you understand the basic technique, you can customize the project endlessly. Try a coastal vase using white, sand, blue, and sea-glass green shells. Add a jute bow and place dried grasses inside. For a luxury look, use black eggshell pieces with gold paint in the cracks. For a garden-inspired vase, create vines using green shells and flowers with red, pink, or yellow fragments.
You can also combine eggshells with other lightweight materials. Tiny paper flowers, pressed leaves, seed beads, or metallic foil can be added before the final sealer. Keep embellishments minimal so the eggshell texture remains the star. The charm of an eggshell mosaic vase is that it turns an ordinary surface into something tactile and surprising.
How to Use and Care for Your Finished Vase
An eggshell mosaic vase is best used as decorative home décor. It can hold dried flowers, faux stems, paintbrushes, makeup brushes, pencils, or kitchen utensils if the inside is clean and sturdy. If you want to display fresh flowers, place water in a separate inner jar instead of filling the decorated vase directly. This protects the glue, paint, and sealer from long-term moisture.
To clean the outside, dust gently with a soft cloth. Avoid scrubbing, soaking, or placing the vase in the dishwasher unless every product used is specifically rated for that type of washing and has fully cured. Even then, hand care is safer for handmade pieces. Treat it like art, not a soup bowl.
Real-Life Experience: What This Project Teaches You
The first time you create a mosaic vase with eggshells, you may expect it to be quick. Technically, it is simple. Emotionally, it becomes a tiny patience workshop. You start with a clean vase, a pile of shells, and big confidence. Ten minutes later, you are negotiating with a fragment the size of a lentil because it refuses to sit inside a leaf shape. This is normal. This is crafting. This is character development with glue.
One of the biggest lessons is that perfection is not the goal. Eggshell mosaic art looks best when it has movement. The tiny cracks, uneven edges, and slight color changes make the vase feel alive. If every piece were identical, the surface would lose its charm. A handmade vase should show the hand that made it. Small imperfections are not flaws; they are visual texture.
Another useful experience is learning how much design depends on contrast. A pale eggshell on a white vase may look elegant up close but disappear from across the room. A dark background behind light shells instantly creates drama. If you want your design to be visible, choose contrast deliberately. For example, white shells on navy paint look crisp and modern. Brown shells on cream paint feel soft and organic. Bright dyed shells on black paint create a stained-glass effect that looks surprisingly bold.
You also discover that preparation saves frustration. Removing the membrane from eggshells may feel fussy, but it helps the shell sit flatter and adhere better. Drying the shells completely prevents mushy glue problems. Sorting colors before you begin keeps the workflow calm. These small steps make the difference between a relaxing craft afternoon and a table covered in sticky eggshell chaos.
Another practical lesson: work in sections and let gravity have fewer opportunities to ruin your day. On a round vase, freshly glued shells can slide if you rotate too soon. Finish one area, let it set, then move on. This slower rhythm actually makes the project more enjoyable. It becomes the kind of craft you can do while listening to music, chatting with a friend, or pretending you are the host of a very niche home décor show.
The finished vase often looks more impressive than expected. People may assume you used specialty mosaic tiles or crackle ceramic pieces. When you tell them it is made from eggshells, they usually lean closer. That surprise is part of the fun. The project takes something fragile and disposable and turns it into a decorative object with texture, color, and personality.
If making this with kids, the experience becomes more playful than precise. Let children create random patterns, rainbows, or abstract shapes. For adults, the same project can become meditative and design-focused. It is flexible enough for a family craft table, a handmade gift, a rainy weekend project, or a low-cost home décor refresh.
Most importantly, this project reminds you that creativity does not always require expensive supplies. Sometimes it starts with a breakfast omelet, a clean jar, and the decision not to throw something away. That is the quiet joy of eggshell crafts: they prove beauty can come from the most ordinary leftovers, as long as you add patience, imagination, and enough sealer to keep everything in place.
Conclusion
Creating a mosaic vase with eggshells is a smart, affordable, and genuinely beautiful way to turn everyday waste into handmade décor. With clean shells, a sturdy vase, a simple design plan, good adhesive, and a protective sealer, you can create a piece that looks textured, artistic, and completely unique. The process is beginner-friendly, but the result can look sophisticated enough for a shelf, mantel, desk, bathroom counter, or handmade gift basket.
The best approach is to start simple. Choose a small vase, use a limited color palette, work in sections, and let each layer dry properly. Once you master the basic eggshell mosaic technique, you can experiment with bolder colors, floral patterns, metallic accents, and larger statement pieces. It is a craft that rewards patience without demanding perfection.
So the next time you crack eggs for breakfast, do not look at the shells as trash. Look at them as tiny tiles waiting for their big home décor debut. Your future mosaic vase is already in the kitchen.
