
Skincare
How to Repair Vinyl Plank Flooring at Home
Jul
Note: Vinyl plank flooring is built to handle everyday life, but it is not invincible. A chair leg, moving appliance, curious pet, leaky dishwasher, or a dropped cast-iron skillet can still leave its mark. This guide covers practical DIY repairs for common vinyl plank flooring problems. Always check your flooring brand’s installation guide and warranty before using adhesive, repair filler, heat, or replacement methods, because click-lock, glue-down, and peel-and-stick floors behave very differently.
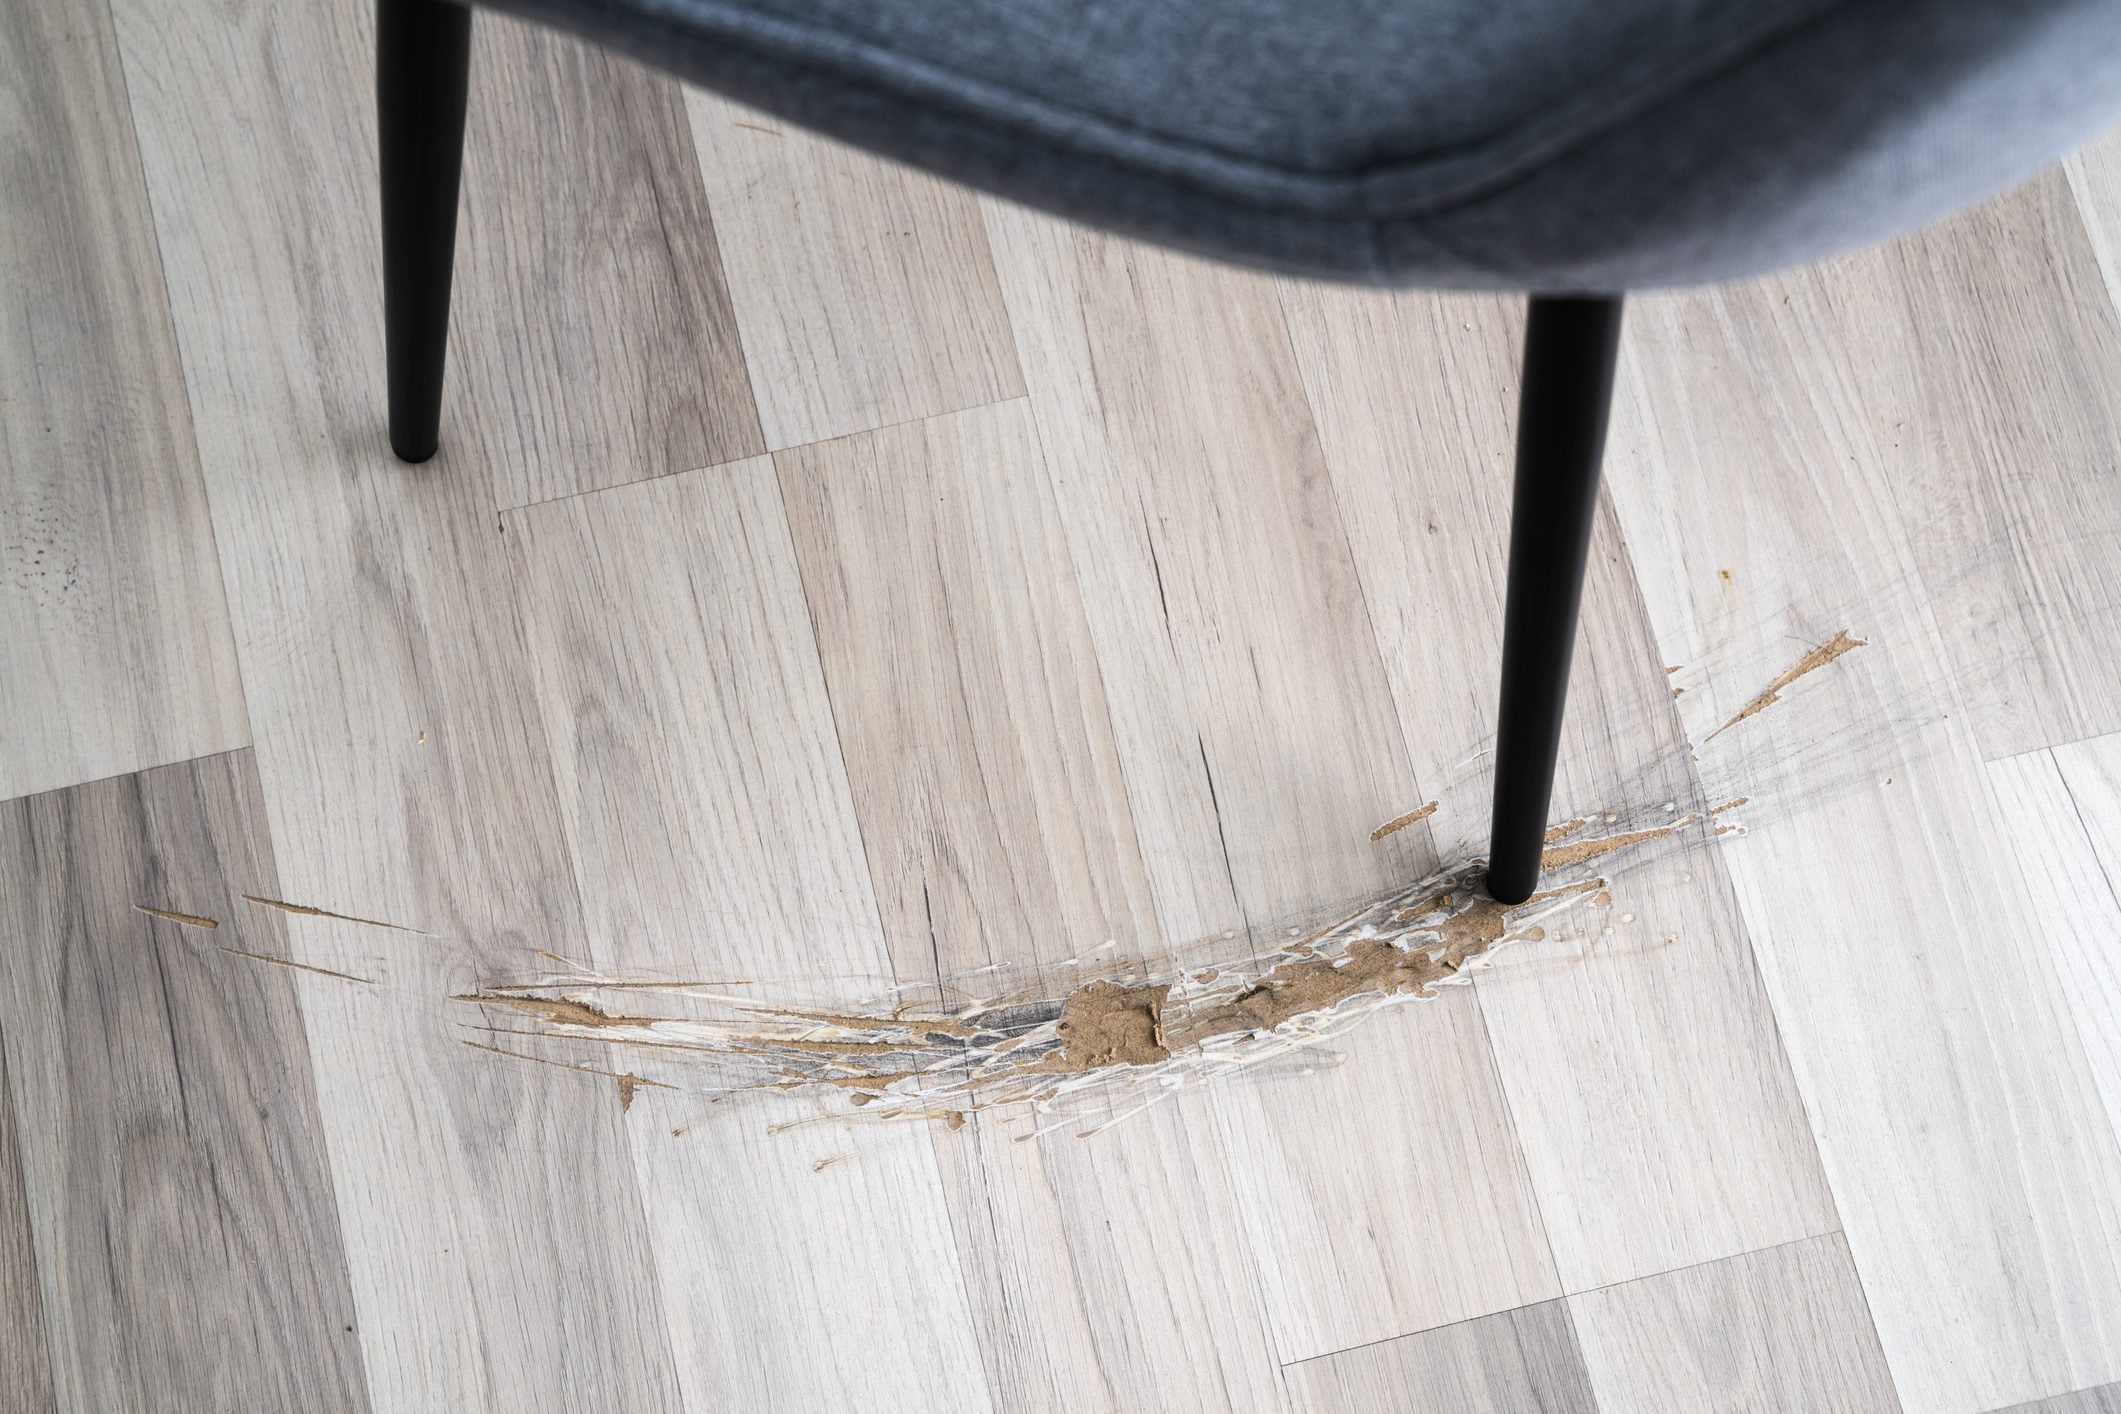
Vinyl plank flooring is one of those household upgrades that looks calm, polished, and expensive right up until someone drags a refrigerator across it like they are relocating a piano through a medieval castle. The good news is that many vinyl plank flooring repairs can be handled at home without replacing an entire room.
Whether you are dealing with scratches, scuffs, loose corners, gaps between planks, dents, chips, or a single damaged board, the right repair depends on two things: the type of vinyl flooring you own and how deep the damage goes. Small cosmetic marks may need only a careful cleaning or a color-matched repair kit. A cracked or warped plank, however, may need to be replaced.
This guide explains how to repair vinyl plank flooring at home step by step, what tools you may need, what mistakes to avoid, and when the floor is politely asking for a professional instead of another round of DIY optimism.
Start by Identifying Your Vinyl Plank Flooring Type
Before you reach for adhesive, a utility knife, or the nearest object that looks vaguely tool-shaped, figure out how your floor was installed. Vinyl plank flooring is commonly installed in one of three ways:
- Click-lock or floating vinyl plank flooring: Planks snap together and sit above the subfloor without being glued down.
- Glue-down vinyl plank flooring: Each plank is secured directly to the subfloor with flooring adhesive.
- Peel-and-stick vinyl plank flooring: Planks have a pressure-sensitive adhesive backing that sticks directly to the surface below.
Click-lock flooring is generally the easiest type for DIY homeowners because damaged planks can often be accessed by taking apart rows from the nearest wall. Glue-down flooring can also be repaired, but the process requires more care because the old adhesive, subfloor, and replacement plank all need to cooperate. Flooring has been known to hold a grudge when rushed.
Check leftover boxes, installation paperwork, receipts, or a spare plank. If you can identify the manufacturer, collection name, color, plank size, and installation type, you will have a much easier time finding a perfect replacement later.
Tools and Materials for Vinyl Plank Floor Repair
The exact supplies depend on the damage, but most homeowners can handle basic vinyl plank flooring repair with a small toolkit.
- Microfiber cloths and a soft broom or vacuum
- pH-neutral vinyl floor cleaner
- Vinyl repair kit, color-fill compound, or touch-up marker
- Plastic putty knife
- Fine-grit sanding pad, only if the repair-kit instructions allow it
- Rubber mallet and tapping block
- Pull bar for click-lock plank repairs
- Utility knife with fresh blades
- Painter’s tape
- Replacement vinyl plank
- Manufacturer-approved flooring adhesive, when repairing glue-down flooring
- Floor roller, heavy books, or a flat weight for adhesive repairs
- Safety glasses and cut-resistant gloves
Do not assume every household cleaner is friendly to vinyl. Many manufacturers recommend pH-neutral, non-abrasive cleaners and warn against bleach, ammonia, harsh alkaline cleaners, oils, waxes, and strong solvents. Those products can dull the wear layer, create a slippery film, or discolor the floor.
How to Repair Scuffs and Light Surface Marks
Scuffs are the vinyl floor equivalent of a smudge on a white sneaker: annoying, obvious from certain angles, and often less serious than they look. Before treating a mark as a scratch, clean it.
Step 1: Sweep Away Grit
Remove dust, pet hair, sand, and tiny bits of debris. Fine grit can make a scuff look worse and can create additional scratches while you rub the area.
Step 2: Clean the Mark Gently
Use a microfiber cloth dampened with a vinyl-safe, pH-neutral cleaner. Rub gently in the direction of the plank grain. Avoid soaking the floor, especially near seams or edges.
Step 3: Try a Soft Buffing Method
If the mark remains, test a gentle buffing method in a hidden spot first. Some flooring manufacturers suggest using a clean tennis ball to lift shoe scuffs. The trick is not to scrub like you are trying to erase a bad Monday from history. Use light pressure and stop if the finish starts looking dull.
Once the mark disappears, wipe the area clean and dry it thoroughly. If you can feel the damage with your fingernail, it is probably a scratch rather than a scuff.
How to Fix Small Scratches in Vinyl Plank Flooring
Light scratches usually affect the decorative surface or protective wear layer rather than the plank’s structure. They can often be disguised with a vinyl repair marker, a wax-style repair product, or a color-matched vinyl repair kit.
Choose the Right Color Carefully
Do not pick a repair marker based on the name alone. “Weathered Oak,” “Rustic Gray,” and “Driftwood Beige” can all look wildly different in real life. Test the color under natural daylight, preferably on an extra plank or in a hidden corner.
Clean Before Applying Filler
Wipe the scratch with a vinyl-safe cleaner and let it dry completely. Repair products stick better to a clean surface. Dirt trapped inside a scratch can make the repair look darker than the surrounding plank.
Build Color in Thin Layers
Apply a small amount of color-fill material or touch-up product directly into the scratch. Use a plastic putty knife, small applicator, or cotton swab to level it. Wipe away excess immediately, following the repair-kit directions.
For a wood-look vinyl plank, mimic the grain instead of filling the scratch with one large solid stripe. A few thin strokes in related colors often look more natural than one heavy blob. Your floor has fake wood grain, but it still appreciates artistic restraint.
Do not sand aggressively, use furniture polish, apply polyurethane, or coat the repaired area with a random sealant. Vinyl plank flooring is not hardwood, and treating it like hardwood can create a shiny patch that attracts more attention than the original scratch.
How to Repair Gouges, Chips, and Small Holes
Deep gouges, chips, and small punctures need more than a touch-up marker. A vinyl or luxury vinyl plank repair kit with filler compound is usually the best option for cosmetic damage that has not cracked the entire plank.
Clean Out the Damage
Remove loose vinyl fragments, dirt, and debris with a plastic scraper or the edge of a putty knife. Do not dig deeper into the plank. The goal is to create a clean repair area, not to excavate a tiny archaeological site in your kitchen.
Apply the Repair Compound
Mix and apply the repair product according to its instructions. Some kits include multiple colors that can be blended to match your flooring. Apply slightly more filler than needed, then level it carefully with a plastic scraper.
Let It Cure Fully
Allow the repair compound to dry or cure for the full recommended time. Avoid walking on it too soon. A repair that looks perfect while wet can turn into a fingerprint museum if someone steps on it before it hardens.
After curing, check the repaired spot from different angles. If the filler sits too high, gently smooth it only if the kit specifically permits sanding or buffing. Never use a power sander on vinyl plank flooring.
How to Fix Loose or Lifting Vinyl Plank Edges
A loose plank corner is more than a cosmetic nuisance. It can catch socks, snag vacuum wheels, collect moisture, and become a larger repair if ignored. The solution depends on whether your flooring is glue-down or click-lock.
Repairing a Loose Glue-Down Vinyl Plank
First, inspect the area for moisture. If the plank lifted after a spill, plumbing leak, dishwasher problem, or wet subfloor issue, fix the moisture source before adding adhesive. Re-gluing a damp floor is like putting a bandage on a leaky fish tank.
- Lift the loose edge gently without creasing or cracking the plank.
- Remove dust, old adhesive crumbs, and debris from the plank and subfloor.
- Dry the area completely.
- Apply only the adhesive recommended for your flooring system.
- Press the plank into place and wipe away excess adhesive immediately.
- Use a roller, flat board, or evenly distributed weight to hold the plank down while the adhesive cures.
Do not use super glue, construction adhesive, hot glue, or whatever tube happens to be in the junk drawer. Those products can damage the vinyl, create a rigid bump, or make future replacement much harder.
Repairing a Loose Click-Lock Plank
Click-lock vinyl planks should not be glued together unless your manufacturer specifically says otherwise. If a plank edge is lifting, the issue may be a broken locking tab, a trapped piece of debris, an uneven subfloor, or a lack of expansion space near a wall.
For a plank close to a wall, remove the baseboard or quarter-round carefully, then work backward from the nearest wall to unlock the affected rows. Inspect the locking edges, remove debris, and reconnect the planks using a tapping block and rubber mallet.
If the locking edge is broken, replace the plank. Trying to force a damaged click-lock joint back together usually creates a temporary truce rather than a real repair.
How to Fix Gaps Between Vinyl Planks
Small gaps can appear when a floating floor shifts, a click-lock joint was not fully engaged during installation, or temperature changes expose an installation issue. Gaps should be addressed early because dirt and moisture can work their way into the seam.
For Click-Lock Flooring
Inspect the gap closely. If the planks are still intact, you may be able to shift them back together using a pull bar, tapping block, or suction-cup floor tool. Work gently and keep pressure parallel to the plank, not downward on the locking edge.
If the gap returns, check for pinched expansion space along walls, heavy furniture trapping the floor, or a transition strip that is screwed through the floating planks. Floating floors need room to expand and contract. They are independent creatures with boundaries.
For Glue-Down Flooring
A gap in glue-down vinyl plank flooring can mean the adhesive failed, the subfloor moved, or the plank shrank or became damaged. If the gap is small and the plank is secure, a color-matched vinyl filler may disguise it. If the plank is moving or lifting, remove and replace it rather than packing the seam with caulk.
How to Replace a Damaged Vinyl Plank
Replace a vinyl plank when it is cracked, badly gouged, warped, permanently stained, badly dented, or damaged through the wear layer. Individual plank replacement is one of vinyl flooring’s biggest advantages, though it is much easier when you still have leftover material from the original installation.
Replacing a Click-Lock Vinyl Plank
The safest method is to disassemble planks from the nearest wall until you reach the damaged one.
- Remove baseboards or quarter-round trim near the closest wall.
- Lift and unlock planks one row at a time, keeping them organized.
- Remove the damaged plank.
- Inspect the subfloor, underlayment, and locking edges for debris or damage.
- Install the replacement plank according to the manufacturer’s locking sequence.
- Reconnect the removed rows and reinstall trim without pinning the floating floor in place.
Some installers use a center-plank cut-and-replace method, but that technique is less forgiving and can damage nearby locking joints. For a single plank in the center of a large room, disassembly may take longer, but it is usually the lower-risk DIY approach.
Replacing a Glue-Down Vinyl Plank
- Mark the damaged plank with painter’s tape.
- Use a utility knife to score the plank carefully without cutting deeply into the subfloor.
- Cut the damaged plank into smaller sections and remove them gradually.
- Scrape away old adhesive without gouging the subfloor.
- Dry-fit the replacement plank before applying adhesive.
- Apply manufacturer-approved adhesive and press the new plank firmly into place.
- Roll or weight the plank as directed while the adhesive cures.
If the subfloor feels soft, damp, uneven, or crumbly, stop before installing the replacement plank. The visible damage may only be the messenger; the subfloor may be the actual problem.
When Water Damage Means More Than a Plank Repair
Many vinyl plank floors are marketed as waterproof, but that does not mean every layer beneath them is immune to water. Standing water can seep through seams, around walls, under trim, and into the subfloor. If a leak has been present for more than a short period, inspect for lifting planks, unusual odors, soft spots, discoloration, mold, or movement underfoot.
Water-related vinyl floor repairs become more complicated when the subfloor is affected. Soft spots, sagging areas, recurring lifting, or persistent moisture may require removal of several planks and repair of the floor beneath.
Dry the area quickly, identify the source of water, and avoid sealing wet materials beneath new planks. Replacing a damaged board without addressing moisture can turn a small repair into a sequel nobody asked for.
Common Vinyl Plank Flooring Repair Mistakes to Avoid
- Using bleach, ammonia, wax, oil-based cleaners, or strong solvents.
- Dragging appliances, furniture, or loaded dollies across the floor.
- Using a heat gun or open flame to soften vinyl.
- Gluing click-lock planks together without manufacturer approval.
- Installing a replacement plank before the subfloor is dry and level.
- Using wood filler, wood stain, or polyurethane intended for hardwood floors.
- Ignoring recurring gaps, soft spots, or water damage.
- Throwing away leftover planks after installation.
Regular cleaning and basic protection can prevent many repairs in the first place. Use felt or nylon pads under furniture legs, lift rather than drag heavy objects, use non-rubber-backed mats at entryways, trim pet nails, and clean grit before it acts like tiny sandpaper beneath shoes and chair legs.
When to Call a Flooring Professional
DIY repairs are ideal for small scratches, scuffs, minor chips, a loose glue-down corner, or one accessible damaged plank. Call a flooring professional when you see widespread lifting, a large area of buckling, repeated gaps, major water damage, mold concerns, soft subfloor spots, broken click-lock joints across several rows, or discontinued planks that cannot be matched.
A professional is also worth considering when the damaged plank sits in the center of a large click-lock installation and disassembling half the room could create more problems than it solves. Paying for a skilled repair can be cheaper than replacing several planks after an ambitious weekend experiment goes sideways.
Homeowner Experiences: What Vinyl Plank Repairs Teach You
One of the most common homeowner discoveries is that vinyl plank flooring is durable, not indestructible. People often choose it because it handles spills, pets, muddy shoes, kitchen traffic, and the occasional toddler-driven toy-car race with impressive calm. Then comes the first deep scratch from a metal chair leg or the first dent from a dropped pan, and suddenly the floor feels less like a low-maintenance hero and more like a very expensive witness to household chaos.
The first lesson is usually simple: small damage is easier to repair than ignored damage. A faint scratch may take ten minutes to clean and touch up. That same scratch can collect dirt over time, become darker, and draw attention every time sunlight hits it. Homeowners who fix small marks early often get better results because they are restoring the finish before the damage turns into a permanent feature.
Another common experience involves color matching. A repair kit may look perfect under bright store lighting and completely wrong in a living room at 4:30 p.m. Natural light, warm bulbs, cool bulbs, plank texture, and wood-look grain all affect the final appearance. The people happiest with DIY repairs tend to test the filler or marker on an extra plank first. The people least happy tend to discover that “gray oak” contains seventeen shades of gray, brown, beige, and existential disappointment.
Homeowners also learn quickly that moving furniture is a bigger threat than daily foot traffic. Vinyl plank flooring may survive years of kids, dogs, and dinner parties, only to get scarred during a ten-minute sofa rearrangement. Felt pads, furniture sliders, plywood sheets under appliance dollies, and a “lift, do not drag” rule can prevent the kind of damage that makes everyone stare silently at the floor.
Water creates another important lesson. A waterproof vinyl surface does not automatically protect the subfloor beneath it. People who respond quickly to leaks, spills, dishwasher failures, and pet accidents usually avoid major problems. Those who leave standing water near seams or walls may later notice lifting edges, odors, soft spots, or planks that no longer sit flat. The visible vinyl damage can be small while the hidden moisture issue is much larger.
Many homeowners also wish they had saved more leftover planks. Keeping one unopened box from the original installation can turn a major-looking repair into a straightforward replacement. Without spare planks, the search becomes a scavenger hunt through discontinued collections, old receipts, local flooring stores, resale listings, and closets where someone hopes an installer hid extra material. Save the boxes. Label them. Store them flat in a dry place. Future you will be deeply grateful.
Finally, the best vinyl plank flooring repair experience is the one that teaches prevention. Clean grit regularly, use safe cleaners, protect furniture legs, handle appliances carefully, and repair small problems before they become floor-shaped drama. Vinyl plank flooring can look great for years, but like most things in a home, it performs best when nobody treats it like a skating rink, workshop table, or demolition zone.
Conclusion
Repairing vinyl plank flooring at home is usually less intimidating than it first appears. Light scuffs may clean away, scratches can often be blended with a repair kit, loose glue-down edges can be re-bonded, and damaged planks can be replaced when necessary. The key is to identify your flooring type, use vinyl-safe materials, address moisture before making cosmetic fixes, and avoid shortcuts that damage the wear layer or locking system.
With a spare plank, a little patience, and the willingness to read the instructions before improvising, you can make many vinyl plank flooring repairs look neat, durable, and nearly invisible. Your floor may never send a thank-you card, but it will stop silently judging you every time you walk past the damaged spot.

