
Beauty Unlocked
An Up-cycled Drawer Pedestal Plant Stand
Jul
Note: This article is written as original, publication-ready content and is based on practical DIY furniture-painting guidance, houseplant drainage advice, reuse principles, and lead-safe renovation recommendations from reputable U.S. home improvement, university extension, nonprofit, and government sources.
Turning One Lonely Drawer Into the Plant Stand of Its Dreams
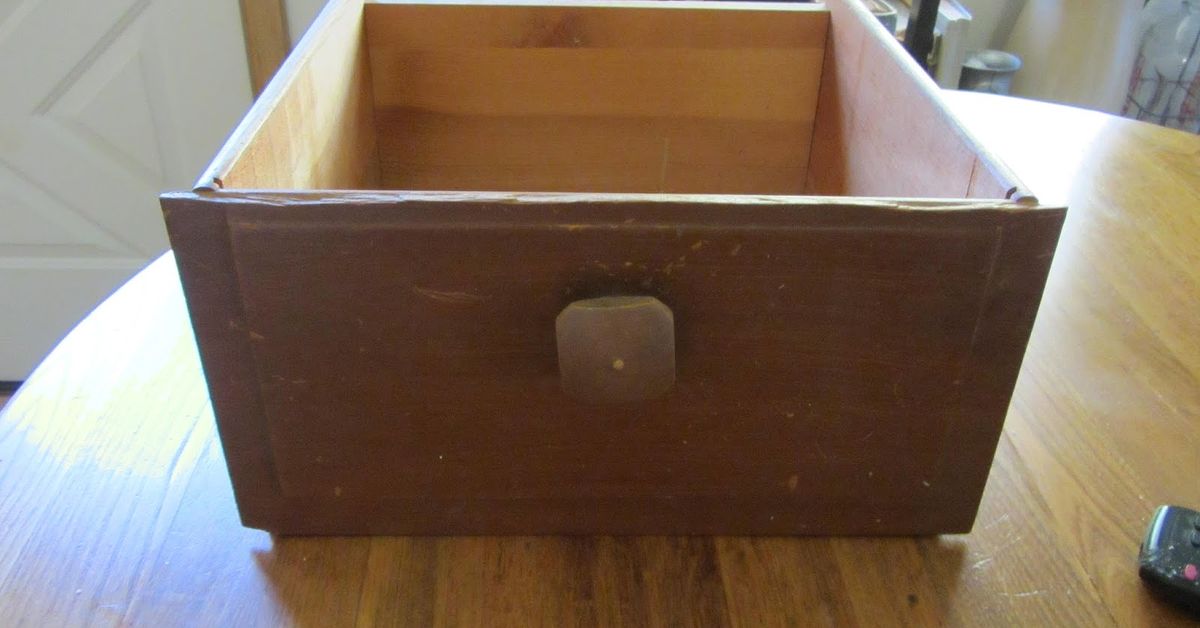
Somewhere in every garage, basement, or “I’ll deal with it later” corner of America, there is a drawer that has lost its dresser, its purpose, and frankly, its confidence. It may be missing a knob. It may have a mysterious crayon mark from 2007. It may smell faintly like cedar, dust, and forgotten tax documents. But before you send it to the landfill with a dramatic goodbye speech, consider this: that orphaned drawer could become an up-cycled drawer pedestal plant stand.
An upcycled drawer pedestal plant stand is exactly what it sounds like: a repurposed drawer transformed into a charming elevated display for houseplants, herbs, succulents, or even seasonal decor. It blends the best parts of DIY home decor, sustainable living, and plant-parent enthusiasm. You get a custom piece, your plants get a throne, and your wallet gets to stay calm.
This project is beginner-friendly, budget-conscious, and wildly forgiving. A tiny nick? Call it vintage character. Slightly uneven paint? That is “hand-finished texture.” A drawer that leans a little? Congratulations, you have created rustic farmhouse drama. With the right prep, a sturdy pedestal base, proper drainage planning, and a durable finish, a discarded drawer can become a decorative plant display that looks intentionally stylish rather than accidentally rescued from the curb.
Why Upcycle a Drawer Into a Plant Stand?
Upcycling is not just crafting with better PR. It is the practical art of taking something old and giving it a higher-value second life. In this case, a drawer becomes more than storage; it becomes a raised planter, side-table accent, porch feature, or indoor plant display.
The appeal is easy to understand. New plant stands can be expensive, especially if you want something with personality. Mass-produced furniture often looks neat but forgettable. A repurposed drawer, on the other hand, already has built-in charm: dovetail joints, old hardware, natural wood grain, carved trim, or the kind of scuffed finish that says, “I have seen things, mostly socks.”
From a sustainability perspective, reuse matters. The U.S. Environmental Protection Agency’s sustainable materials management hierarchy emphasizes reducing and reusing materials before recycling or disposal, which makes furniture upcycling a smart small-scale way to keep useful items in circulation. Habitat for Humanity ReStores also accept and resell furniture and home improvement materials, showing how secondhand goods can support both reuse and community benefit.
For homeowners, renters, and apartment dwellers, the project is also wonderfully customizable. You can make a slim indoor plant stand for a sunny window, a weather-sealed porch planter, a pedestal herb box for the kitchen, or a bold painted statement piece that says, “Yes, I own seven pothos plants and I am not accepting feedback.”
What Makes a Good Drawer for This Project?
Not every drawer deserves a pedestal. Some are too flimsy, too water-damaged, or too warped to safely hold a plant. Choose a drawer that feels sturdy when you press on the sides and bottom. Solid wood is ideal, but plywood can work if it is not separating. Particleboard drawers can be used for indoor decorative displays, but they need extra sealing because they dislike moisture with the passion of a cat near a bathtub.
Look for These Features
- A flat, stable bottom that can hold weight without sagging
- Secure corners and joints
- Enough depth to hold a nursery pot, liner, or small planter
- Interesting hardware, trim, or wood grain
- No mold, rot, or serious water damage
If the drawer came from an older painted piece, be careful before sanding. Homes and furniture made before 1978 may contain lead-based paint, and the EPA recommends lead-safe practices such as testing, minimizing dust, protecting the work area, and cleaning thoroughly. When in doubt, avoid dry sanding old paint and consider sealing the surface or using a safer piece.
Materials and Tools You Will Need
The beauty of an upcycled furniture project is that the supply list can flex. You can build a pedestal from scrap wood, an old stool, table legs, turned spindles, a salvaged lamp base, or even a short column-style stand. Just remember: plants are adorable, but wet soil is heavy. Your base needs to support the drawer without wobbling like a newborn giraffe.
Basic Materials
- One sturdy drawer
- Pedestal base, stool, wood legs, scrap lumber, or table base
- Wood screws or construction adhesive
- Wood filler
- Sandpaper or sanding sponge
- Primer suitable for wood or laminate
- Furniture paint, mineral paint, chalk paint, or enamel paint
- Clear protective topcoat
- Plastic liner, nursery pots, or a removable tray
- Optional: drawer pull, decorative molding, stencils, feet, or casters
Helpful Tools
- Screwdriver or drill
- Measuring tape
- Level
- Paintbrush or small foam roller
- Clamps
- Drop cloth
- Dust mask and safety glasses
Lowe’s furniture-painting guidance recommends cleaning, sanding, priming, and applying multiple coats of furniture paint for a smoother, longer-lasting result. That same sequence works beautifully for a drawer pedestal plant stand, especially because the piece may face water drips, sunlight, and regular handling.
Step-by-Step: How to Make an Up-cycled Drawer Pedestal Plant Stand
Step 1: Clean the Drawer Like It Owes You Money
Start by removing dust, cobwebs, old paper liners, mystery crumbs, and any drawer history you do not want following you into your plant era. Wipe the entire piece with mild soap and water or a degreasing cleaner. Let it dry completely.
This is not a glamorous step, but it matters. Paint does not love dirt, grease, furniture polish, or whatever lived under the drawer liner. A clean surface helps primer and paint adhere better, which keeps your finished stand from chipping after one enthusiastic watering session.
Step 2: Repair Loose Corners and Fill Holes
Check the drawer joints. If a corner is loose, add wood glue, clamp it, and let it dry. Fill old screw holes, cracks, or dents with wood filler. Once dry, sand the patched areas until smooth.
Do not overthink every imperfection. The goal is sturdy and attractive, not sterile. Upcycling should still look like upcycling. If you want showroom perfection, you may need a factory. If you want character, keep the charming little scars.
Step 3: Sand or Degloss the Surface
Light sanding helps dull glossy finishes and gives primer something to grip. Use fine- to medium-grit sandpaper and sand in the direction of the wood grain. For detailed trim, a sanding sponge can reach curves and edges more easily.
If the drawer has an intricate finish or you do not want to sand heavily, a liquid deglosser may help prepare the surface. Work in a well-ventilated area and follow the product label. If the drawer may have lead-based paint, skip dry sanding and follow lead-safe guidance instead.
Step 4: Design the Pedestal Base
The pedestal is what turns a drawer into a plant stand rather than a drawer sitting on the floor pretending to be furniture. You have several options:
- Stool base: Fast, sturdy, and great for a farmhouse look.
- Table legs: Ideal for a mid-century or cottage-style stand.
- Wood column: Creates a true pedestal silhouette.
- Scrap lumber frame: Budget-friendly and customizable.
- Old lamp base: Quirky, decorative, and surprisingly elegant when balanced correctly.
Before attaching anything, dry-fit the drawer on the base. Use a level. Press gently on all corners. If the stand rocks now, it will rock more once you add a plant, soil, and water. Wobble is not a design style; it is a warning.
Step 5: Attach the Drawer Securely
Turn the drawer upside down and mark the center. Position the pedestal base so the weight is evenly distributed. Use wood screws through the drawer bottom into the base, or use brackets if needed. For extra security, add construction adhesive between the surfaces before screwing them together.
If the drawer bottom is thin, reinforce it with a small plywood panel inside the drawer. This spreads the load and helps prevent sagging. A plant stand should be ready for real life, which includes overwatering, moving it three inches to the left, and placing “just one more” pot on top.
Step 6: Prime Before Painting
Primer is the humble hero of furniture makeovers. It blocks stains, improves paint adhesion, and helps your color look even. Use a bonding primer for slick surfaces, laminate, or previously finished wood. Apply a thin coat and let it dry according to the label.
Thin coats are your friend. Thick coats are the friend who says they will help you move and then drops your sofa. They create drips, tackiness, and uneven texture.
Step 7: Paint With Personality
Now comes the fun part: color. For a classic look, try soft white, charcoal, sage green, navy, or warm beige. For a playful plant-corner moment, go with coral, mustard, teal, or a two-tone design. If the drawer has pretty trim, highlight it with a slightly darker or lighter shade.
Use a small foam roller for flat surfaces and a brush for corners and details. Apply two thin coats instead of one heavy coat. Let each coat dry fully. If you want a distressed finish, lightly sand the edges after painting so the original wood peeks through. This gives the piece a lived-in charm without making it look like it lost a fight with a belt sander.
Step 8: Seal It Against Water
Because this is a plant stand, moisture protection matters. Even indoor plants can drip, sweat, spill, and generally behave like tiny green toddlers. Add a clear topcoat after the paint dries. Use a water-based polyurethane or furniture sealer for light colors to reduce yellowing. Apply multiple thin coats and allow proper curing time before adding plants.
If the stand will live outdoors or on a covered porch, choose exterior-rated paint and sealer. Keep in mind that most old drawers were not built for constant rain. A covered location is much safer than leaving the stand exposed to storms.
Drainage: The Detail That Saves Your Plant and Your Paint Job
A drawer is not naturally a planter. It is a box with furniture ambitions. If you fill it directly with soil and water, you may rot the drawer, drown the plant, and create an indoor swamp with legs. Do not do that unless your decorating style is “mold boutique.”
University extension plant-care guidance consistently recommends containers with drainage holes because poorly drained pots increase the risk of waterlogged soil and root rot. Illinois Extension notes that pots without drainage holes are riskier for most plants, while Wisconsin Horticulture advises not allowing plants to sit in drainage water because wet soils encourage root rot organisms.
Best Drainage Options for a Drawer Plant Stand
- Use nursery pots inside the drawer: The easiest and safest method.
- Add a removable waterproof tray: Great for catching drips.
- Line the drawer: Use a heavy plastic liner, but avoid standing water.
- Drill drainage holes: Only if the drawer will be outdoors and drainage can escape safely.
- Use cachepot styling: Keep plants in draining pots and hide them inside decorative containers.
For indoor use, the nursery-pot method is usually best. Water the plant at the sink, let it drain, then place it back in the drawer. Your plant stays healthier, and your upcycled masterpiece does not slowly become compost.
Best Plants for an Upcycled Drawer Pedestal Plant Stand
The right plant depends on where the stand will live. A sunny window wants different greenery than a shaded hallway. The University of Minnesota Extension notes that many succulents and cacti prefer direct sun, while leafy plants such as pothos, philodendron, ferns, and snake plants often tolerate half sun to shade better.
Great Indoor Choices
- Pothos: Trailing vines soften the drawer edges beautifully.
- Snake plant: Upright, sculptural, and forgiving.
- Philodendron: Lush and easygoing.
- Spider plant: Playful, cascading, and beginner-friendly.
- Peperomia: Compact and perfect for small drawers.
- Succulents: Best for bright light and shallow displays.
Porch and Patio Choices
- Herbs such as basil, thyme, parsley, or mint in individual pots
- Trailing annuals such as sweet potato vine or calibrachoa
- Small ferns for shady covered porches
- Seasonal flowers in removable nursery pots
When using several plants together, group them by similar water and light needs. A cactus and a fern may look cute together, but one wants desert vacation energy while the other wants spa-day humidity. Respect the lifestyle differences.
Style Ideas for Different Home Decor Looks
An upcycled drawer pedestal plant stand can fit nearly any room if you style it intentionally. The secret is to match color, finish, and plant choice to the mood of the space.
Farmhouse Style
Use a white or cream paint finish, lightly distressed edges, and antique bronze hardware. Add trailing ivy or pothos for that “collected over time” look. A drawer with cup pulls or beadboard detail is especially charming.
Modern Cottage
Choose sage green, dusty blue, or mushroom beige. Keep the finish smooth but not too glossy. Add a fern, peperomia, or small flowering plant. The result feels cozy without screaming “I own twelve burlap runners.”
Mid-Century Inspired
Attach tapered legs, stain the drawer front, and paint the box a bold color such as black, olive, or burnt orange. A snake plant or rubber plant works beautifully with this cleaner silhouette.
Boho Plant Corner
Paint the drawer in warm terracotta, mustard, or soft clay. Add a stencil, woven basket texture, or macramé detail. Fill it with trailing vines and mixed foliage. Bonus points for a nearby rattan chair and a cup of tea you forget to drink.
Vintage Garden Look
Use pale green, antique white, or faded blue paint. Add small ceramic pots, a tiny watering can, and herbs. This style works especially well on a covered porch, sunroom, or kitchen window area.
Common Mistakes to Avoid
DIY projects are supposed to be fun, but certain mistakes can turn a cute plant stand into a wobbly regret sculpture. Avoid these issues before they sneak up on you.
Skipping Prep Work
Paint over dust and gloss, and the finish may peel. Clean, sand or degloss, prime, then paint. The prep phase is not glamorous, but neither is watching paint scratch off with your fingernail.
Ignoring Weight
Wet soil is heavier than dry soil. A drawer filled with multiple pots needs a strong base. Reinforce thin drawer bottoms and test the balance before styling.
Forgetting Moisture Protection
Plants and water are a package deal. Seal the painted surface, use liners or trays, and avoid letting water sit inside the drawer.
Using the Wrong Plants
Match plants to the light. A succulent in a dark hallway will stretch sadly toward the nearest lamp. A fern in hot direct sun may crisp faster than toast.
Making It Too Top-Heavy
A tall pedestal with a wide drawer can tip if the base is too narrow. Keep proportions sensible. If small children, pets, or enthusiastic vacuuming are part of your home, stability matters even more.
Budget Breakdown: How Much Does It Cost?
The cost depends on what you already have. If you are using a free drawer, scrap wood, and leftover paint, this can be a very low-cost project. If you buy new legs, premium paint, hardware, and sealer, it may cost more, but still less than many boutique plant stands.
- Salvaged drawer: free to $15
- Pedestal base or legs: free to $30
- Primer: $8 to $20
- Furniture paint: $10 to $30
- Topcoat: $10 to $25
- Hardware or decorative trim: $3 to $20
- Plant tray or liner: $3 to $15
A realistic budget is $25 to $75, depending on your stash. The more materials you reuse, the more satisfying the project becomes. There is a special joy in looking at a finished plant stand and knowing it cost less than takeout.
Where to Use Your Drawer Pedestal Plant Stand
This plant stand is versatile enough to move around your home as seasons change. Use it beside a sunny window during winter, on a covered porch in spring, or in an entryway with a low-light plant. It can also become a seasonal display stand for pumpkins, holiday greenery, Easter flowers, or a tiny herb garden.
In a living room, it adds height and texture to a plant corner. In a bedroom, it makes a sweet nightstand alternative for a small lamp and a trailing plant. In a kitchen, it can hold herbs near a bright window. In a bathroom with good light, it can support humidity-loving plants like ferns, though you should still protect the drawer from splashes.
Extra Experience: Lessons From Making and Living With an Upcycled Drawer Plant Stand
The first thing you learn from making an upcycled drawer pedestal plant stand is that old furniture has opinions. A new board behaves predictably. An old drawer, however, may have warped slightly, absorbed old polish, collected paint in the corners, or developed one side that refuses to sit perfectly square. That is not failure. That is the drawer announcing its biography.
One helpful experience is to spend more time on the dry-fit stage than you think you need. Place the drawer on the pedestal, step back, look at it from across the room, and then look again from plant height. A base can seem centered when you are holding it, then look oddly off-balance once the drawer is upright. Use painter’s tape to mark alignment before drilling. This tiny step saves you from creating a stand that looks like it is politely leaning away from responsibility.
Another real-world lesson: choose the plant before you finalize the drawer interior. A shallow drawer looks gorgeous with succulents in individual nursery pots, but it may not work for a tall peace lily. A deep drawer can hide plastic pots beautifully, but it may visually swallow tiny plants unless you raise them on blocks or upside-down saucers. Styling is often about height. Use small risers inside the drawer to stagger plants, and suddenly your display looks designed instead of crowded.
Moisture management is the difference between “adorable plant stand” and “future woodworking lesson.” Even sealed paint can suffer if water sits too long. The easiest routine is to remove each pot for watering, let it drain in the sink, wipe the bottom, and return it to the drawer. This sounds fussy until you realize it takes two minutes and protects hours of work. Plant parenting already involves talking to leaves, so a little pot rotation is not where we draw the line.
Paint color also changes the personality of the project more than expected. White feels clean and cottage-like, but it shows soil. Black looks dramatic and modern, but dust may appear quickly. Green blends beautifully with foliage but can disappear into the plants if the shade is too close. Warm neutrals are forgiving and easy to style. If you are unsure, paint the outside a neutral shade and add personality inside the drawer with a contrasting color, peel-and-stick wallpaper, or a patterned liner.
Hardware deserves attention too. Keeping the original drawer pull preserves vintage charm, while replacing it can modernize the whole piece. A brass knob, black cup pull, ceramic handle, or leather tab can shift the style instantly. Just make sure the hardware does not stick out so far that it catches on clothing or bumps into nearby furniture. Beauty is important, but so is not bruising your shin on a plant stand named Mildred.
Finally, this project is a great reminder that DIY does not have to be complicated to feel rewarding. You are not building a staircase or rewiring a chandelier. You are taking one discarded piece and giving it function, beauty, and a reason to stay in your home. That is the magic of upcycled decor: the object becomes useful again, and the room gains a story. Every time someone says, “Cute plant stand, where did you buy it?” you get to smile and say, “Actually, it used to be a drawer.” Try not to sound too smug. Or do. You earned it.
Conclusion: A Small DIY Project With Big Personality
An up-cycled drawer pedestal plant stand is more than a clever weekend project. It is a practical way to reuse old furniture, create a custom plant display, and add character to your home without spending a small fortune. With a sturdy drawer, a balanced pedestal base, thoughtful prep, durable paint, and smart drainage, you can turn a forgotten furniture part into a charming piece of DIY home decor.
The best part is that no two stands will look exactly alike. Your drawer may be rustic, modern, colorful, vintage, or proudly quirky. Your plants may trail, bloom, climb, or sit there looking dramatic in the sunlight. Together, they create a piece that feels personal, useful, and just a little bit smug in the best possible way.
So the next time you see an abandoned drawer, do not see junk. See potential. See a pedestal. See a pothos having its main-character moment. With a little paint, patience, and common sense, that old drawer can rise againliterally.

