Beauty Unlocked
How to Restore Furniture
Jun
That old dresser in your garage? The one holding a single screwdriver, three mystery keys, and enough dust to qualify as an indoor beach?
It might be the best “new” piece of furniture you’ll ever own. Furniture restoration is basically time travel with sandpaper:
you get to meet the choices someone made in 1974 (including that orange stain) and politely undo them.
This guide walks you through how to restore furniture the smart waycleaning, repairs, stripping or scuff-sanding, staining or painting,
and sealing it so it survives real life (pets, kids, roommates, and that one friend who thinks coasters are “a vibe”).
Whether you’re doing antique furniture restoration or reviving a thrift-store find, the steps are the same: be patient, be methodical,
and don’t start sanding until you know what you’re sanding for.
Restore vs. Refinish vs. Repair (Pick the Right Adventure)
“Restore furniture” can mean a few different things, and choosing the right approach can save you hoursand prevent you from accidentally
sanding through veneer like it’s a scratch-off lottery ticket.
Quick decision guide
- Restore (full makeover): You’re fixing structure + surface: wobbles, missing veneer, ugly finish, broken hardware.
- Refinish: Structure is solid, but the finish is scratched, stained, flaky, or dated.
- Repair + refresh: Finish is mostly fine; you just need cleaning, tightening joints, touch-ups, and a protective topcoat.
- Conserve (valuable antiques): You want minimal change to preserve age, patina, and value. Gentle cleaning and reversible repairs only.
Safety First (Because “Vintage” Shouldn’t Mean “Toxic”)
Before you DIY furniture restoration, assume the piece has a few surprises. Older painted finishes can contain lead, and sanding or scraping can create harmful dust.
Take precautions especially if the furniture is older, has many paint layers, or came from an estate where “we don’t know how old it is” is the official history.
Must-do safety basics
- Ventilation: Work outside or in a garage with doors open and a fan pulling fumes away from you.
- PPE: Gloves, eye protection, and a proper respirator when stripping, sanding, spraying, or using solvents.
- Dust control: Use a vacuum with a HEPA filter if possible. Wipe surfaces with a damp cloth instead of dry sweeping.
- Lead awareness: If you suspect lead paint, avoid dry sanding and consider testing or professional helpespecially around children and pets.
- Fire safety: Oily rags (like stain or oil finishes) can self-heat. Lay them flat to dry outdoors or store in a sealed metal container.
Tools and Materials (The “Don’t Make 12 Trips to the Store” List)
You don’t need a pro woodshop to restore wood furniture, but you do need the right basics. Here’s the practical kitadd or subtract depending on paint vs. stain,
and “light refresh” vs. “full makeover.”
Core tools
- Screwdrivers, pliers, small containers for hardware
- Soft brushes, microfiber cloths, sponges
- Putty knife/plastic scraper, old toothbrush for crevices
- Sandpaper (80, 120, 150, 180, 220; plus sanding block or sanding sponge)
- Random orbital sander (optional, but your wrists will send thank-you notes)
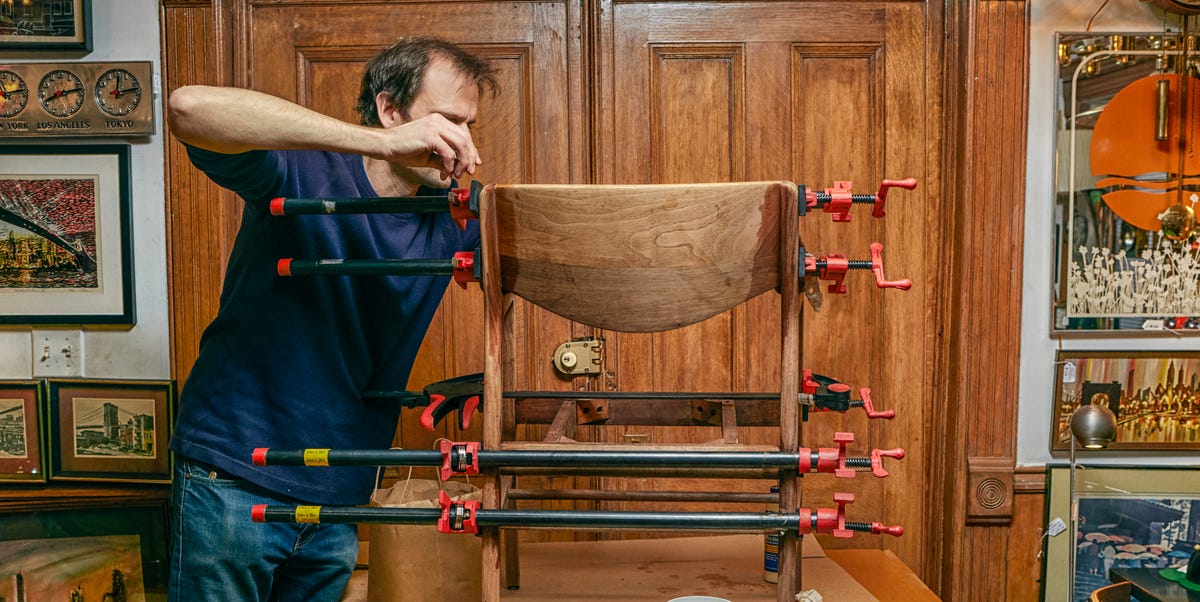
- Clamps (bar clamps or corner clamps for chair joints)
- Wood glue, toothpicks/dowels for stripped holes, wood filler (stainable/paintable)
- Tack cloth or vacuum + clean rag
Finishing supplies
- Paint/finish stripper (if stripping), mineral spirits (as needed), denatured alcohol (shellac cleanup)
- Stain (oil, water, or gel) and/or primer + paint
- Topcoat: polyurethane, lacquer (spray), shellac, hardwax oil, or furniture wax
- High-quality brush, foam brush, or lint-free wiping cloths
Step-by-Step: How to Restore Furniture Like You Mean It
1) Inspect, Photograph, and Label Everything
Start with an inspection. Is it solid wood, veneer, plywood, particleboard, or a “creative” mix? Check for wobbling legs, loose chair joints, cracked rails,
missing veneer, water rings, and drawer issues. Take photos before you remove anything. Then label parts with painter’s tape:
“left hinge,” “top drawer,” “this weird bracket that only makes sense at 2 a.m.”
If you’re restoring antique furniture, look for maker’s marks, unusual joinery, or hand-cut details.
Those clues can tell you whether to preserve the original finish instead of stripping it into modern oblivion.
2) Deep Clean (Yes, Even Before You “Fix” Anything)
Most “ugly furniture” is just filthy furniture wearing bad lighting. Clean first so you’re not grinding old grease into the grain during sanding.
Use warm water with a small amount of mild dish soap for general grime. Wipe with a damp cloth, then dry immediately.
For sticky buildup (common on kitchen pieces), step up to a stronger cleaner designed for wood or a degreasing solutiontest in a hidden spot.
Avoid harsh chemicals on delicate finishes like lacquer; gentle soap-and-water cleaning is often safest.
When in doubt, start mild and level up only if needed.
3) Choose Your Surface Plan: Strip, Scuff-Sand, or “Leave It Alone”
This is the fork in the road. Not every piece needs full stripping. The goal is a stable, clean surface that accepts your new finish.
A) When to strip the old finish
- The old finish is peeling, flaking, gummy, or cracked.
- You want to change from dark stain to light stain (or show natural wood).
- There’s paint you want gone, and sanding alone would take you until the next presidential administration.
B) When to scuff-sand instead
- The finish is intact, but dull or scratched.
- You’re painting and just need adhesion.
- You’re using a gel stain or a refinishing product meant for existing finishes (still prep carefully).
C) When to preserve the finish
- The piece is valuable, antique, or has a desirable patina.
- Damage is minor: light scratches, haze, small rings.
- You want “clean + stabilize,” not “brand-new.”
4) Stripping the Finish (Messy, Satisfying, Worth It)
If you strip, do it deliberately. Lay down a drop cloth. Wear gloves and a respirator. Apply stripper according to the label.
After it bubbles or softens the finish, scrape with a plastic scraper to avoid gouging. Repeat as needed.
For carved details, use steel wool or a brush designed for strippinggently. Don’t turn your antique into modern “distressed” by accident.
Some projects call for heat guns, especially for stubborn layers, but heat can scorch wood and loosen veneer.
If you’re restoring furniture with veneer, slow and chemical stripping is usually safer than aggressive heat.
5) Fix the Structure: Wobbles, Loose Joints, and Stripped Screws
A flawless finish on a wobbly chair is like a tuxedo on a jellyfishimpressive for three seconds, then tragic.
Get the structure solid before you obsess over stain color.
Loose chair joints
For loose joints, the best fix is often to disassemble (carefully), remove old dried glue, re-glue, and clamp until fully cured.
Simply squirting glue into a gap rarely holds long-term because old glue prevents good bonding.
Stripped screw holes
If screws spin without biting, pack the hole with wood glue and toothpicks (or a small dowel), let dry, then re-drive the screw.
This trick works beautifully for hinges, drawer pulls, and chair hardware.
Cracks and splits
Open the crack gently, work wood glue into it, clamp, and wipe squeeze-out with a damp cloth.
For missing chunks or corners, use a quality wood epoxy or a patch if you need strength.
6) Repair Surface Damage: Veneer, Dents, Gouges, and Water Rings
Veneer bubbles or lifting edges
Veneer is thinthink “wood wallpaper with feelings.” If it bubbles, it often needs re-adhering.
Many restorers use careful heat and moisture (like a damp cloth and a warm iron) to reactivate older hide glue,
or inject glue under the bubble and clamp flat with a caul (a flat board) to spread pressure.
Always test your method in a hidden area first.
Dents (the magic steam trick)
If the wood fibers are compressed (a dent) rather than removed (a gouge), steam can lift it.
Place a damp cloth over the dent and touch a hot iron to the cloth in short bursts.
Let it dry, then sand lightly. It’s not sorceryjust wood fibers swelling back toward their original shape.
Gouges and deep scratches
Use stainable wood filler for gouges, then sand flush after it cures.
For tiny scratches, a stain marker or tinted wax can be enough.
For larger areas, patching with real wood (a dutchman patch) looks best, but takes more skill.
7) Sanding: The Unsexy Step That Makes Everything Look Expensive
Sanding is where “DIY” turns into “wait…you did that yourself?” The secret is a grit progression.
Start with what’s necessary to level the surface, not what feels gentle. Then move up gradually.
Practical sanding sequence
- After stripping: start around 120–150, then move to 180, finishing at 220.
- Raw wood prep: often 120/150 to 220, always with the grain.
- Between finish coats: light sanding around 220 (or finer as recommended), then remove dust completely.
Don’t over-sand edges, especially on veneer. Rounded edges scream “I got impatient with an orbital sander.”
For corners and details, use sanding sponges or hand sanding so you keep crisp lines.
8) Color Time: Stain vs. Paint (And How to Avoid Blotchy Chaos)
Stain highlights wood grain. Paint gives you total color control and can rescue less-attractive wood.
Either can look incredibleif you prep properly.
If you’re staining
- Test first: Use the underside or a hidden back edge. Wood species changes color dramatically.
- Consider conditioner: Soft woods (like pine) can blotch; conditioner helps absorption look more even.
- Wipe consistently: Apply stain, let it sit briefly, then wipe off evenly with clean cloths.
- Gel stain option: Great for vertical surfaces and sometimes for staining over an existing, properly scuff-sanded finish.
If you’re painting
- Clean obsessively: Paint hates grease more than cats hate closed doors.
- Scuff-sand for adhesion: You’re creating “tooth” so primer and paint can grip.
- Prime when needed: Especially over glossy finishes, tannin-rich wood, or stain that might bleed through.
- Thin coats win: Two to three thin coats beat one thick coat that drips like sad frosting.
9) Seal It: Choosing the Right Protective Finish
The topcoat is your furniture’s armor. Pick based on how the piece will be used, the look you want,
and your tolerance for fumes, drying time, and “I touched it too soon” fingerprints.
Common topcoats and best uses
- Polyurethane: Very durable for tables, desks, and high-use surfaces. Oil-based warms the tone; water-based stays clearer.
- Shellac: Beautiful, fast-drying, and great for many interior pieces. Not ideal for high water/heat exposure without extra care.
- Lacquer: Classic on many vintage pieces; often sprayed for a smooth finish. Needs good ventilation and careful technique.
- Hardwax oil: Natural look and easy spot repair; great for a matte, modern feel.
- Wax: Best as a low-duty finish or over certain paints. Looks lovely, but isn’t the toughest shield for dining tables.
Application tips that prevent heartbreak
- Remove all dust before topcoatingvacuum, wipe, then tack cloth if appropriate.
- Apply thin, even coats and respect dry times (your finish is not impressed by your optimism).
- Lightly sand between coats as recommended, then clean off dust before recoating.
- Let the finish cure fully before heavy usedry-to-touch is not the same as durable.
10) Hardware, Drawers, and the Final Rebuild
Clean hardware with a gentle metal polish (or replace it for a modern update).
Wax drawer runners for smoother action. Check drawer alignment and tighten slides or guides.
Reassemble carefullythis is where those earlier photos and labeled bags save your sanity.
Bonus: Quick Upholstery Refresh (Because Seats Have Feelings Too)
Restoring furniture isn’t only about wood. Dining chairs and benches often just need new fabric and padding.
If the frame is sturdy, reupholstering a seat is a beginner-friendly win.
Simple dining chair seat recover
- Remove the seat from the chair base (usually screws underneath).
- Pull off old fabric and staples. Use the old fabric as a cutting template.
- Replace foam if it’s crushed; add batting for a smoother look.
- Center your new fabric pattern, staple from the center outward on opposite sides, then fold corners neatly and staple.
- Trim excess fabric and reattach the seat.
Common Furniture Restoration Mistakes (And How to Avoid Them)
- Skipping cleaning: Dirt + sanding = mud pushed into grain. Clean first, always.
- Over-sanding veneer: Veneer is thin. Hand sand edges, go easy with power tools.
- Gluing without removing old glue: New glue doesn’t bond well to old glue. Clean joints properly.
- Rushing dry times: Most finish disasters are just impatience wearing a tool belt.
- Using silicone polishes before refinishing: They can cause fish-eye and adhesion problems later.
- Not testing color: Stain on oak vs. maple can look like two different planets.
Two Real-World Examples (So This Isn’t Just Theory)
Example 1: Thrift-store oak side table with water rings
The table is solid but has white rings and a hazy finish. Start with gentle cleaning.
If the haze remains, scuff-sand lightly with 220 to level the surface, then apply a fresh protective topcoat.
If rings persist under the top layer, you may need to strip the top, sand to 220, then re-stain (or keep natural) and seal.
Example 2: Mid-century dresser with chipped veneer and sticky drawers
Repair veneer first: re-glue lifting edges, clamp flat, and fill missing spots with a tinted filler or veneer patch.
Clean thoroughly (especially drawer fronts and handles).
Strip only if the finish is failing; otherwise, a careful scuff-sand and gel stain might refresh color without removing everything.
Finish with a durable topcoat, wax the drawer runners, and replace tired hardware for a clean, modern look.
How to Keep Restored Furniture Looking Good (Without Becoming a Full-Time Butler)
- Use coasters and felt padsfuture you will be smug about it.
- Keep pieces out of direct sun to reduce fading and drying.
- Dust with a soft cloth; avoid harsh cleaners, especially on lacquered or delicate finishes.
- Re-wax only when needed (if waxed), and don’t layer mystery polishes forever.
When to Call a Professional
DIY furniture restoration is fun until it isn’t. Consider pro help when:
the piece is very valuable, the veneer is extensive and damaged, the structure is seriously compromised,
or you suspect lead paint and can’t safely contain dust. Pros can also color-match and spray lacquer finishes with a factory-smooth result.
Conclusion
Restoring furniture is part craft, part patience, and part detective work. Clean first, stabilize structure, decide whether to strip or scuff-sand,
repair what’s damaged, then finish with a stain or paint that suits the piece and a topcoat that matches real-world use.
Do it thoughtfully and your “old junk” becomes a custom, durable, genuinely good-looking piecewith a story you actually want to tell.
Experience-Based Add-On: What People Only Learn After Their First (and Second) Restoration
If you’ve ever watched someone restore furniture for the first time, you’ll notice a pattern: confidence spikes around minute six (“I’m basically a pro”),
dips sharply at minute forty (“why is everything sticky”), and returns triumphantly at the end (“look at my beautiful child”). The following lessons come up
again and again in real restoration projectsespecially the ones that start as “a quick weekend refresh.”
1) The piece tells you what it needsif you stop arguing with it. People often decide the finish plan before they’ve cleaned the furniture.
Then they discover the “dark stain” was actually decades of grime, and the “ruined top” just needed a gentle leveling and a new coat of finish.
The practical habit: clean, dry, inspect under bright light, and only then choose strip vs. scuff-sand.
2) Veneer is the ultimate humility instructor. The number one “oops” is sanding through veneer at the edges or on rounded corners.
In real-world terms: veneer doesn’t forgive enthusiasm. The workaround most experienced restorers use is boring but effective:
do edges by hand, keep power sanders flat, and treat corners like they’re made of expensive chocolate.
3) Glue repairs succeed or fail before glue ever leaves the bottle. Loose chair joints that keep loosening usually weren’t cleaned properly.
New glue over old glue is like trying to tape over dustit sticks emotionally, not structurally. A reliable approach is to disassemble enough to
remove old adhesive, dry-fit, then clamp with even pressure. People also learn that more glue isn’t stronger; good contact is stronger.
4) Your finish is only as smooth as your dust control. In the wild, “dust nibs” show up because someone sanded, admired the smoothness,
then immediately applied finish in the same space where they’ve been making airborne wood confetti for two hours. A practical routine that works:
vacuum thoroughly, wipe down, wait a few minutes for airborne dust to settle, then do a final wipe right before coating.
It feels fussy. It also makes the difference between “handmade charm” and “why is my table crunchy.”
5) Dry-to-touch is a liar (or at least, an optimist). Many finishes feel dry quickly but need longer to cure hard enough for real use.
That’s how you end up with a perfect tabletop… decorated with the imprint of last night’s pizza box.
People who restore often develop a rule: if it’s a table, treat it like it’s still wet for longer than you think it should be.
6) Color matching is easier when you stop trying to win on the first try. Stain is not paint; it interacts with the wood.
Experienced folks test multiple samples, sometimes layering or adjusting with a glaze or gel stain to dial in tone.
The “experience move” is testing on the underside and writing notes: grit used, conditioner yes/no, stain time, wipe method.
Those notes turn future projects from guesswork into repeatable results.
7) The best restorations include one “invisible upgrade.” It might be adding felt pads, tightening drawer guides,
replacing missing bumpers, or waxing runners so drawers glide quietly. Viewers notice the beauty first, but owners love the function every single day.
These upgrades are small, cheap, and wildly satisfyinglike giving your furniture a secret superpower.
8) The “fun style” finish is the one that fits your life. Some people love waxed, matte pieces and accept the gentle maintenance.
Others need a bulletproof polyurethane topcoat because the furniture lives through homework, coffee spills, and a cat with parkour ambitions.
The experienced approach isn’t chasing a trend; it’s matching your finish choice to how the piece will actually be used.
If you take only one real-world lesson: restoration is a chain, and every link matters. Cleaning affects sanding, sanding affects stain,
stain affects topcoat, and topcoat affects how much you’ll love the piece six months from now. Slow down, do the “boring” steps well,
and you’ll end up with furniture that looks custombecause it basically is.
